Campaigns
The Campaigns section in Skima AI lets recruiters build and run automated, personalised outreach sequences for candidates. Instead of sending emails manually or chasing candidates one by one, you can design multi-step communication flows that run on autopilot based on candidate behaviour and hiring goals.
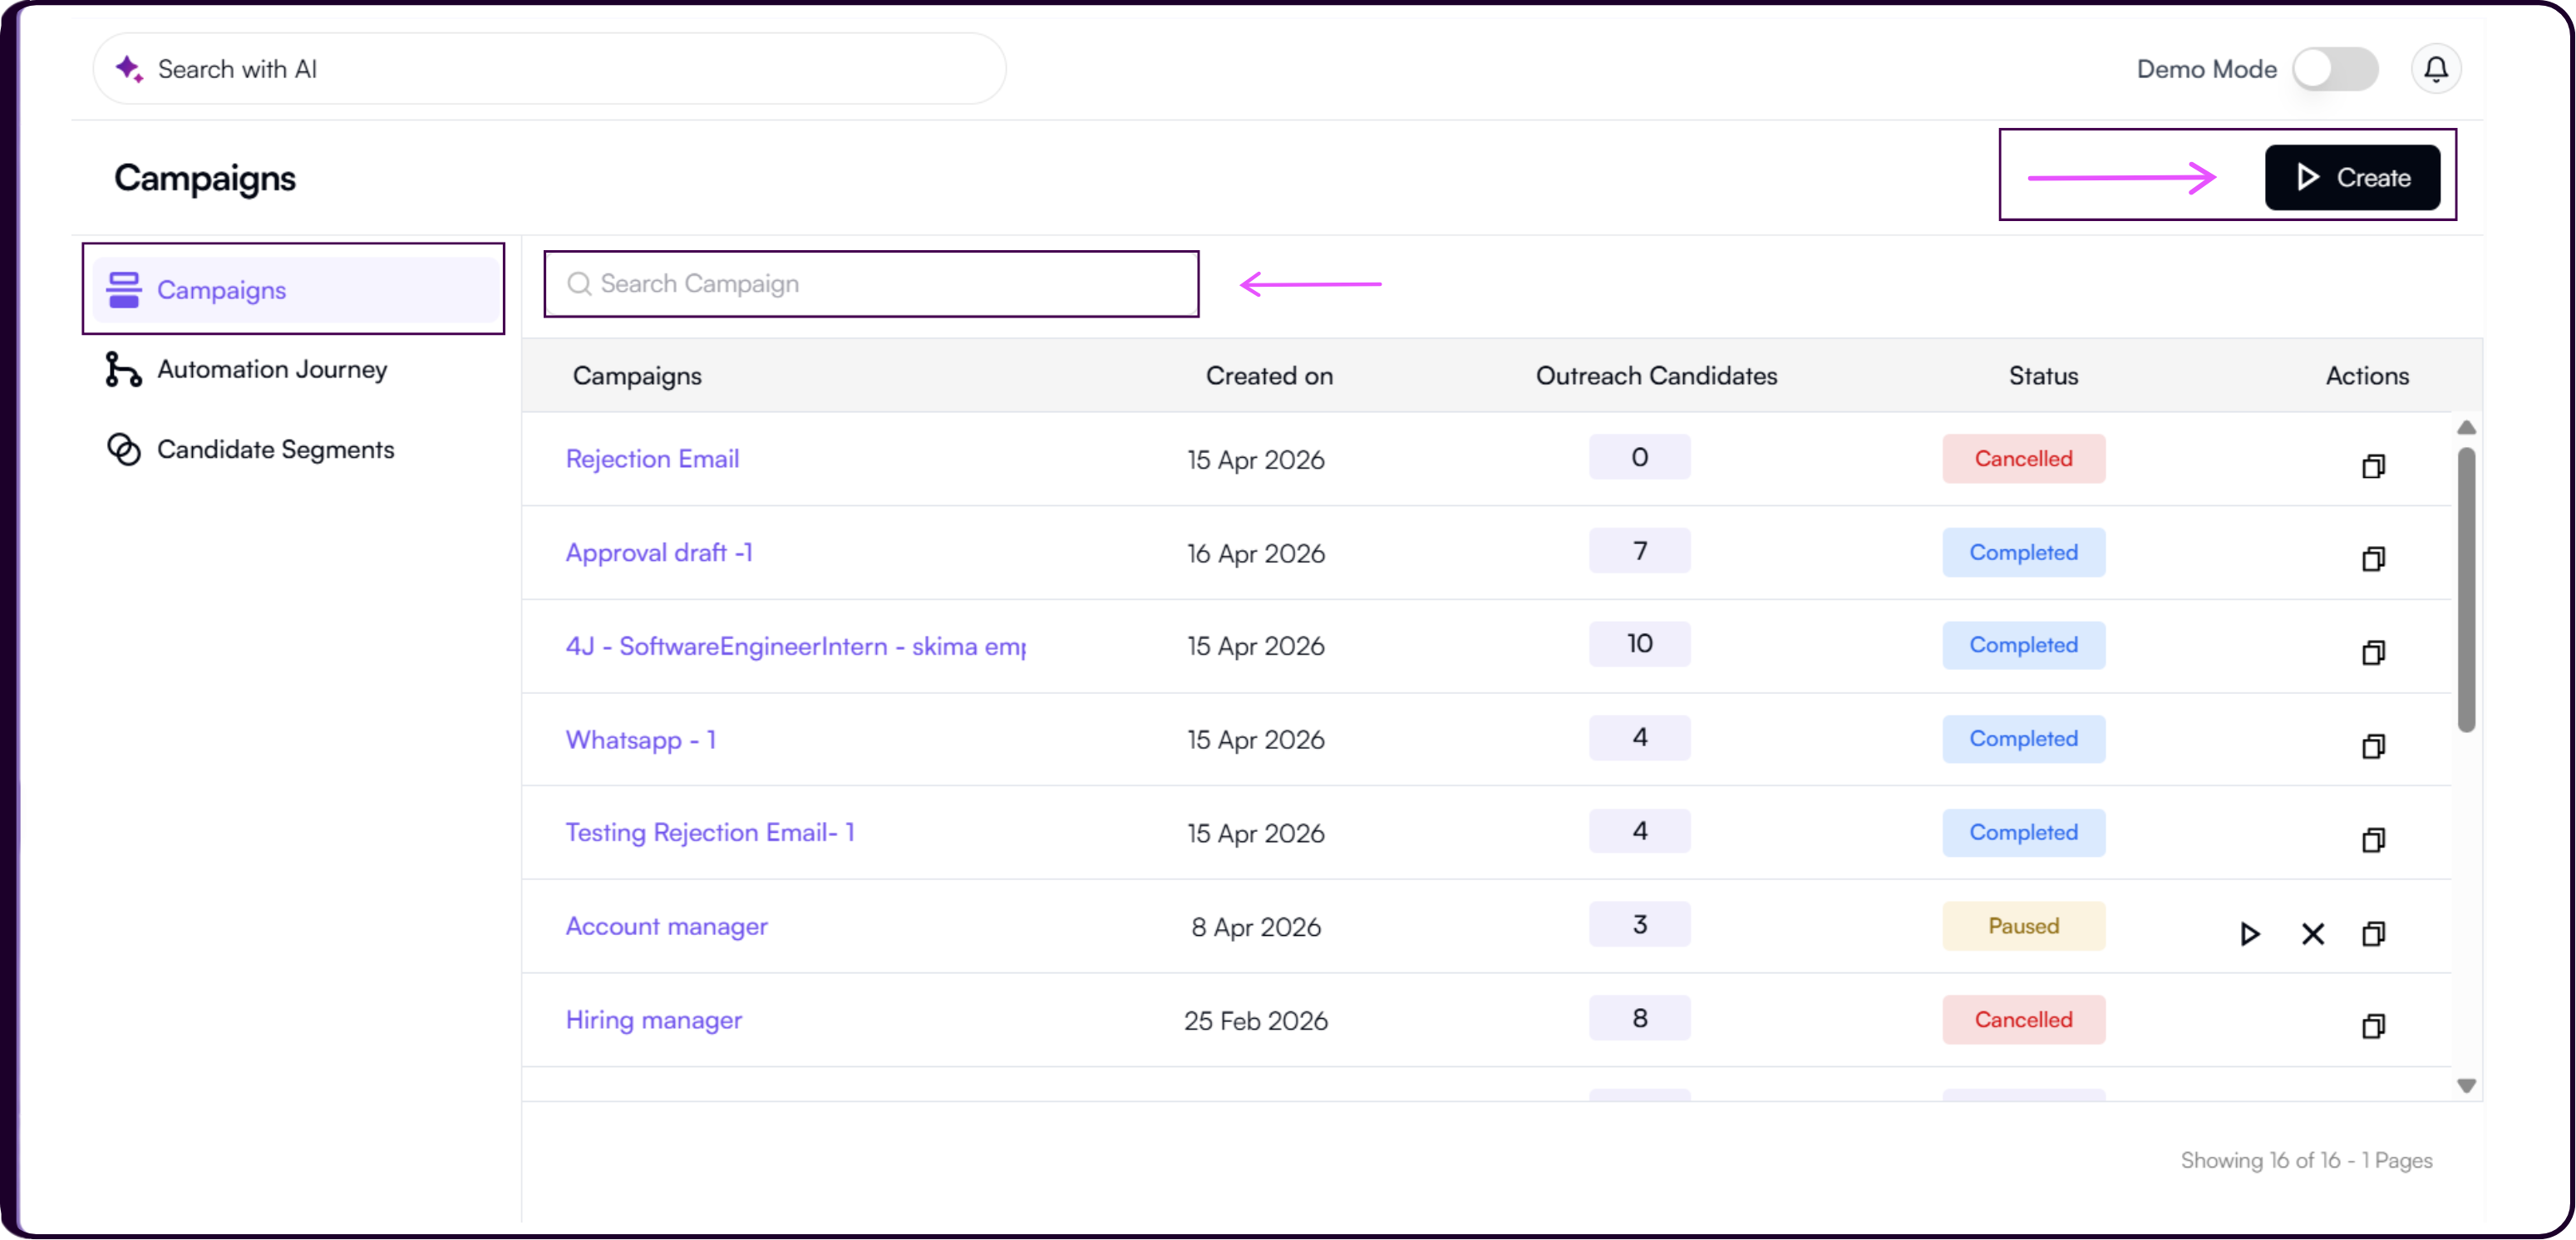
Navigate to 'Campaigns' from the left sidebar. You will see three tabs: Campaigns, Automation Journey, and Candidate Segments.
Campaigns Tab
The Campaigns tab is the main workspace where all created campaigns are listed. The table shows each campaign's name, created date, outreach candidate count, status (such as Draft or Active), and Actions where you can clone or delete a campaign.
Build Your First Campaign
Create a Campaign
- Click 'Create' to start building a new outreach campaign. Skima AI creates tailored messages and sequence flows that adapt to the preferences of each candidate.
- Enter a Campaign Name and choose how you want to build your campaign flow.
- Create from Scratch lets you build a custom campaign flow from the ground up.
- Use Template loads an existing template from your Automation Journey. Select a template and click 'Load Template' to apply it.
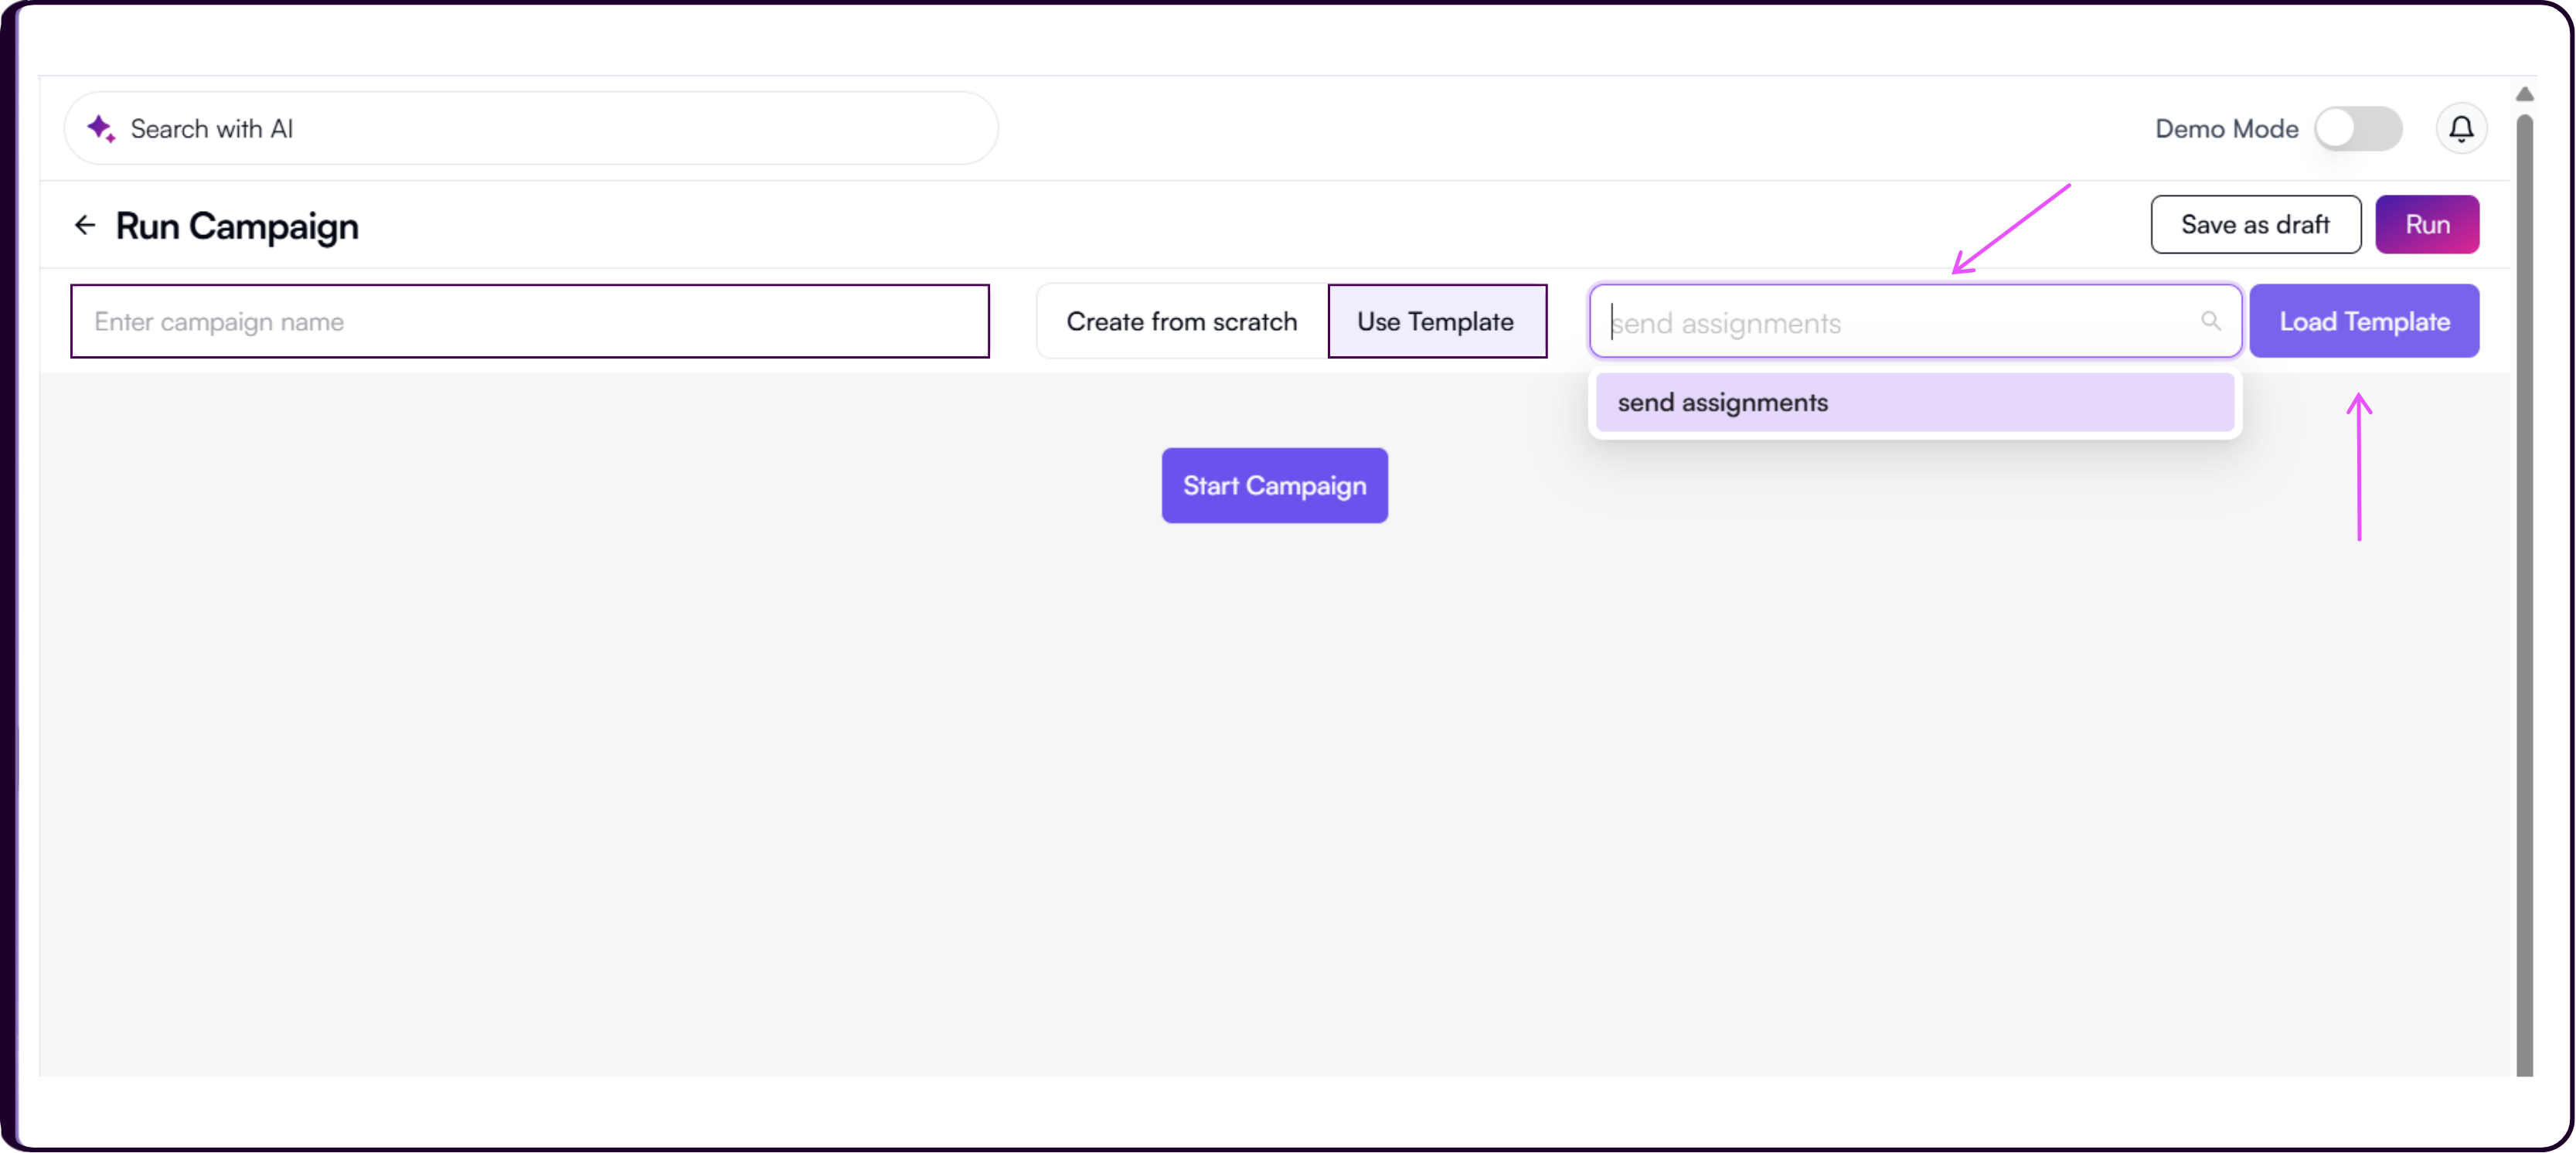
- Click 'Start Campaign' to move to Campaign Configuration.
Campaign Configuration
Before your campaign runs, you need to define which candidates it targets. Skima AI runs campaigns against Candidate Segments, which are structured groups of candidates filtered by job relevance and score threshold.
What is a Candidate Segment?
A segment is a saved group of candidates that match a specific job or set of criteria. You can create segments from the Candidate Segments tab within Campaigns, from the Candidates page, or directly from a Job in Skima AI. All segments created across these areas are shared and available here.
When creating a segment, you set a Title, choose a Segment Type (Automatic or Manual), optionally associate it with one or more jobs, and define a Relevancy Score Threshold between 50% and 90%. Skima AI calculates how many candidates qualify based on these settings before you save.
Learn more about how segmentation works without linking to a job: Segment Candidates Without Linking to Jobs
Configure and Submit
- Under 'Run Against?', select 'Segment'.
- Choose the segment you want to run the campaign against from the 'Select Segment' dropdown. The Segmented Candidates Count will display automatically based on the selected segment.
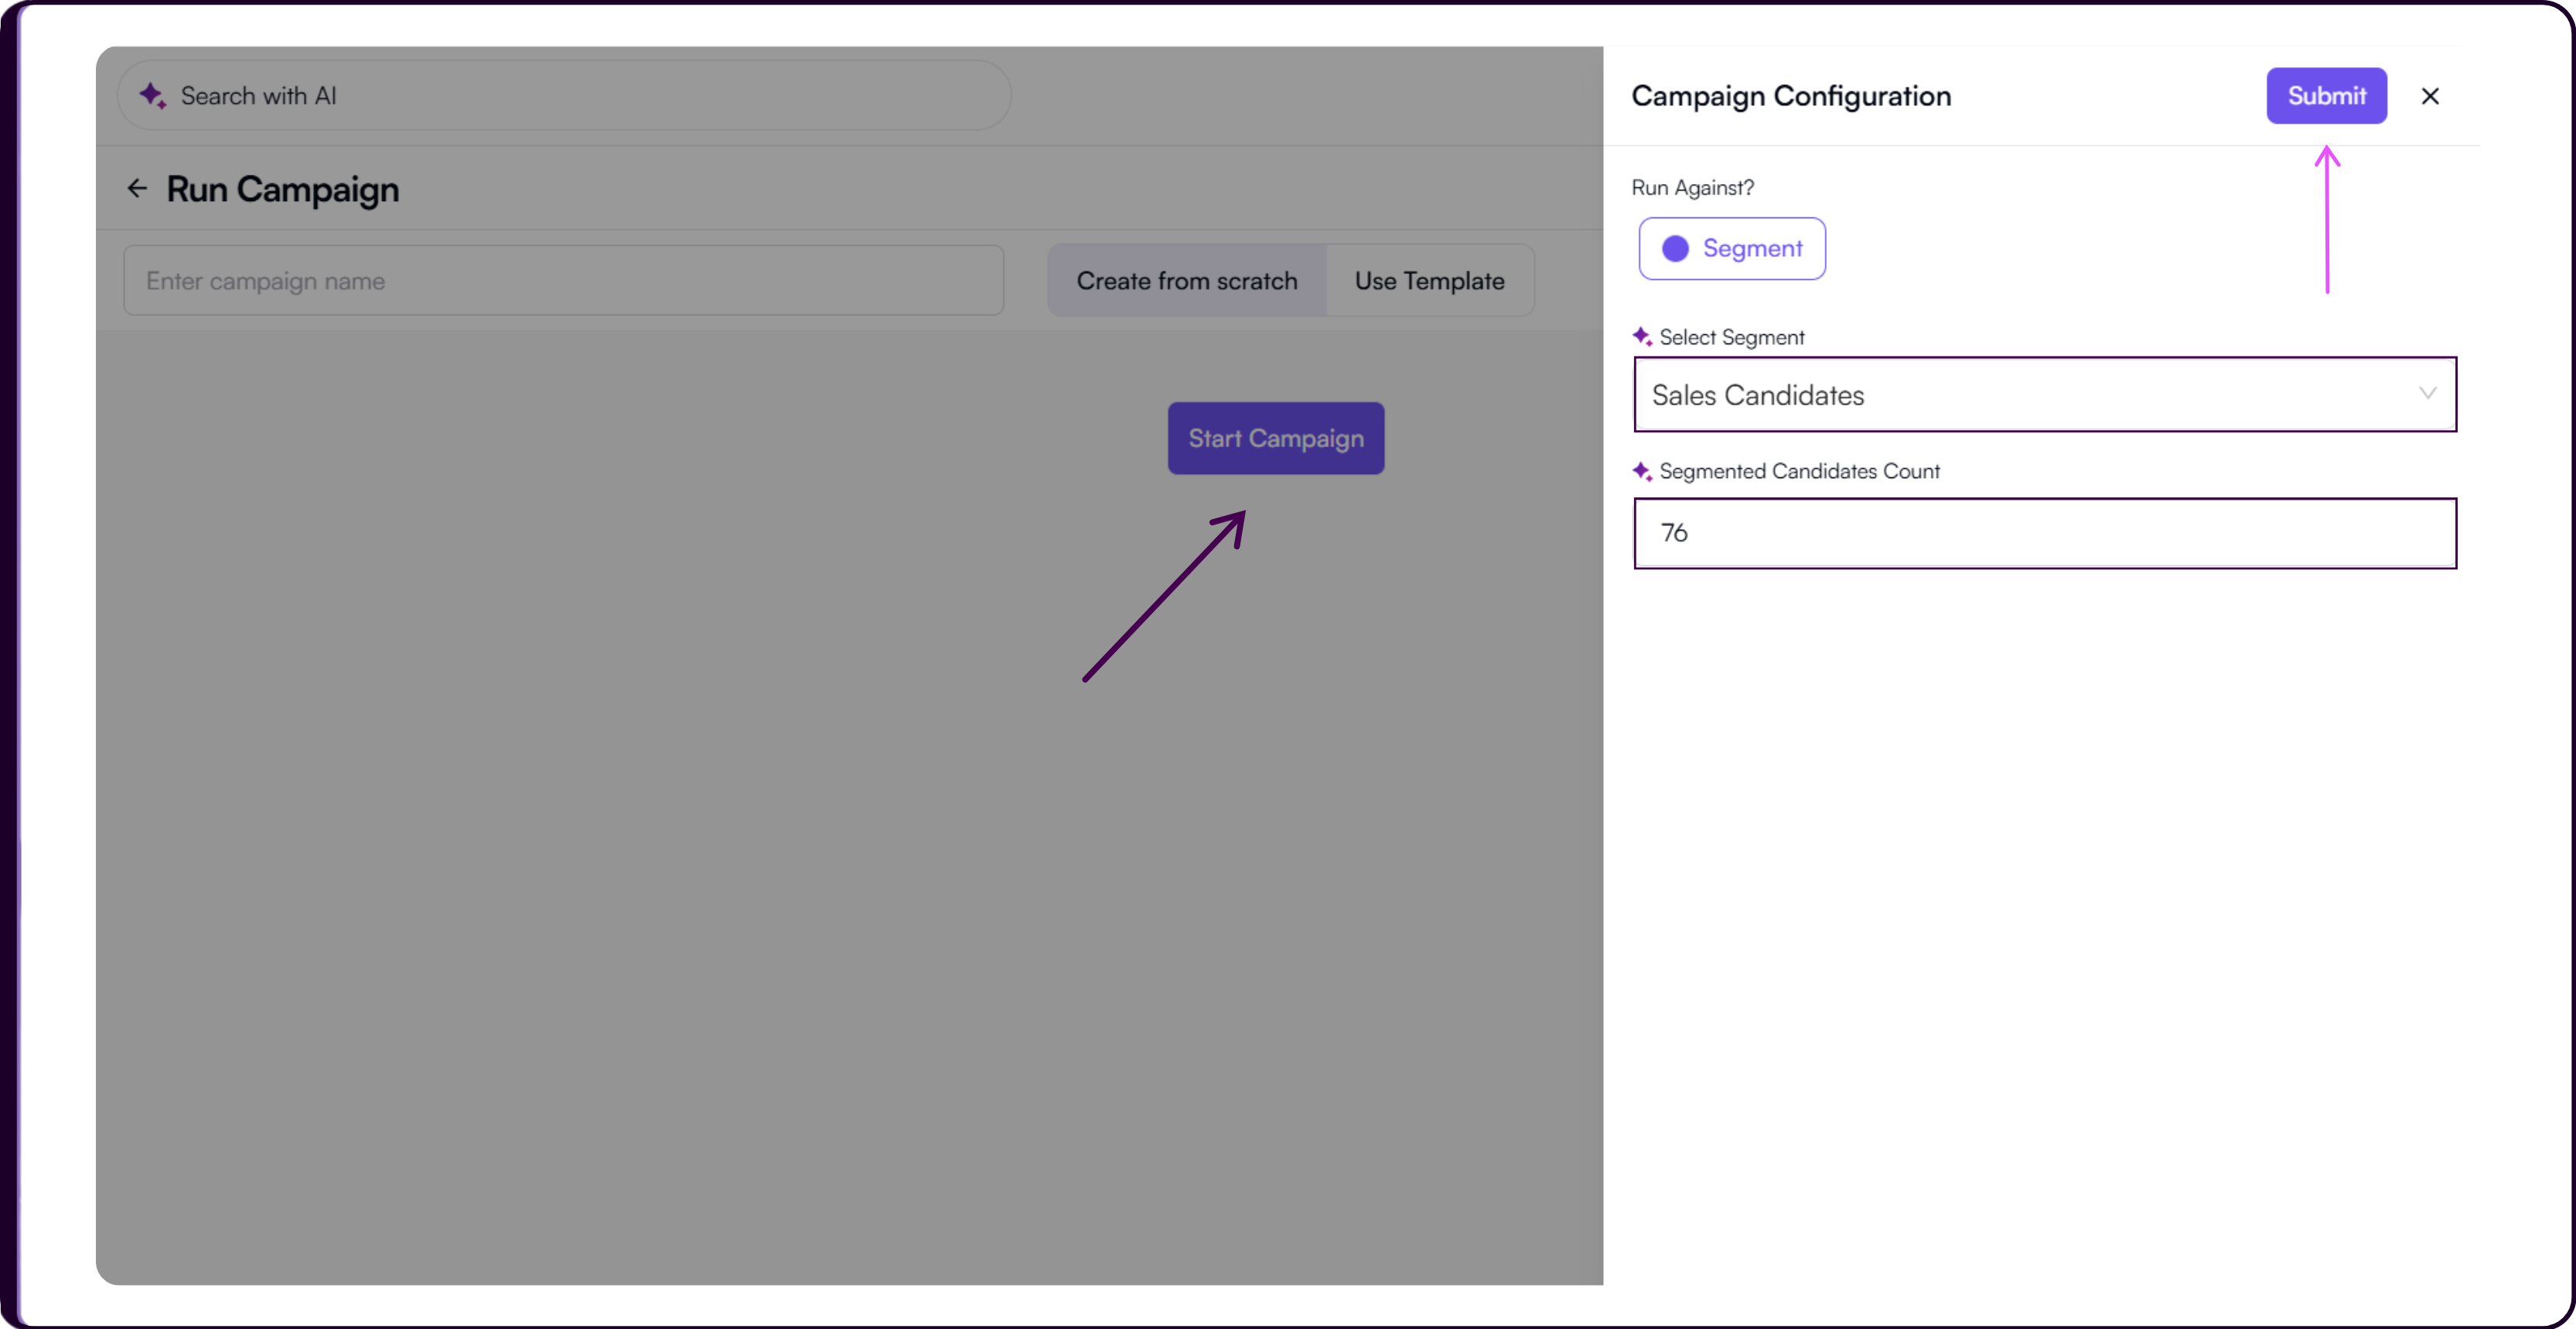
- Click 'Submit' to move to the Campaign Flow builder.
Campaign Flow
Once configuration is complete, you build the sequence of actions that each candidate will move through. Click the '+' button to add an action to the flow.
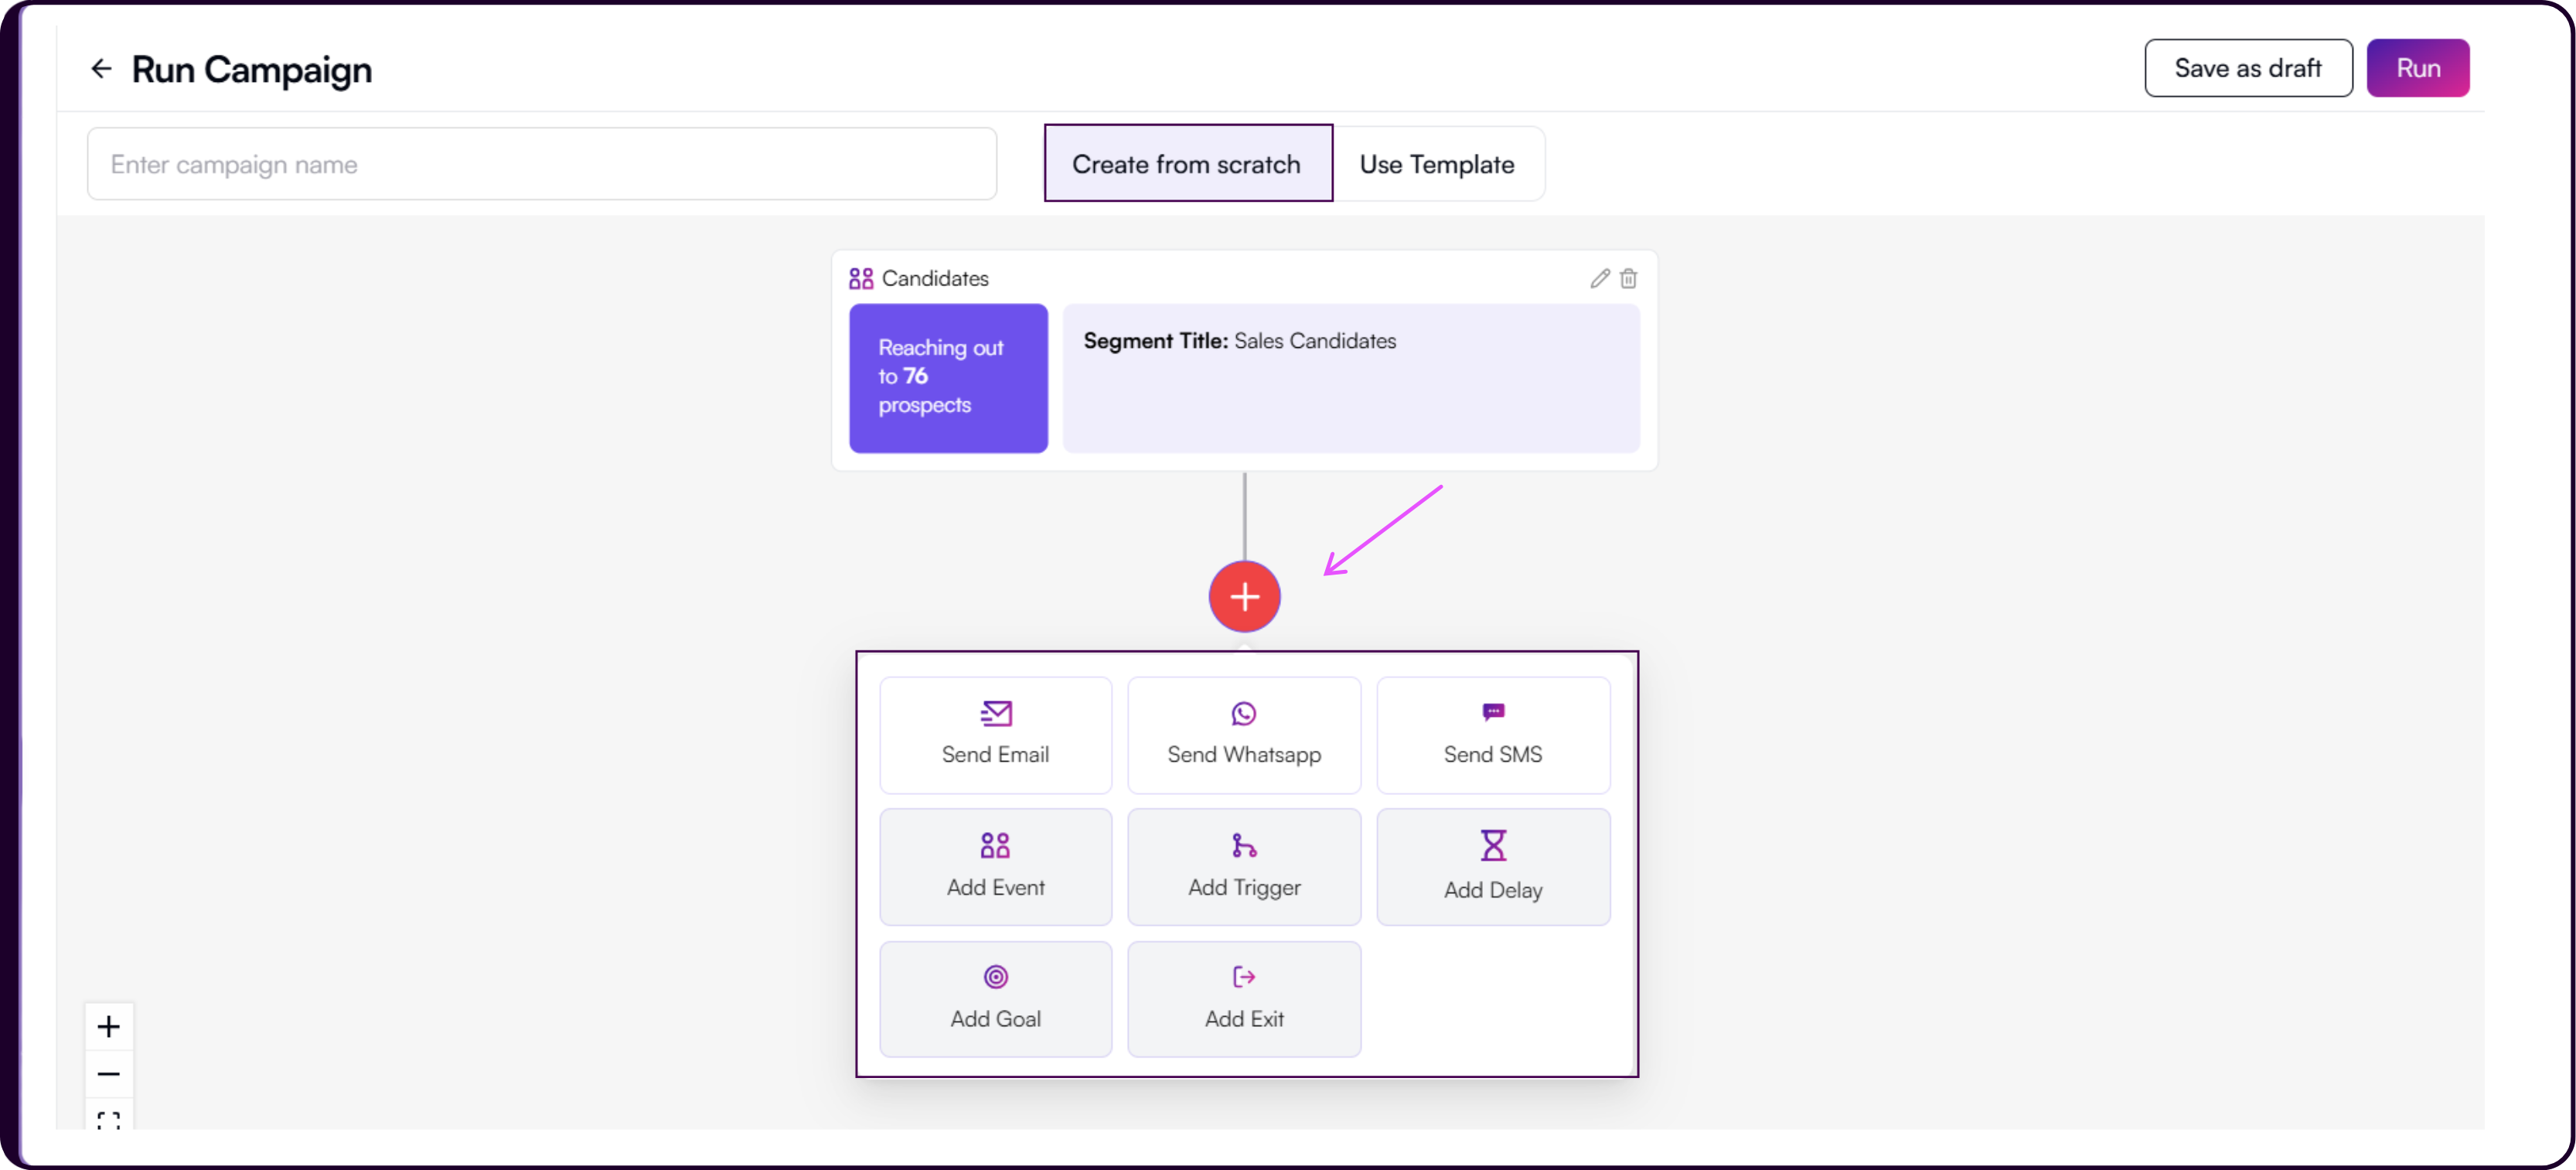
Send Email
Select 'Send Email' to configure an outreach email for candidates in the campaign.
Write your email content directly in the editor. Placeholders are available to personalise the message at scale. You can also attach files at the bottom of the email section before finalising.
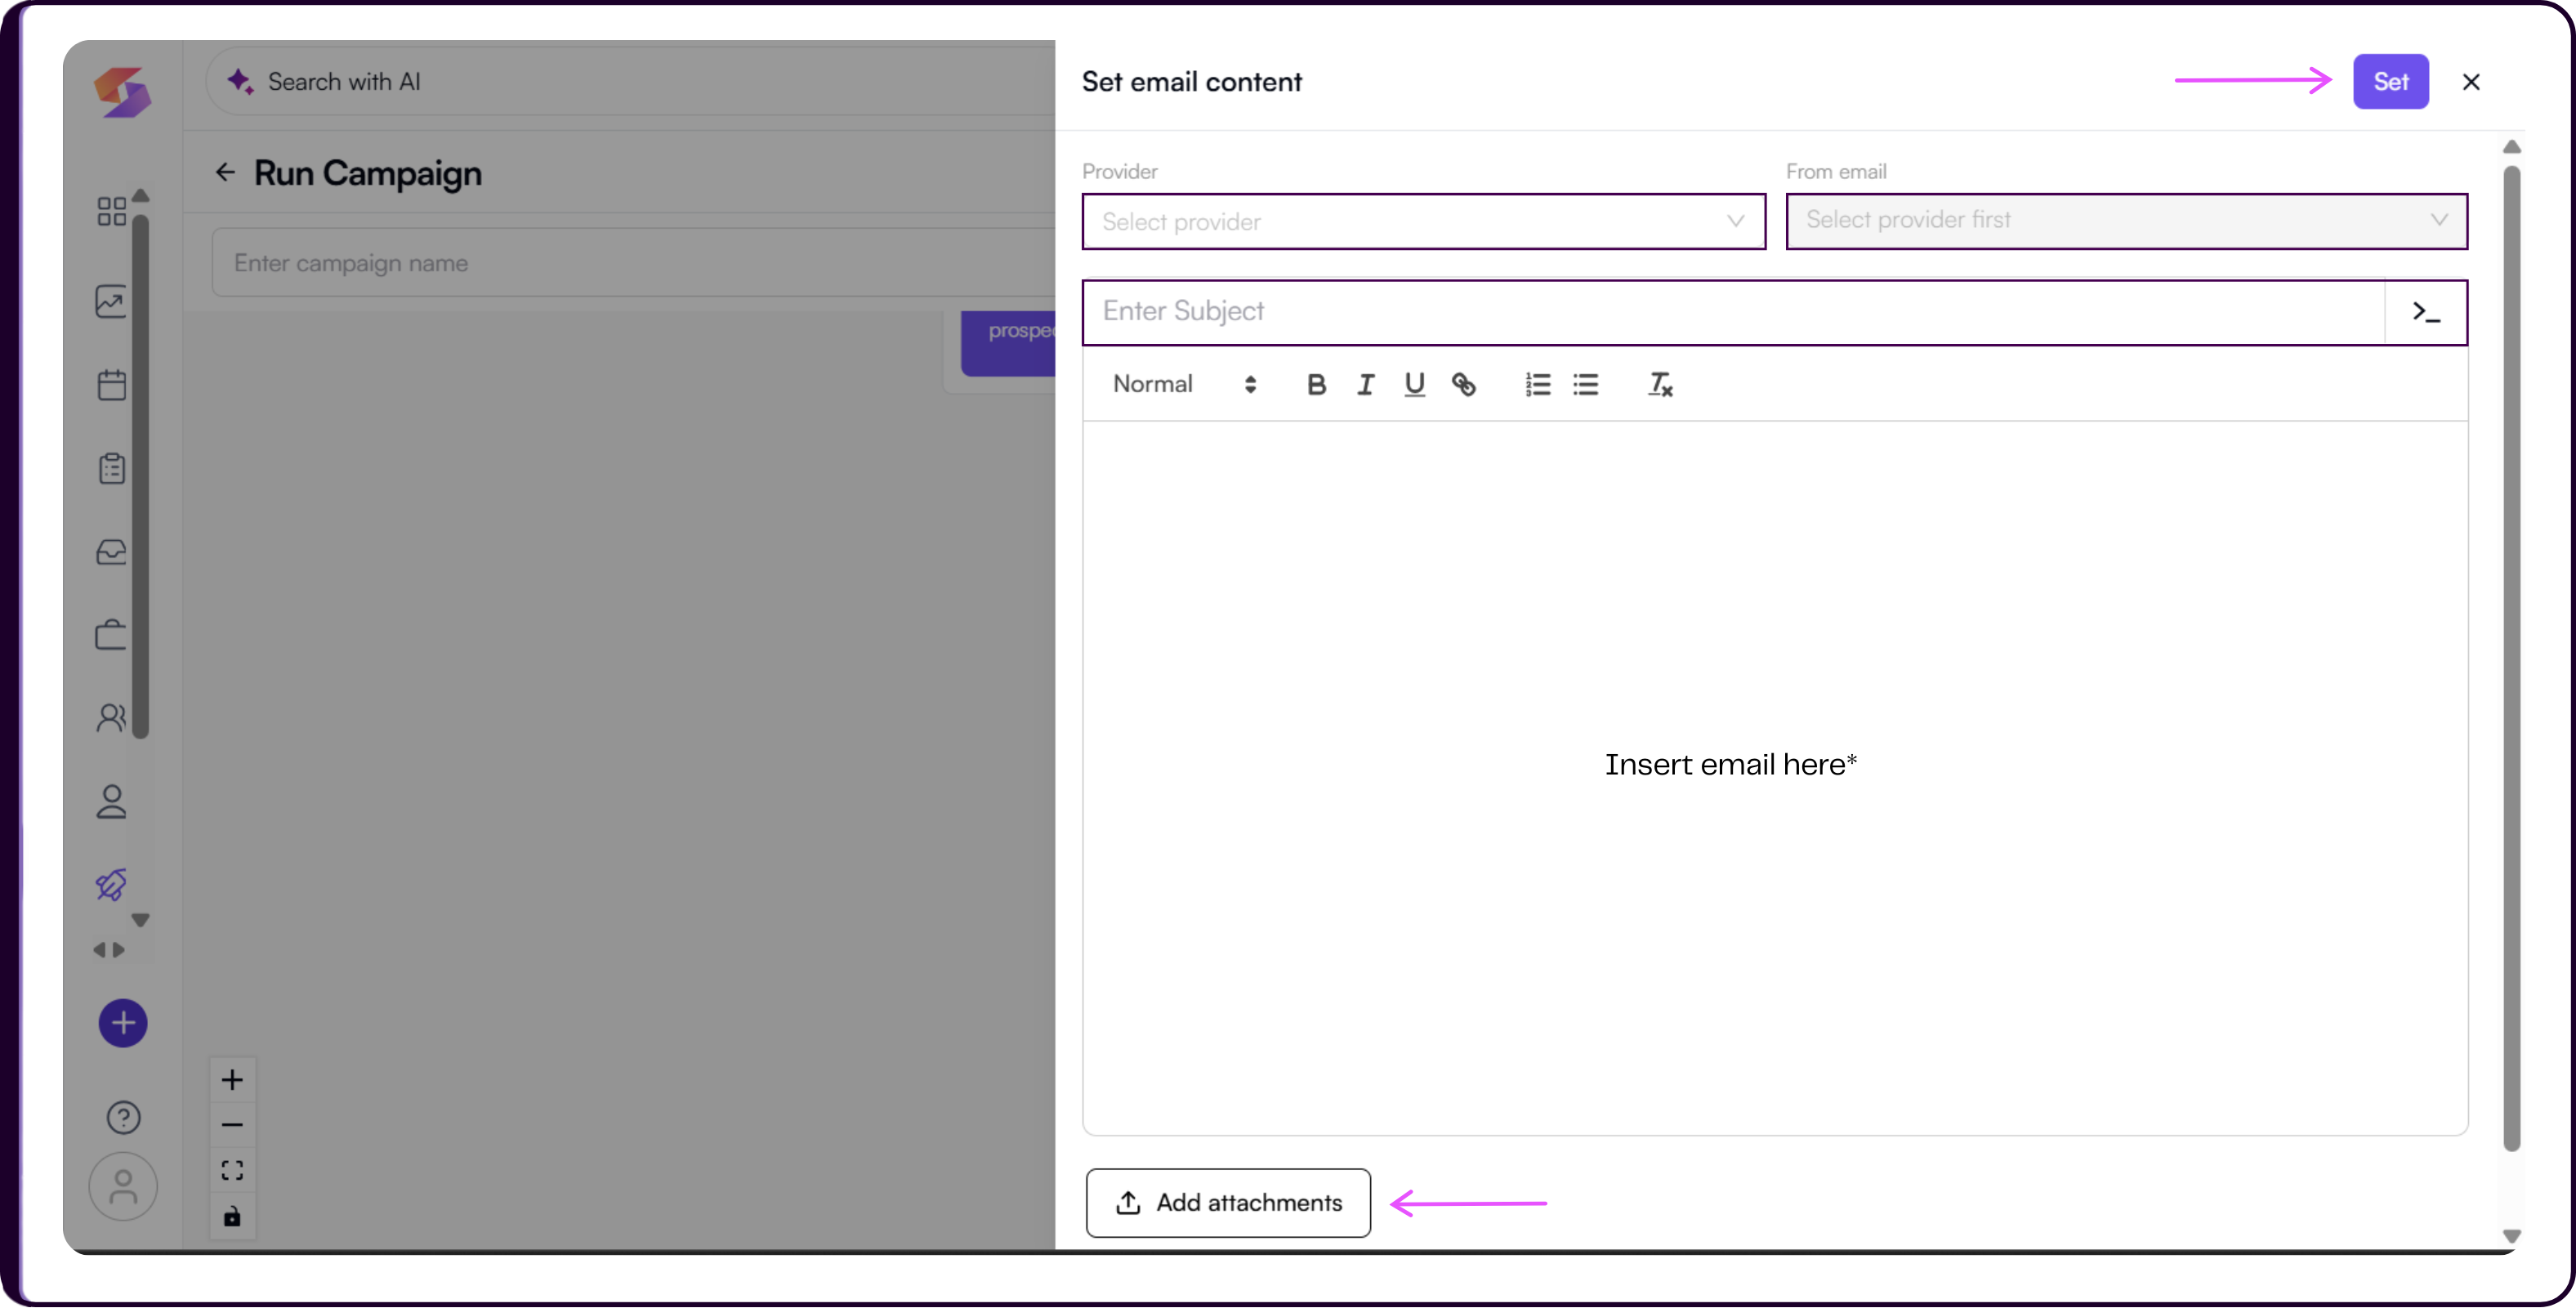
Click 'Set' to add the email step to your campaign flow.
Send WhatsApp
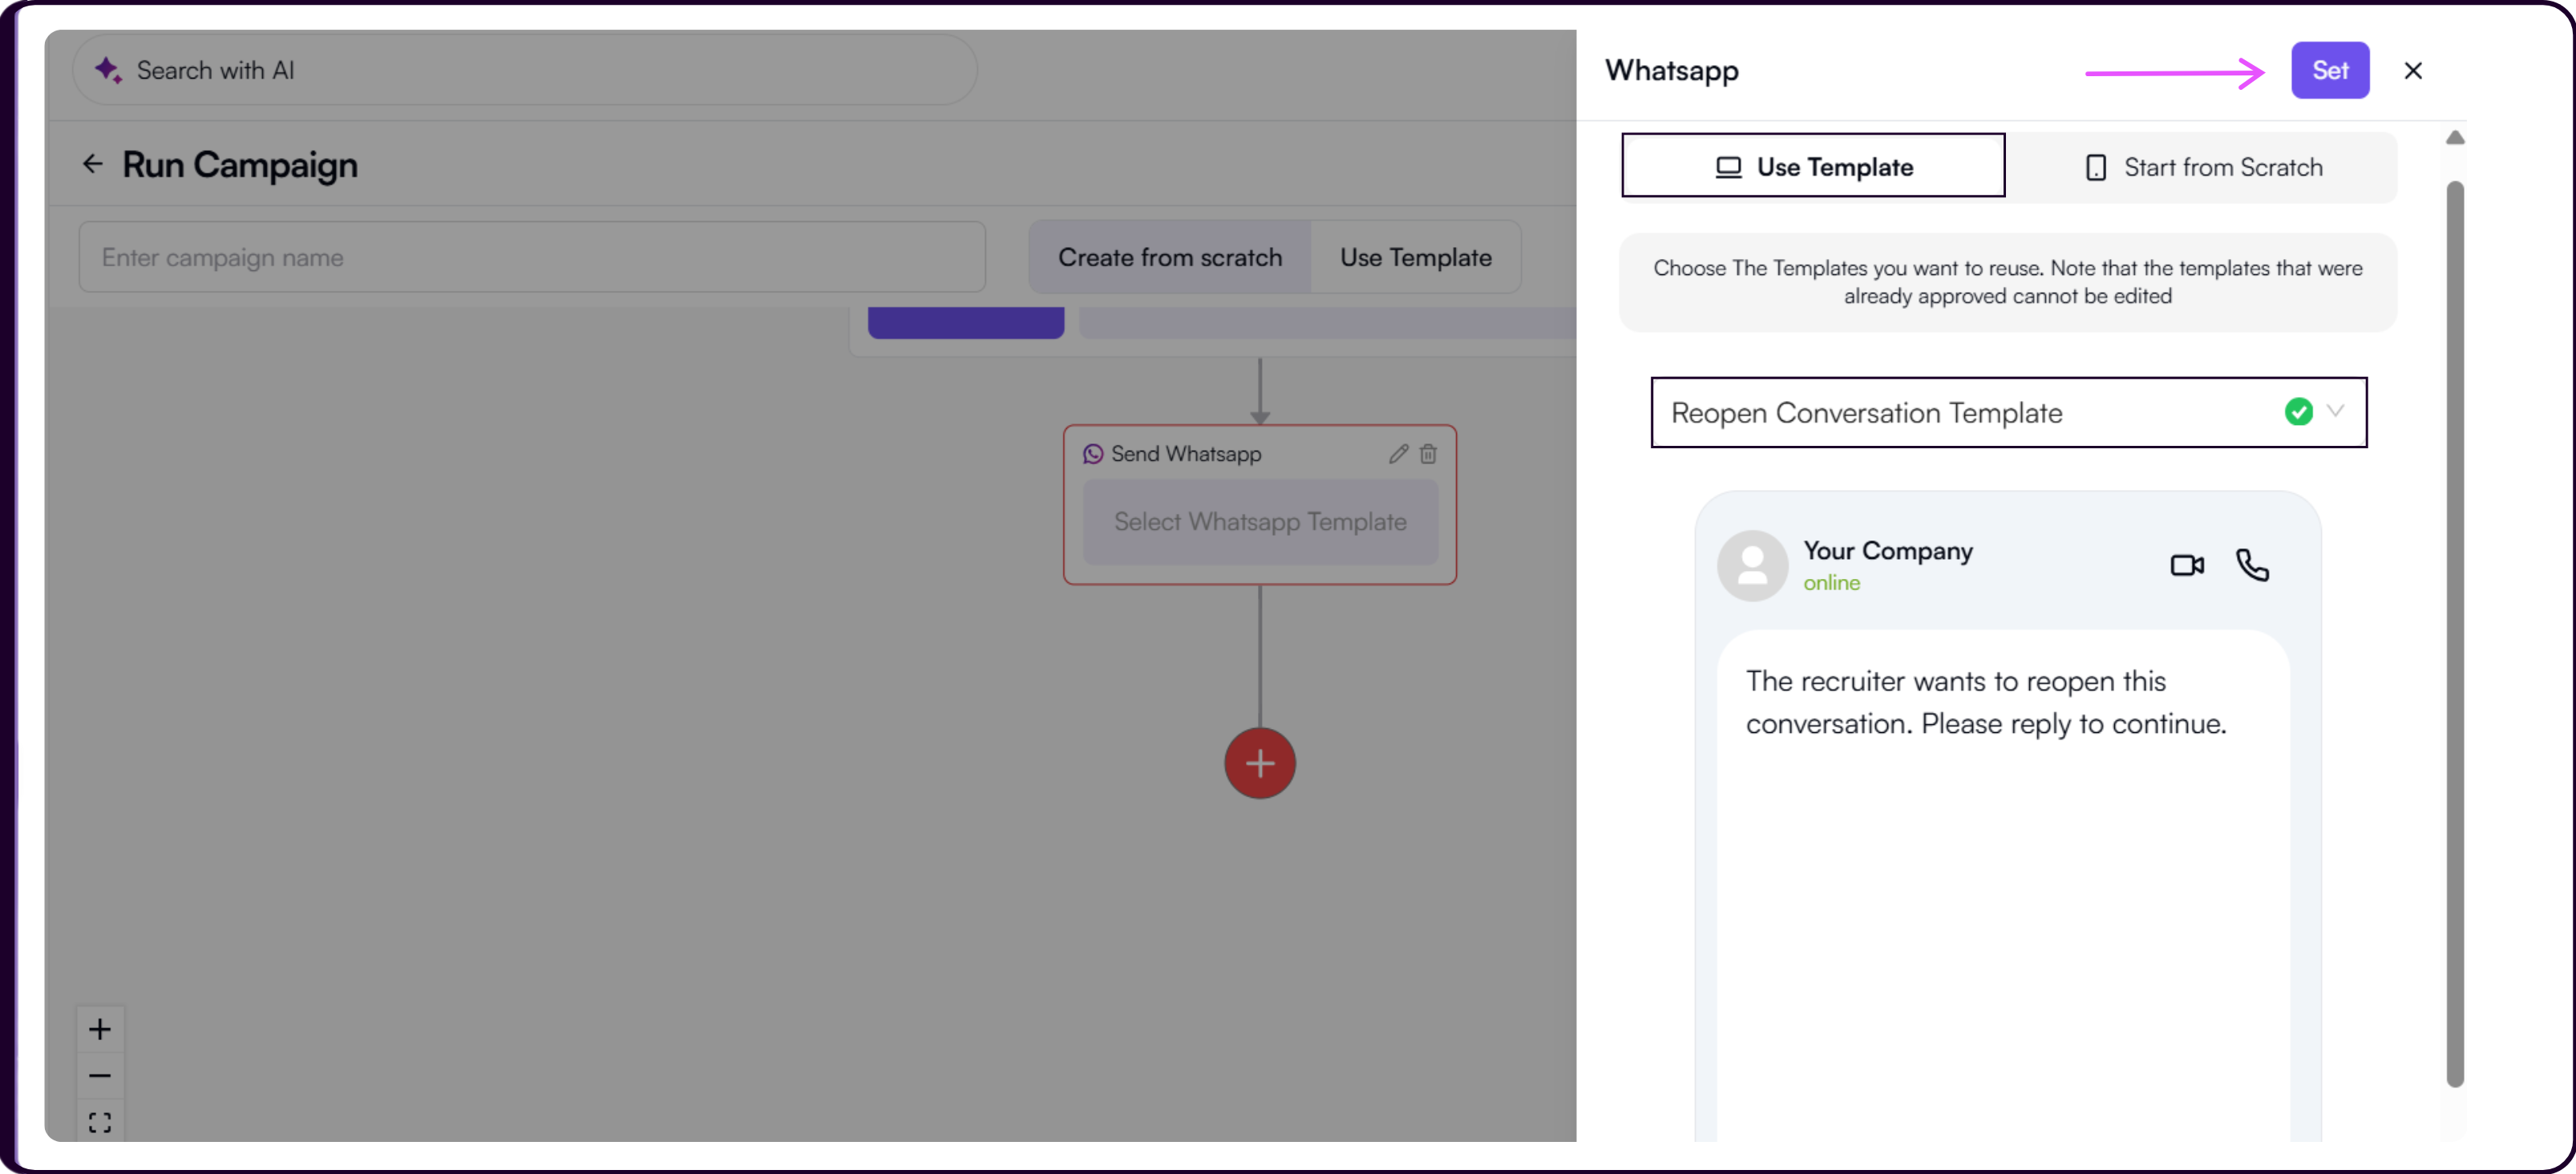
Select 'Send WhatsApp' to add a WhatsApp message to your campaign sequence.
The WhatsApp panel opens on the right with two tabs: Use Template and Start from Scratch.
Use Template lets you choose from your existing approved WhatsApp templates and preview how the message will appear to the candidate before sending. Approved templates cannot be edited.
Start from Scratch shows a Disclaimer section and a 'Create New WhatsApp Template' button. The disclaimer states that WhatsApp templates generally take 24 to 48 hours to get approved, and that you should save your campaign as a draft before navigating away to create a new template.
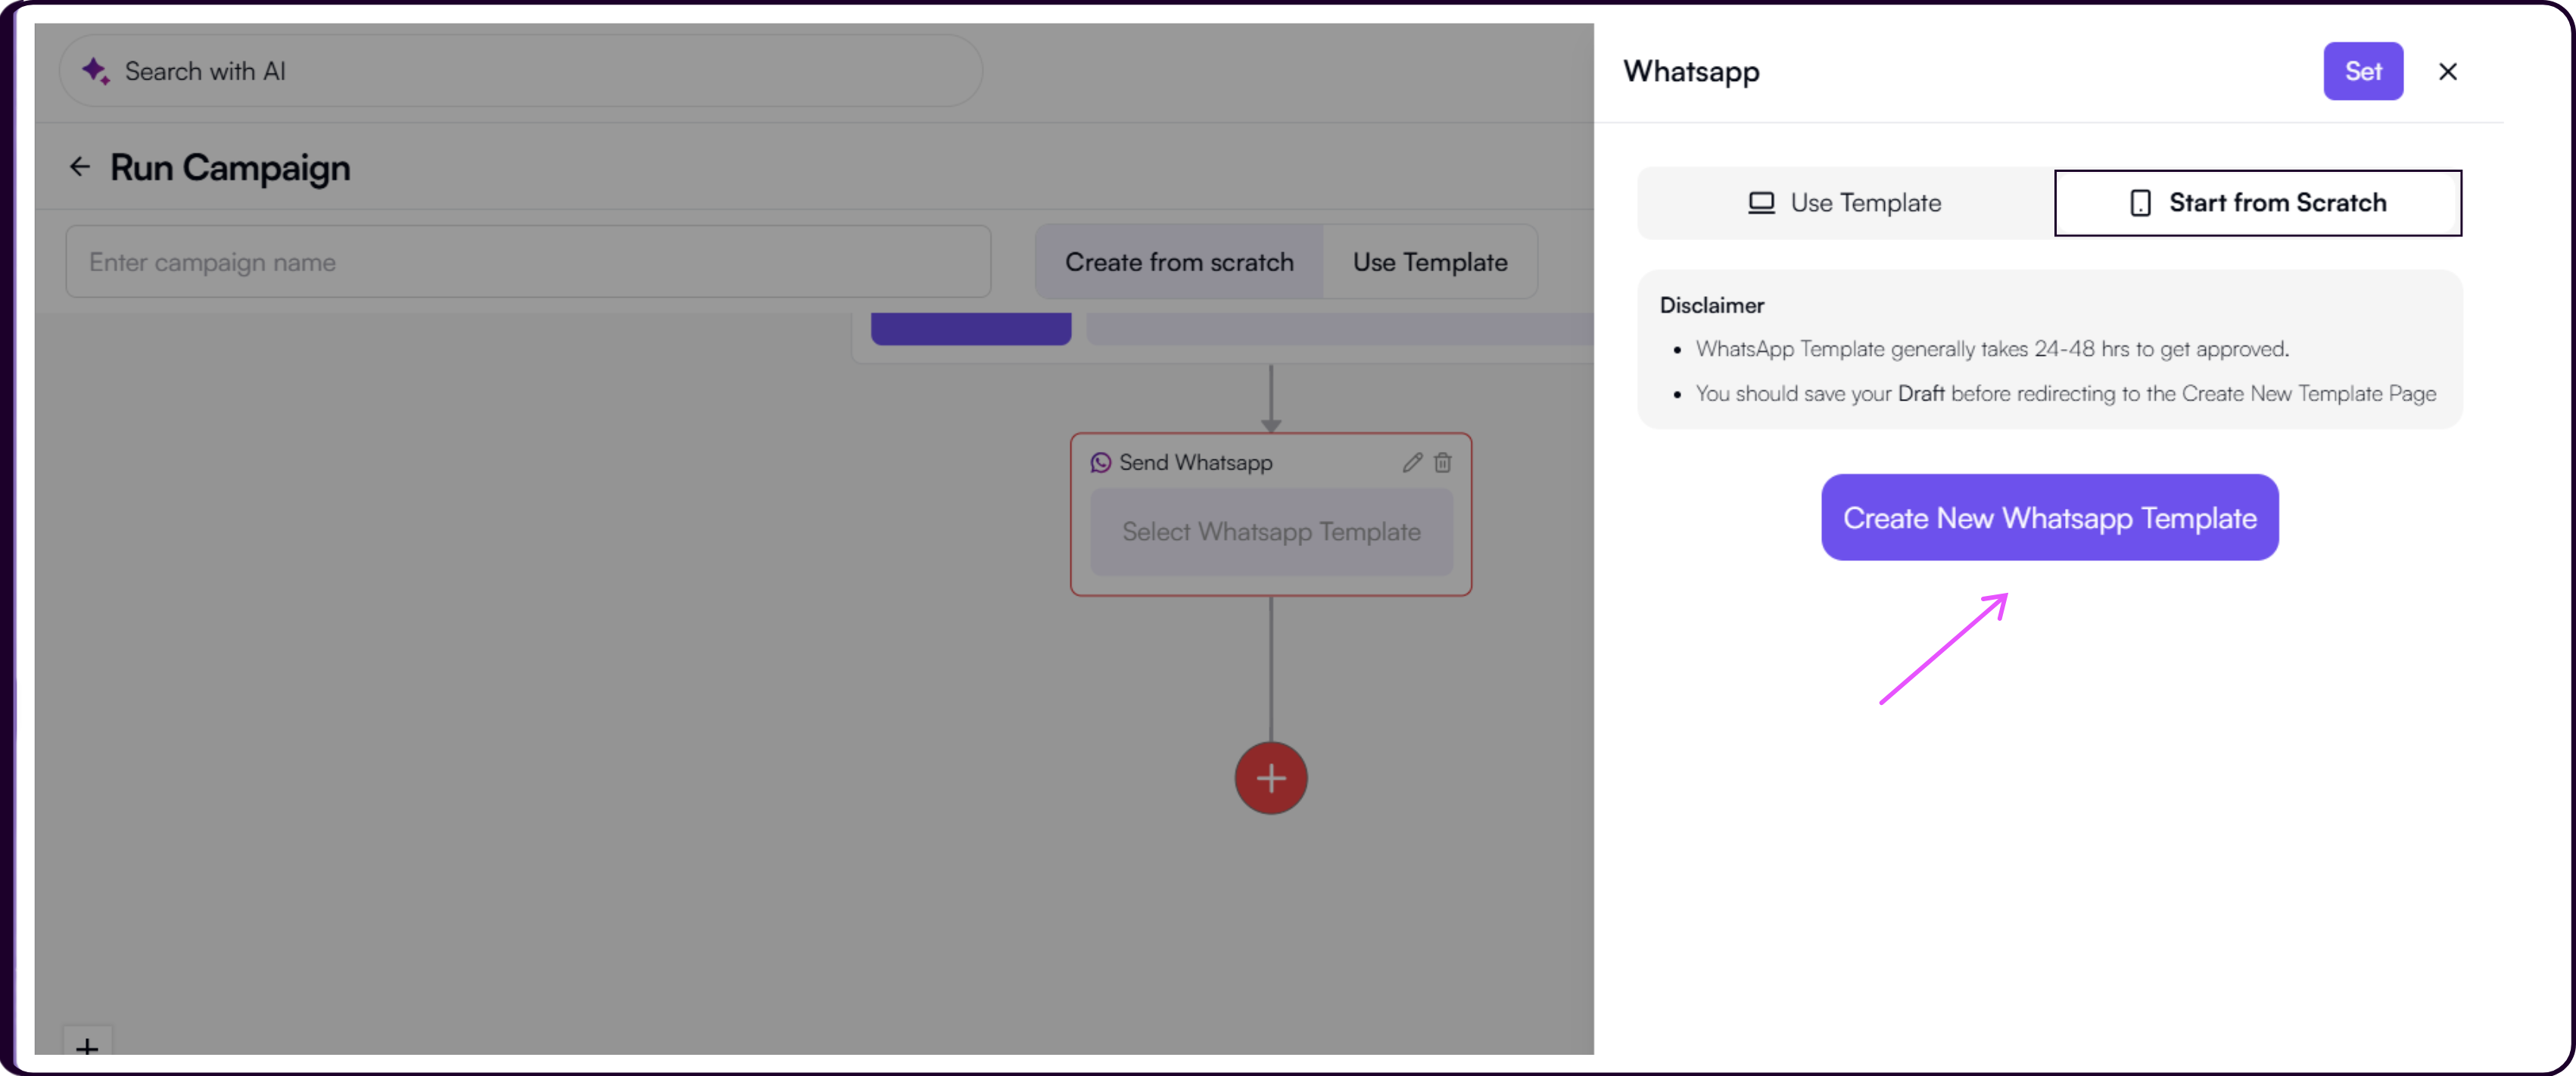
Clicking 'Create New WhatsApp Template' takes you to the Content Template Builder inside Settings where you can create and submit a new template for WhatsApp approval. For the full step-by-step guide on creating a WhatsApp template, refer to the WhatsApp Settings section.
Click 'Set' after selecting or creating your WhatsApp template to add it to the campaign flow.
Add Trigger
Select 'Add Trigger' to set a condition that determines how candidates move through the next step of the campaign.
Available triggers include Opened Email, Interested, Link Clicked, and Replied.
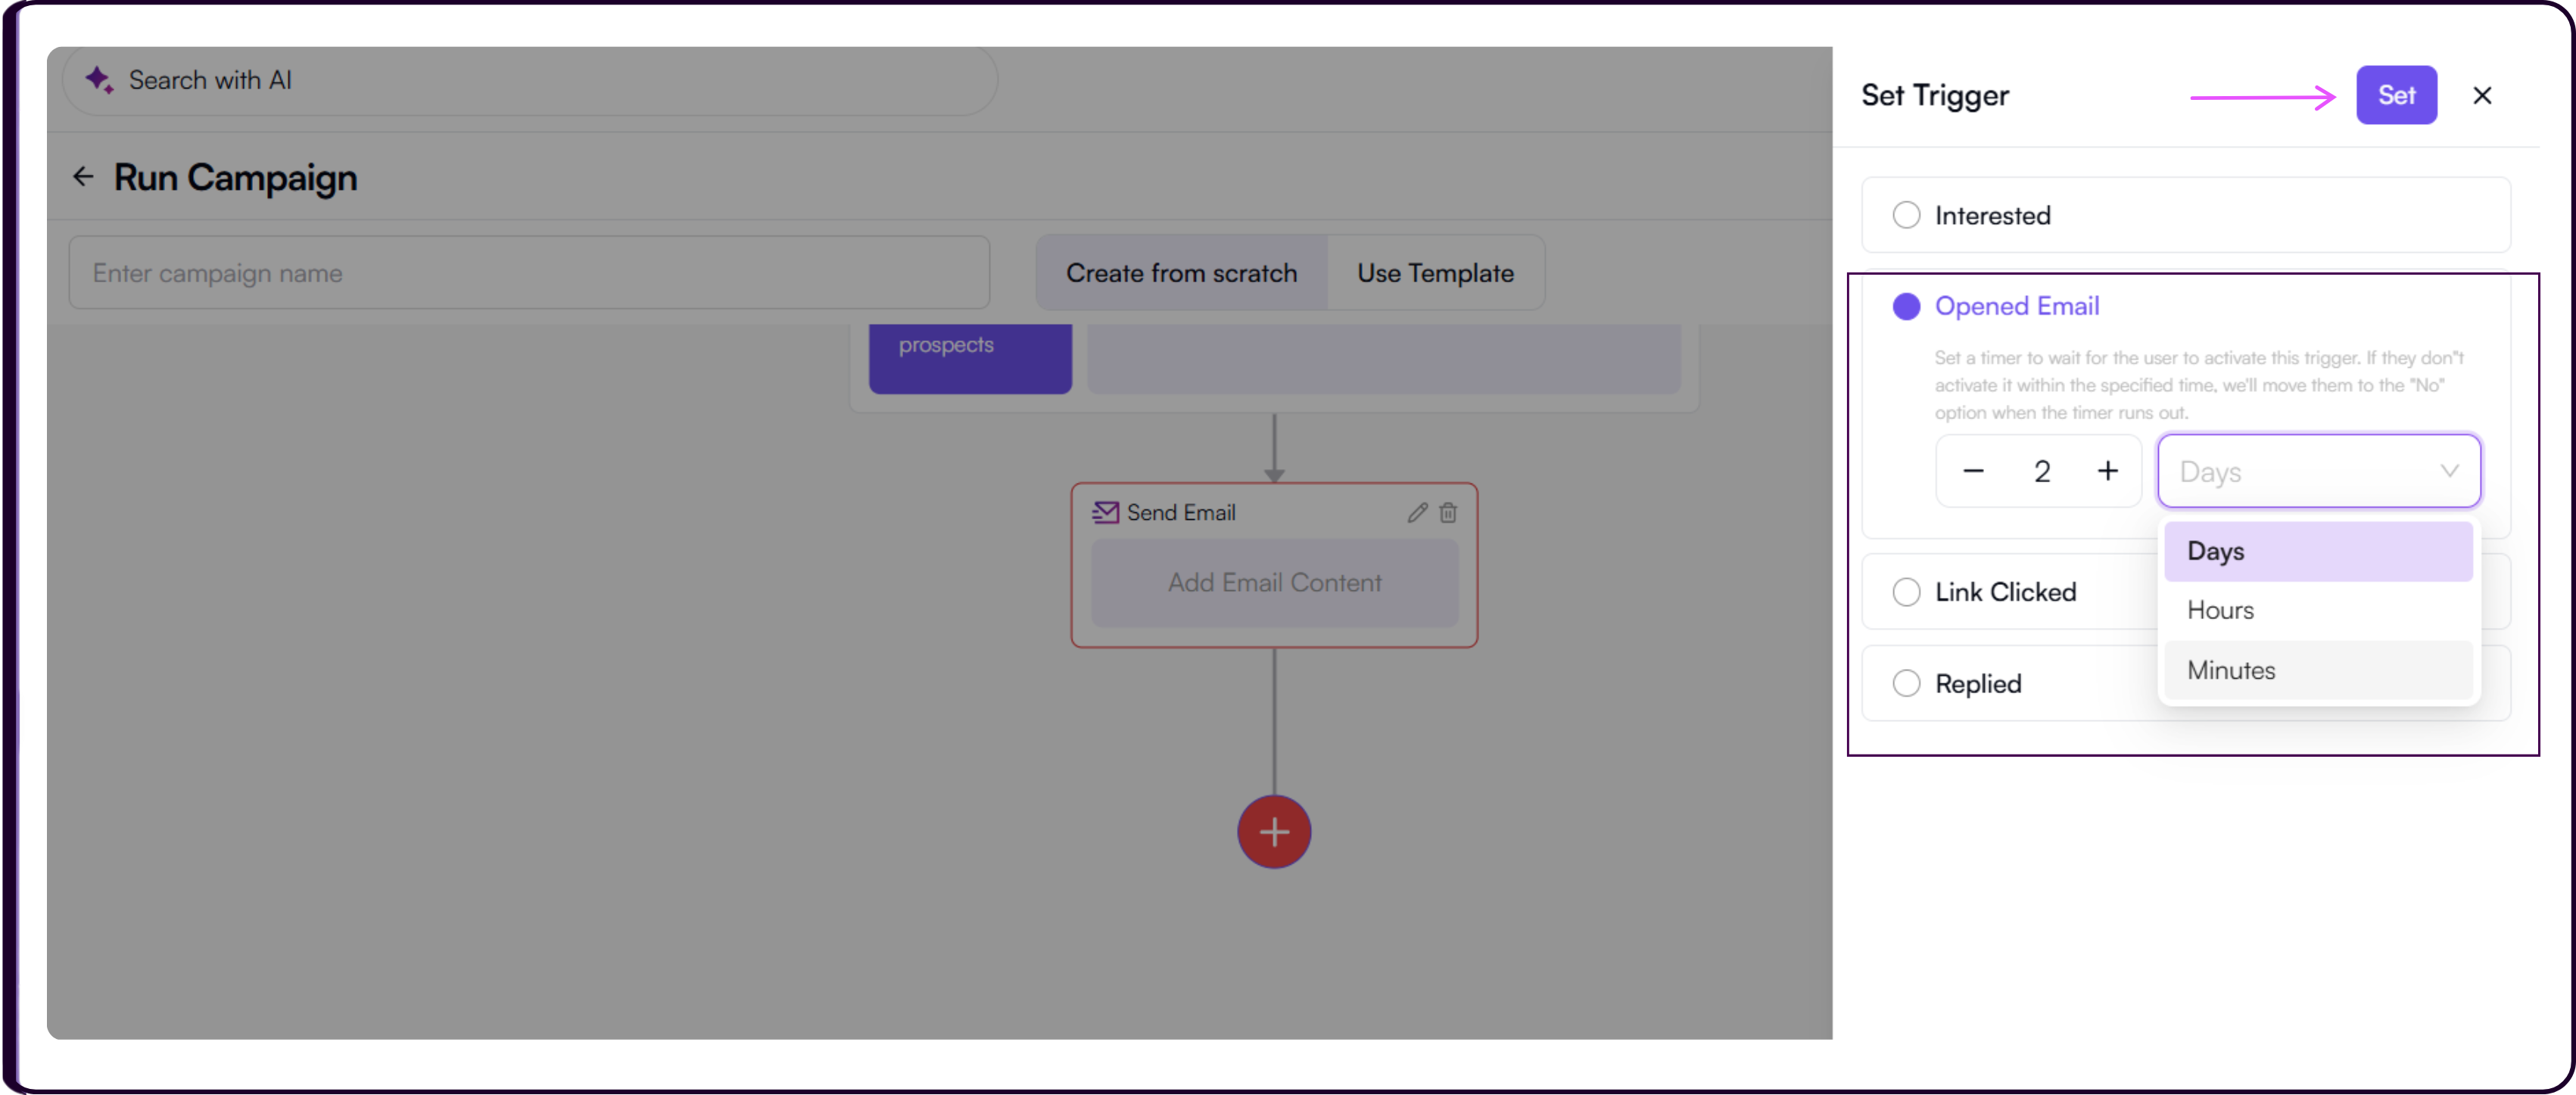
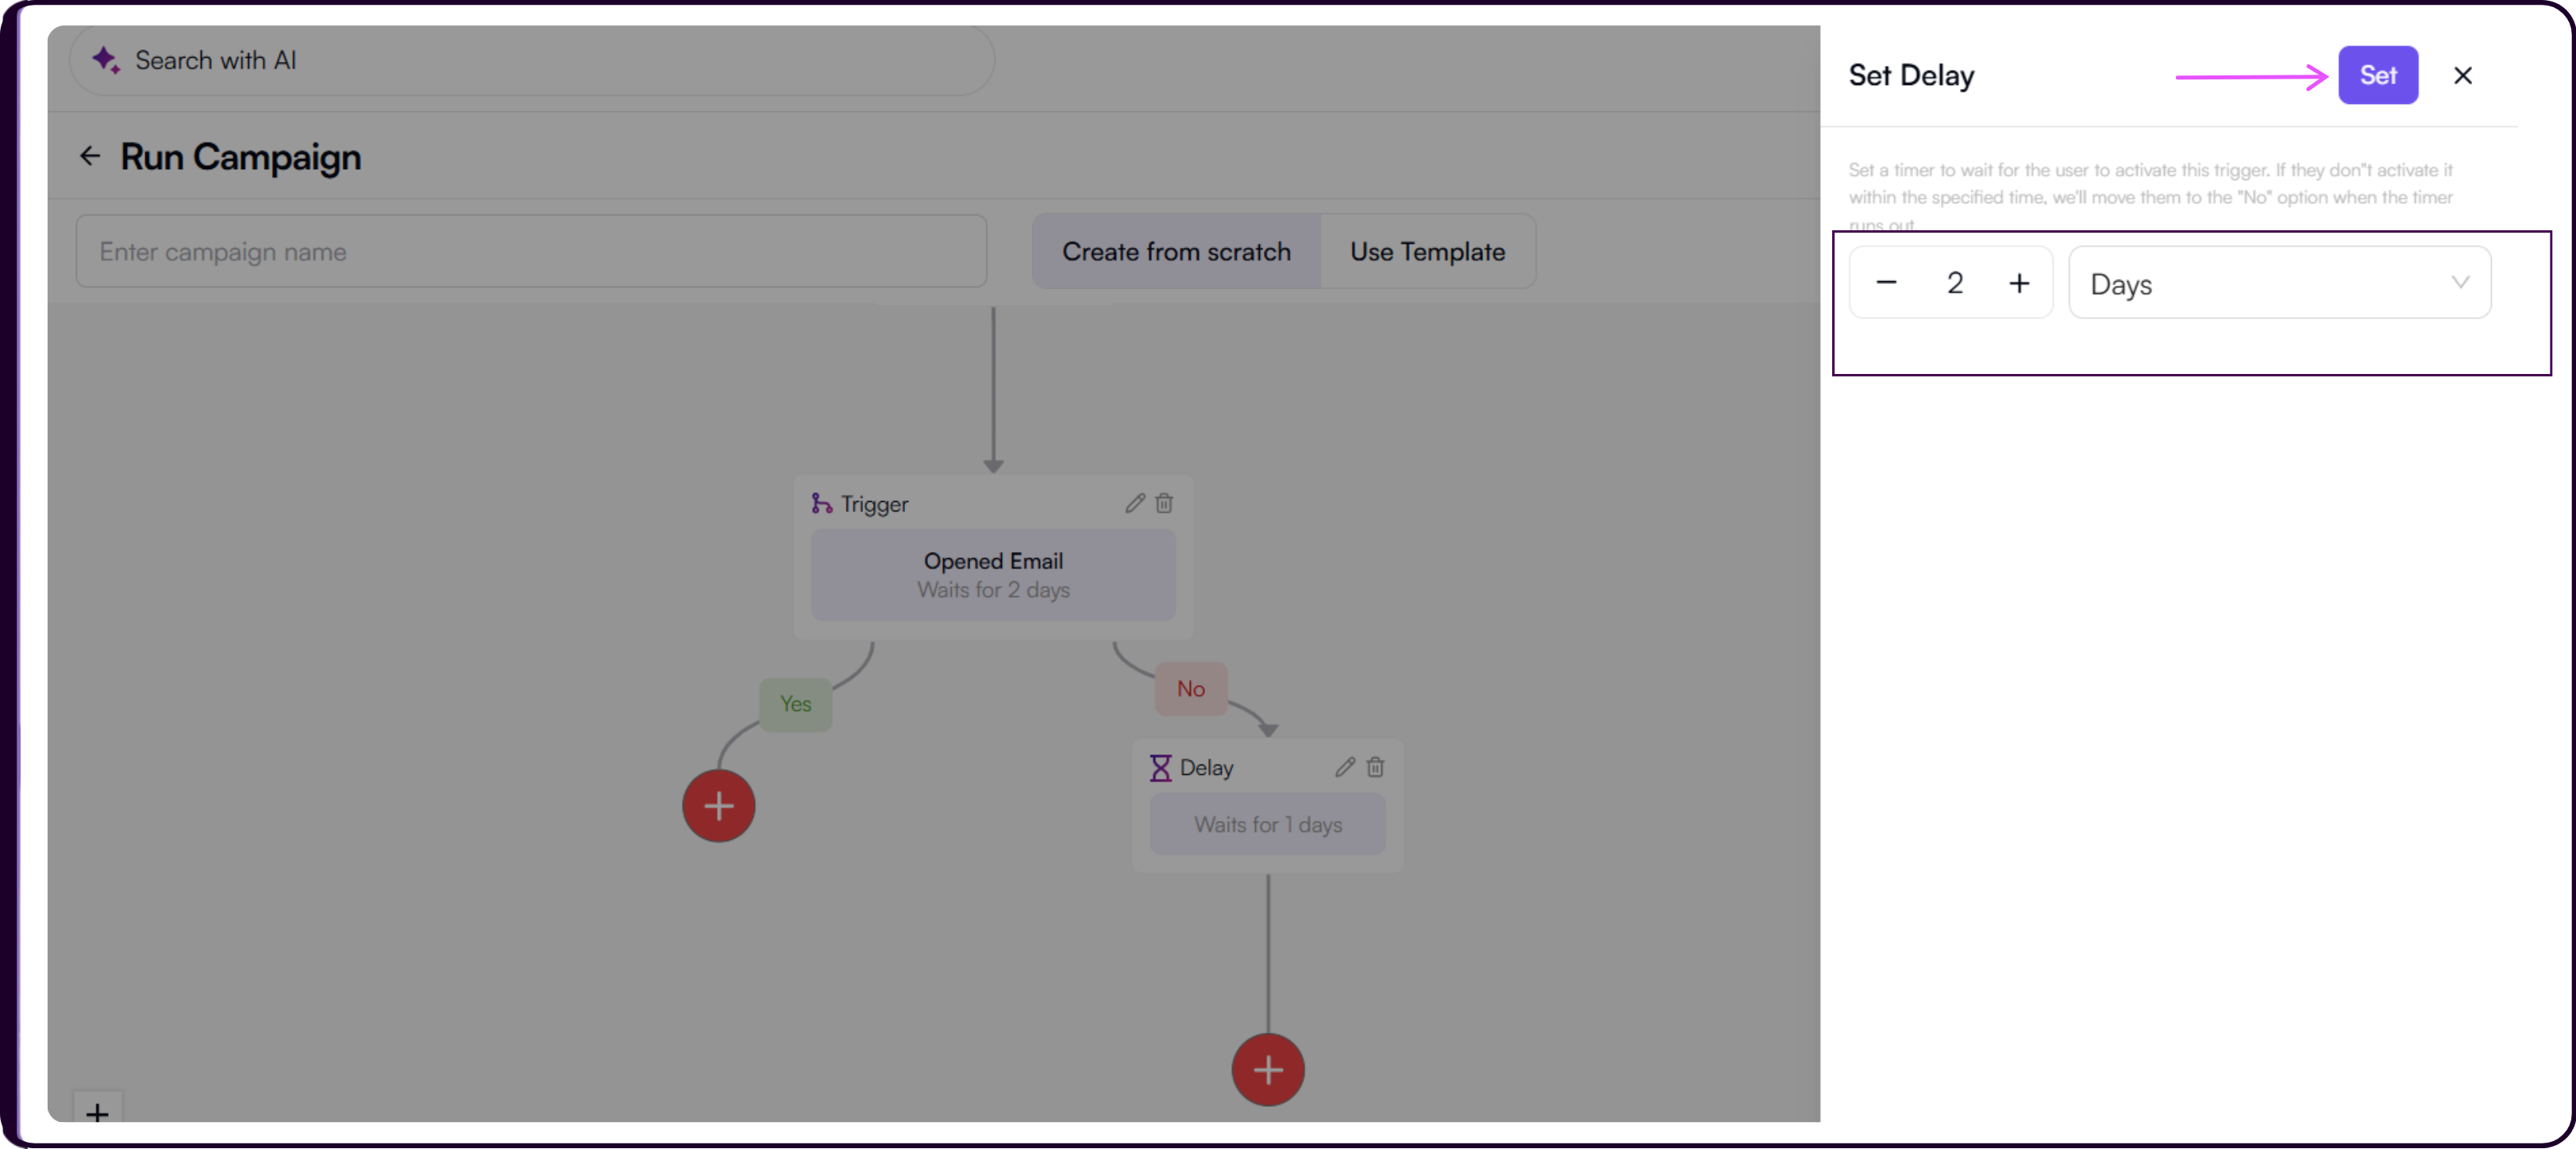
Set a Waiting Time in days, hours, or minutes. This is the timer that controls when candidates are moved to the Yes or No branch depending on whether they met the trigger condition within the set window.
For example, if a candidate clicks the link within the waiting period, they are moved to the Yes path when the timer runs out. Candidates who do not meet the condition move to the No path.
Click 'Set' to add the trigger to your flow.
Add Delay
Select 'Add Delay' to introduce a pause between two actions in the campaign flow. Set the waiting time in days, hours, or minutes, then click 'Set' to confirm.
Add Goal
Select 'Add Goal' to define a success milestone within the campaign.
- Enter a name for the goal such as "Hot Leads".
- Under 'What's next?', select the action to trigger when a candidate reaches this goal.
- To link the candidate to a job, select 'Link Candidate to Job' and choose the relevant job from the 'Select Job' dropdown. This field is required.
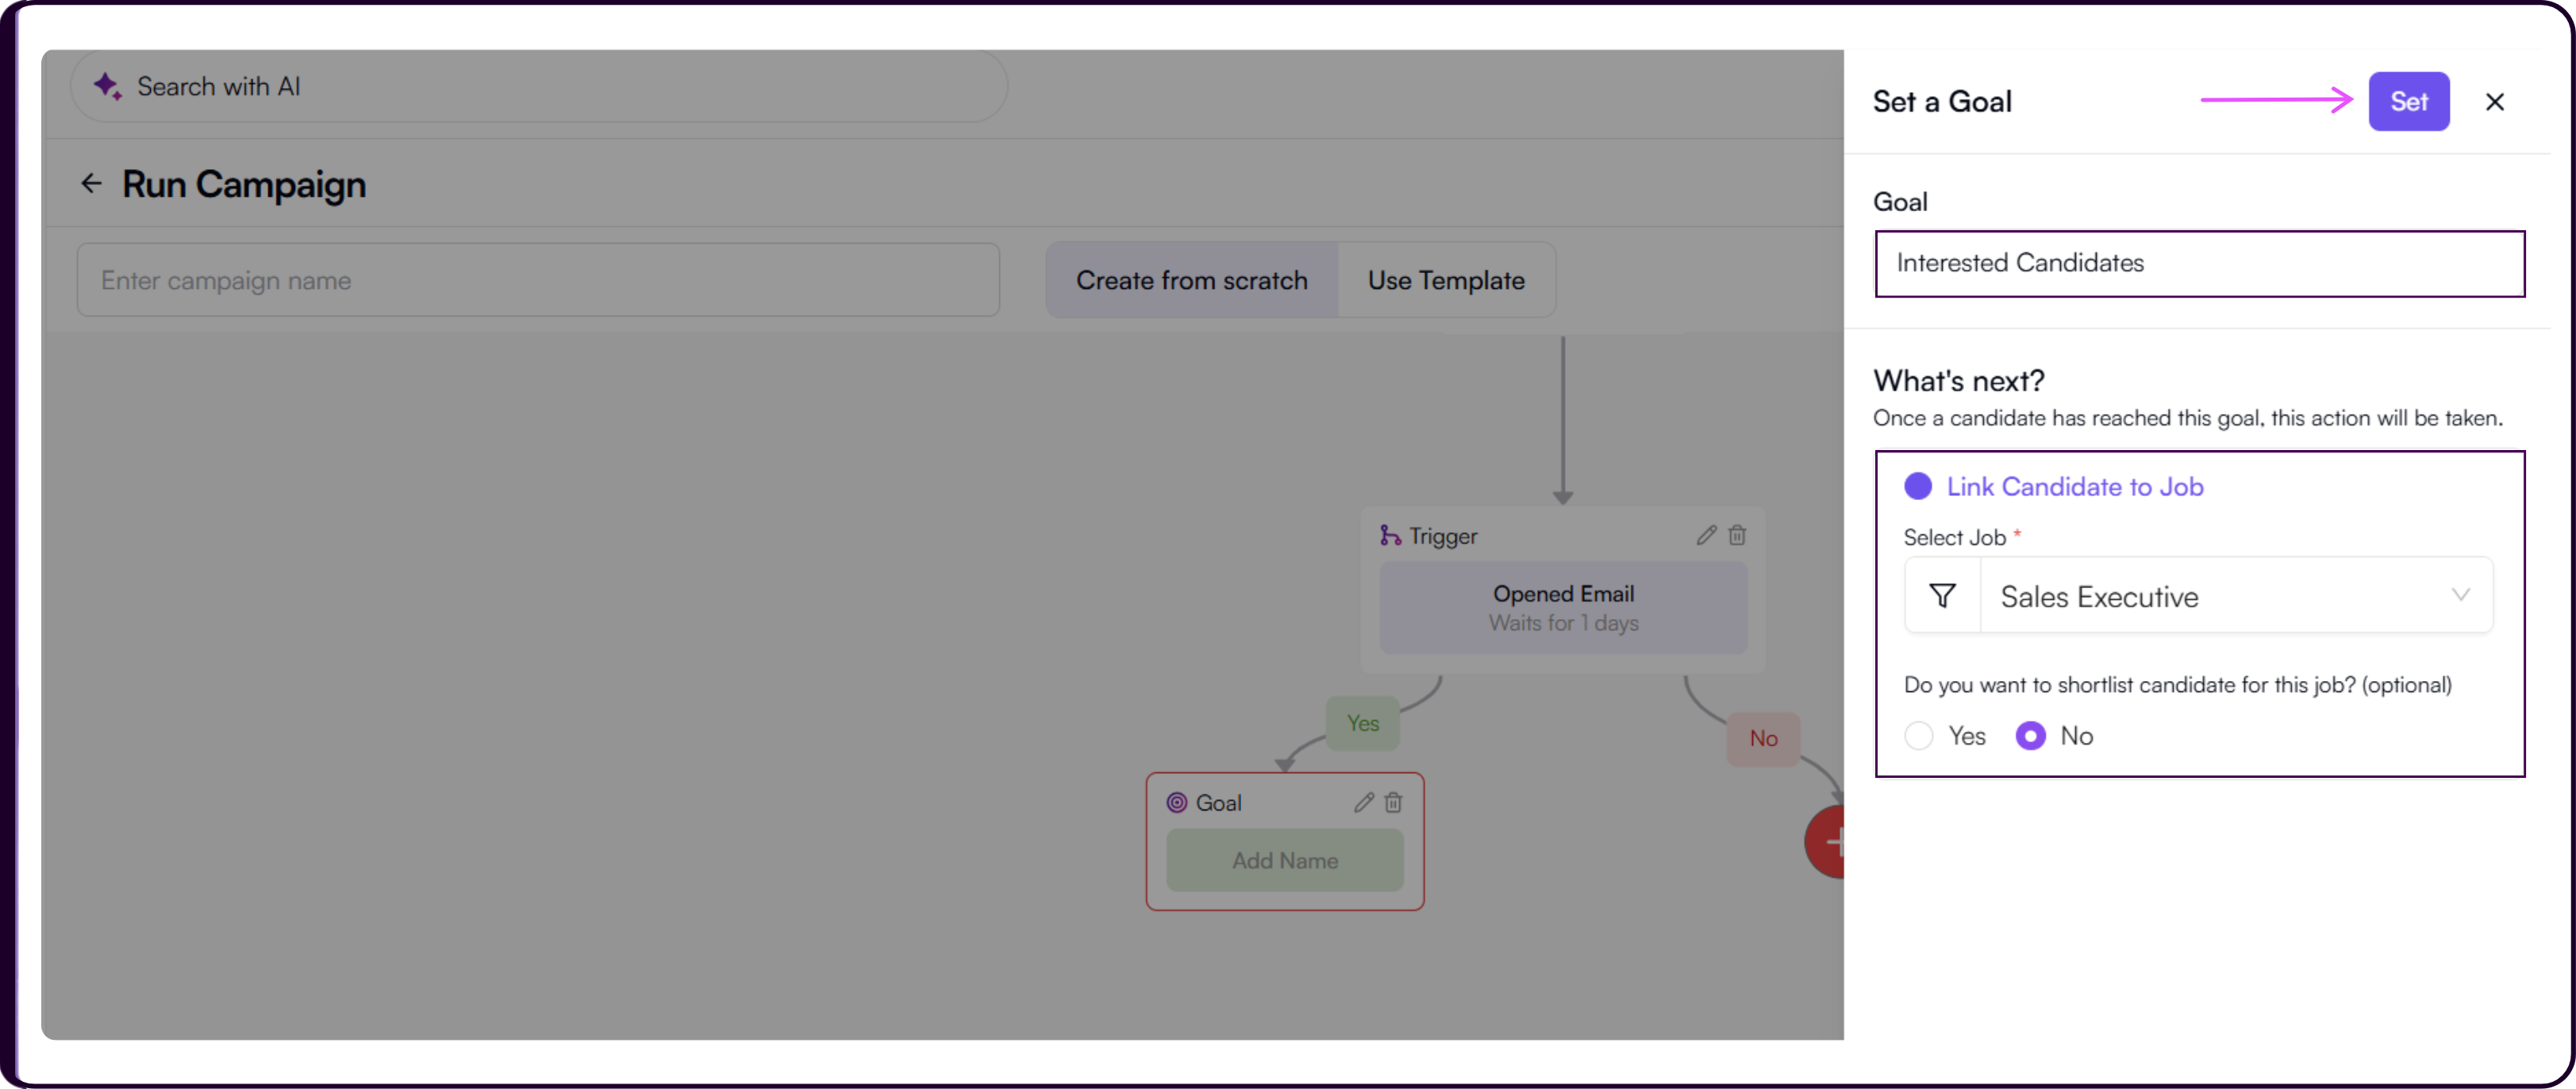
- Choose 'Yes' or 'No' for shortlisting candidates for the selected job. If 'Yes' is selected, enter shortlisting notes in the text box provided. Notes are required when shortlisting is enabled.
- Review the details and click 'Set' to save the goal.
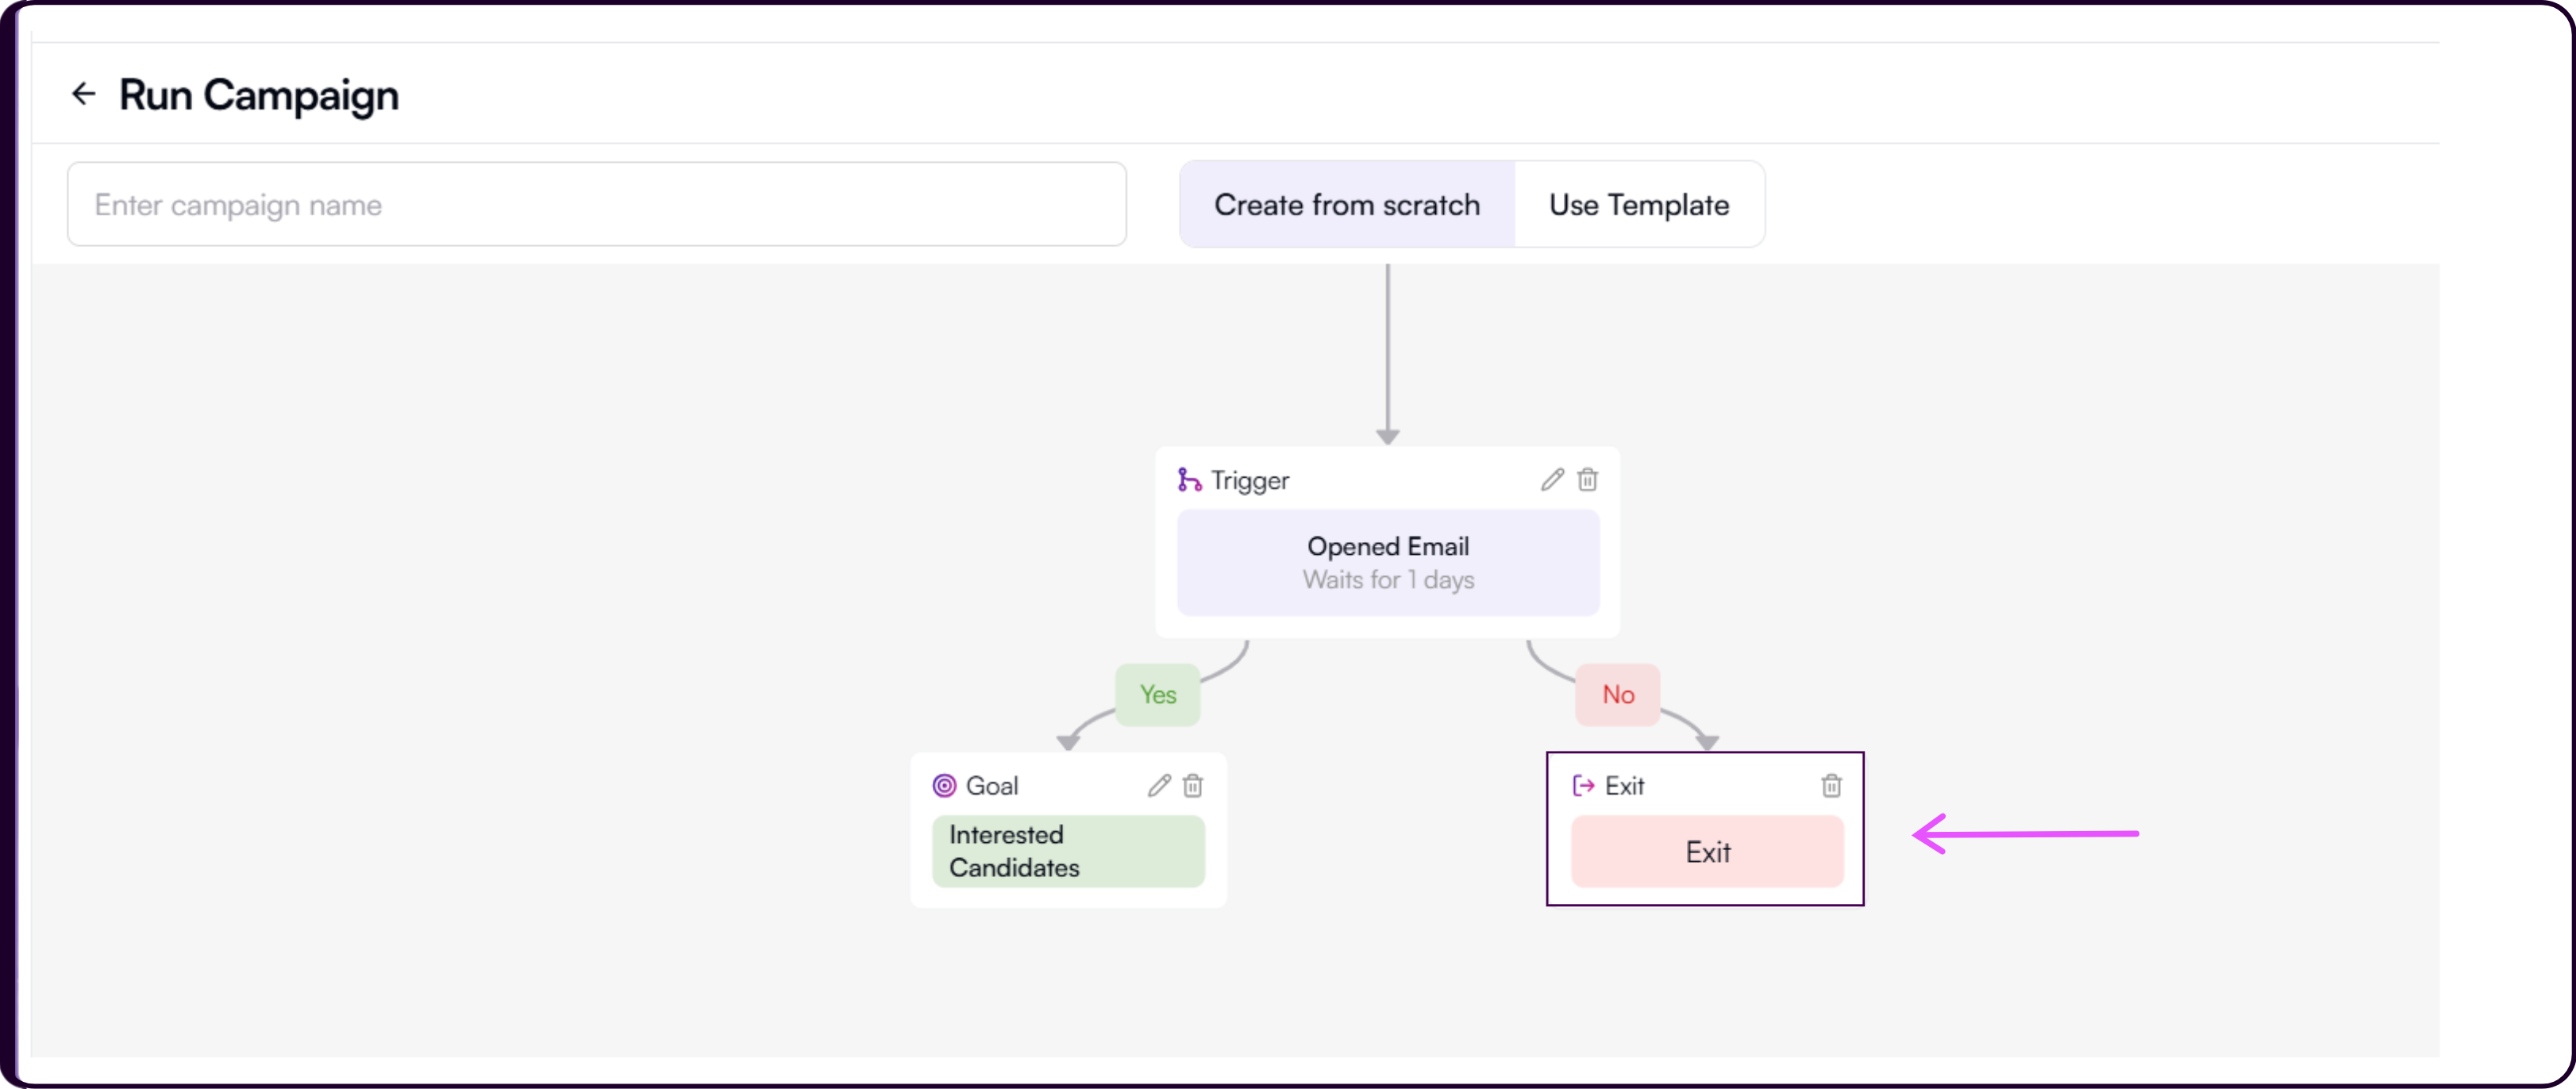
Add Exit
Select 'Add Exit' to end the campaign flow at a specific point. Any candidate who reaches this action will exit the sequence.
Save and Run Campaign
- Click 'Save as Draft' to store your campaign and return to it later. The campaign will appear in the Campaigns list with a Draft status.
- When ready to launch, click 'Run'.
- Set the Campaign Start Date and Time and the Campaign End Date and Time.
- Click 'Run Campaign' to launch.
Automation Journey Tab
The Automation Journey tab is where reusable campaign flow templates are created and managed. Templates built here appear in the 'Use Template' option when creating a new campaign. Once saved, a template can be selected and loaded into any new campaign without rebuilding the sequence from scratch.
The templates table shows each template's name, created date, and status (Active). Click on a template name to edit or update the flow.
How to Create a Journey Template
A Journey Template lets you design a reusable automation flow using a drag-and-drop builder. The flow supports multi-channel communication, conditional branching based on candidate behaviour, delays, goals, and exit points.
1. Start a New Template
- Navigate to the 'Automation Journey' tab.
- Click 'Create New Template'.
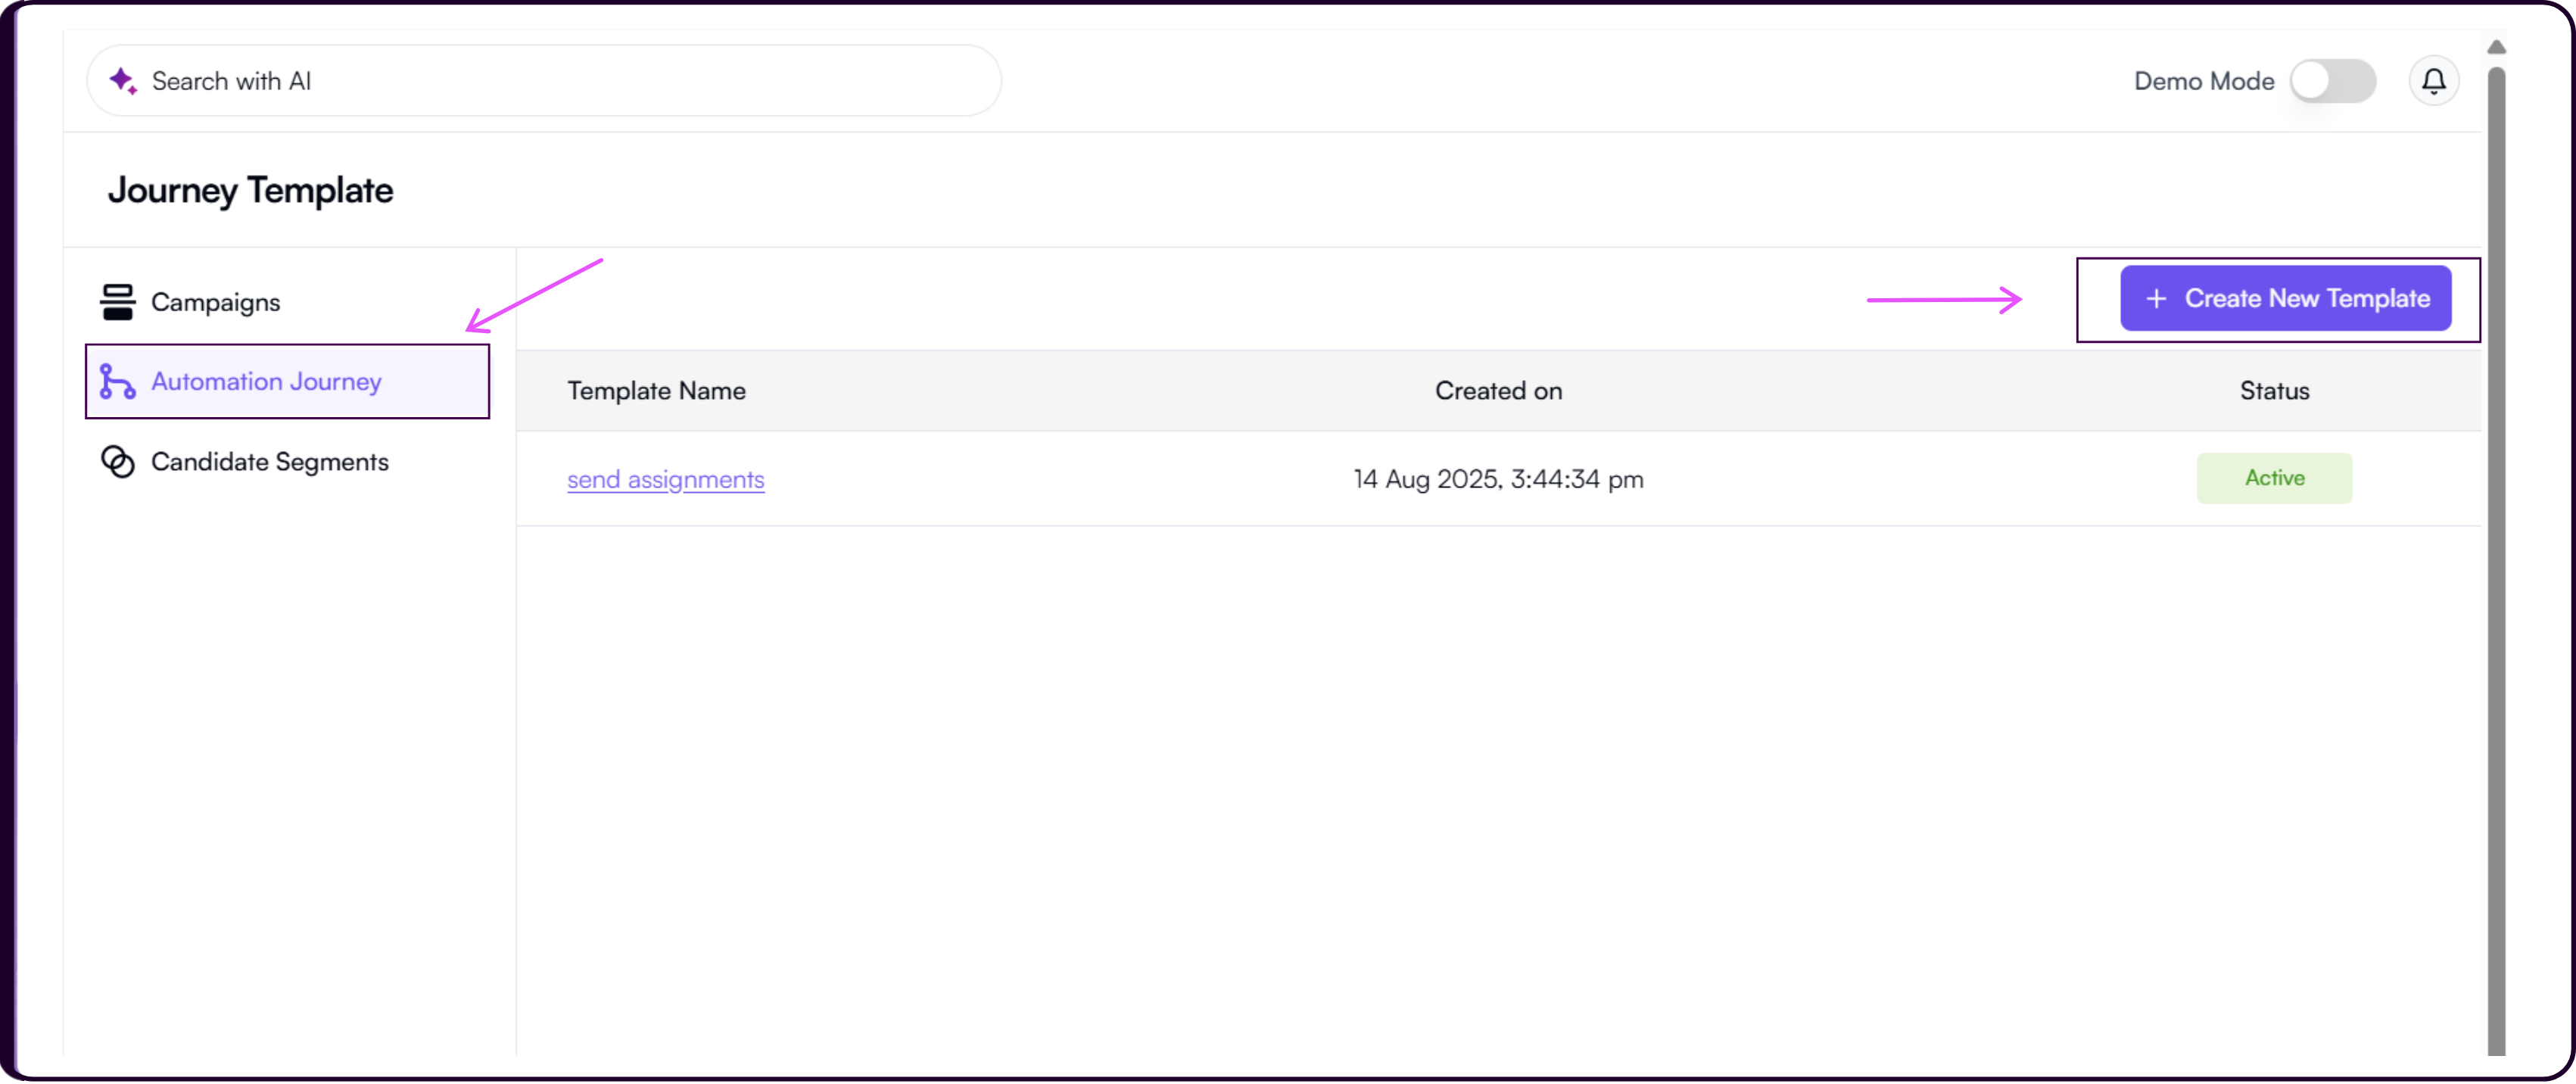
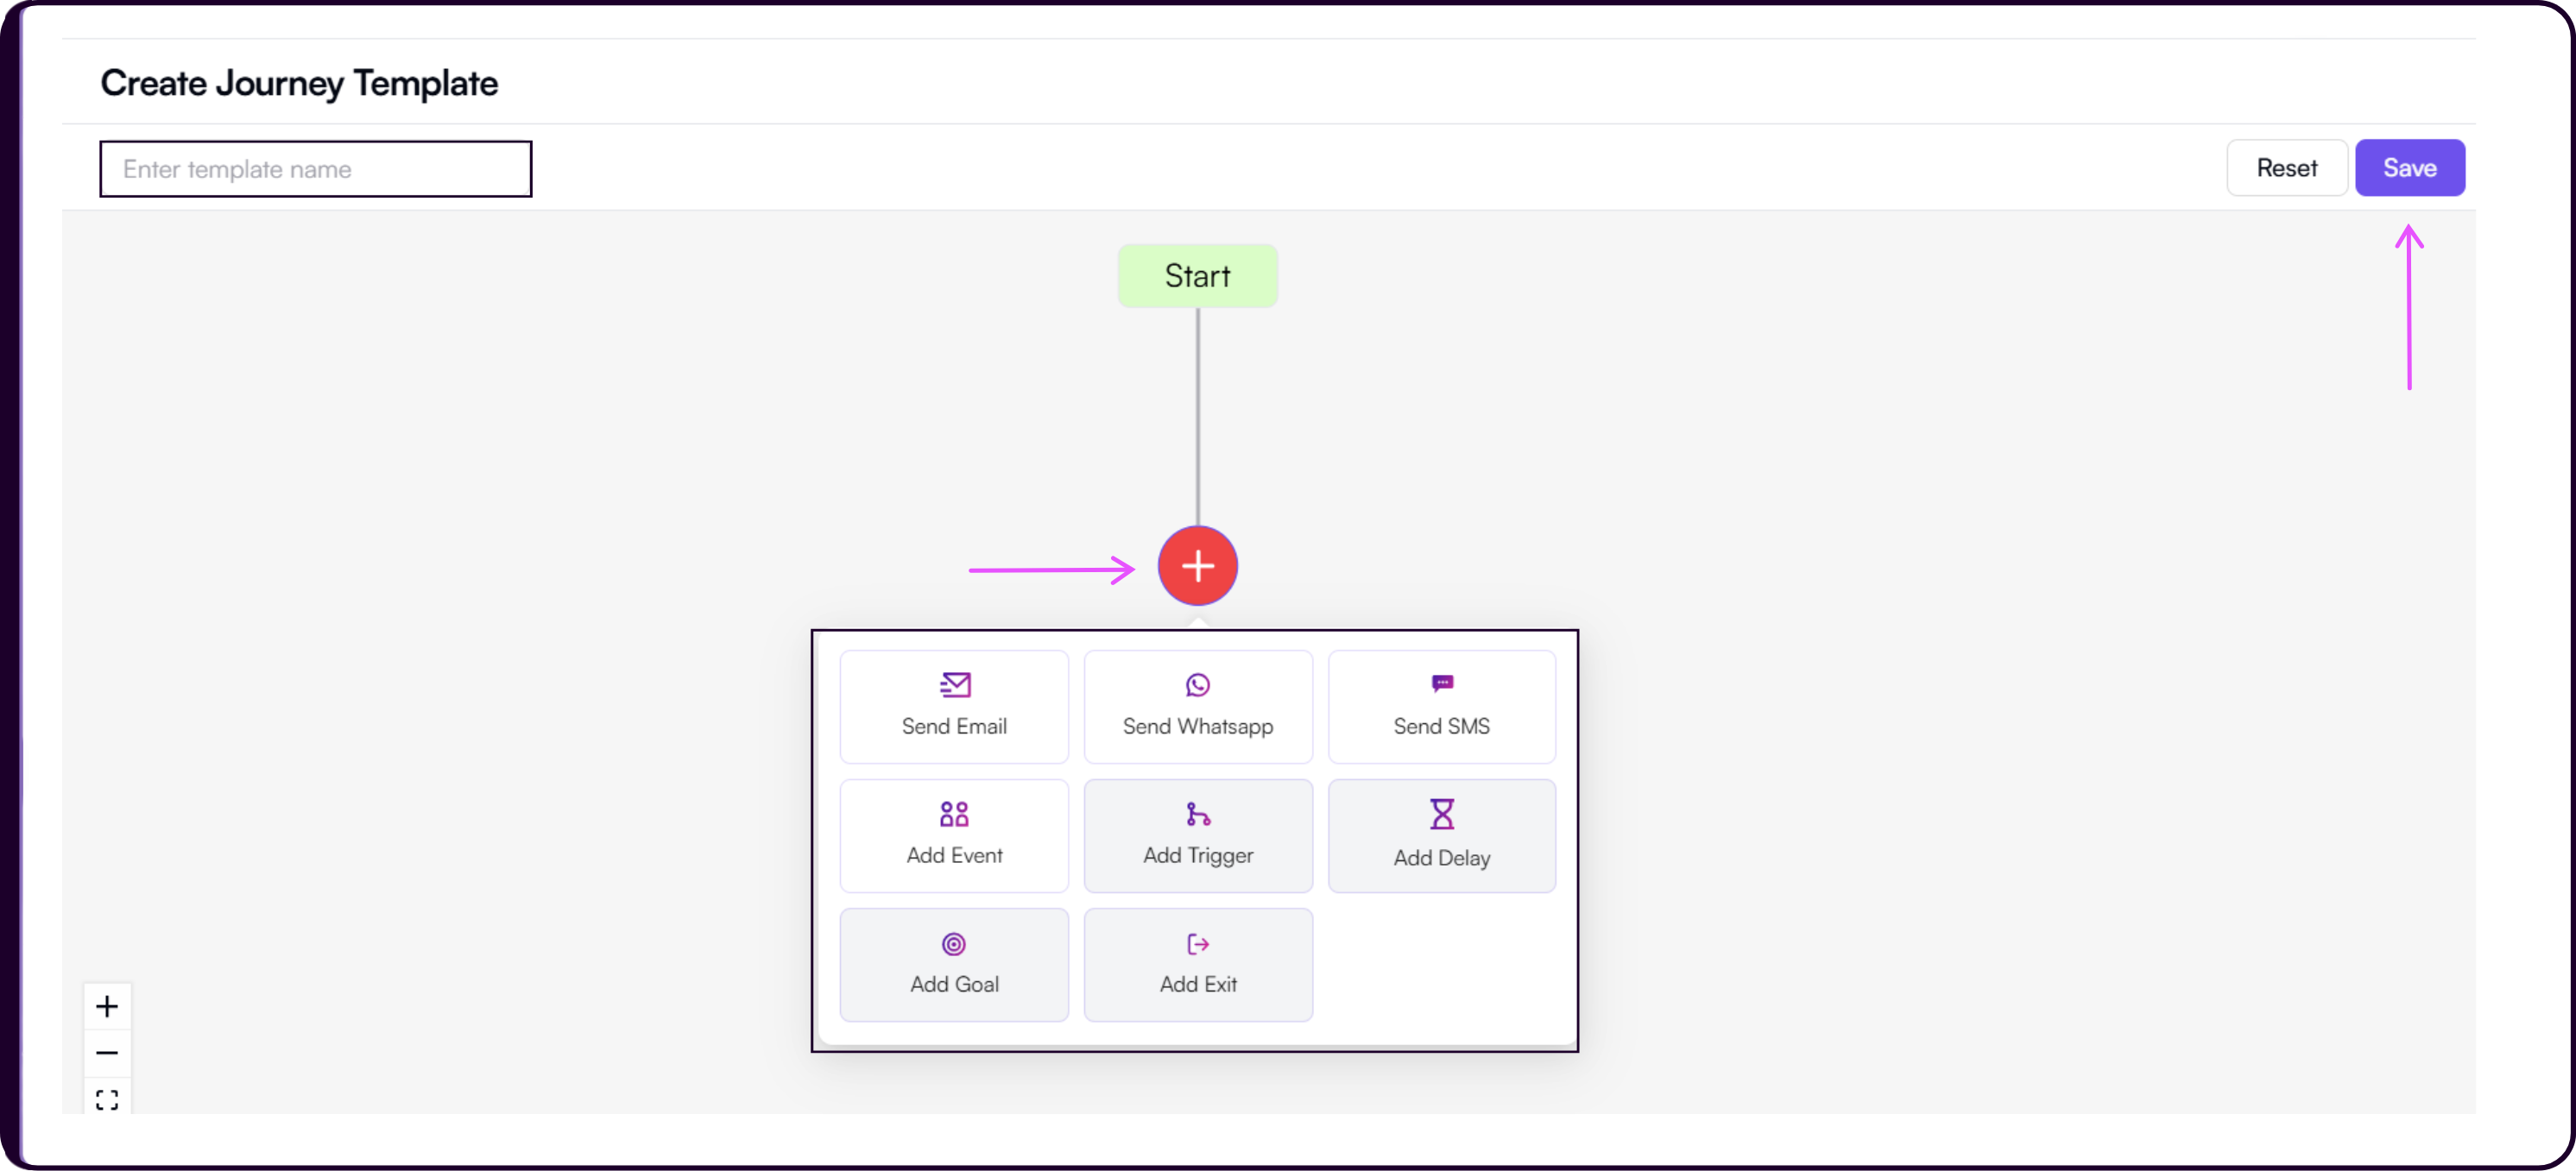
- Enter a name for the template. The journey always begins with a Start block.
2. Add Actions
Click the '+' button below the Start block to add the first action. The same action options available in a live campaign are available here: Send Email, Send WhatsApp, Add Trigger, Add Delay, Add Goal, and Add Exit.
Refer to the Campaign Flow section above for a full description of each action.
3. Set Triggers and Build Conditional Paths
Add a Trigger block to create conditions based on candidate behaviour. Available triggers include Opened Email, Link Clicked, Interested, and Replied.
Each trigger splits the flow into a Yes path for candidates who met the condition and a No path for those who did not. This allows you to define different follow-up actions depending on how each candidate responds.
For example:
- Yes path → Send a WhatsApp follow-up message
- No path → Send a reminder email after 1 day
4. Save and Reuse
Once the flow is complete, click 'Save'. The template will appear in the templates table and can be loaded into any new campaign from the 'Use Template' option during campaign creation.
Candidate Segments Tab
The Candidate Segments tab is where segments are created and managed for campaign targeting. Segments created here are shared across the Candidates page and Jobs page inside Skima AI, so any segment created in any of these locations will appear everywhere it is relevant.
Use the search bar to find a segment by name or use 'Filter by Job' to narrow down segments associated with a specific role.
How to Create and Manage Segments
Create a New Segment
- Click 'New Segment' to open the Create Candidate Segment modal.

- Enter a descriptive Title for the segment such as "ML Engineer - Batch 1" so it is easy to identify later.
- Choose a Segment Type: Automatic lets Skima AI populate the segment dynamically based on your criteria, while Manual gives you full control over which candidates are included.
- Optionally associate the segment with one or more Jobs.
- Set the Relevancy Score Threshold between 50% and 90%. This controls the minimum AI match score a candidate must have to qualify for the segment.
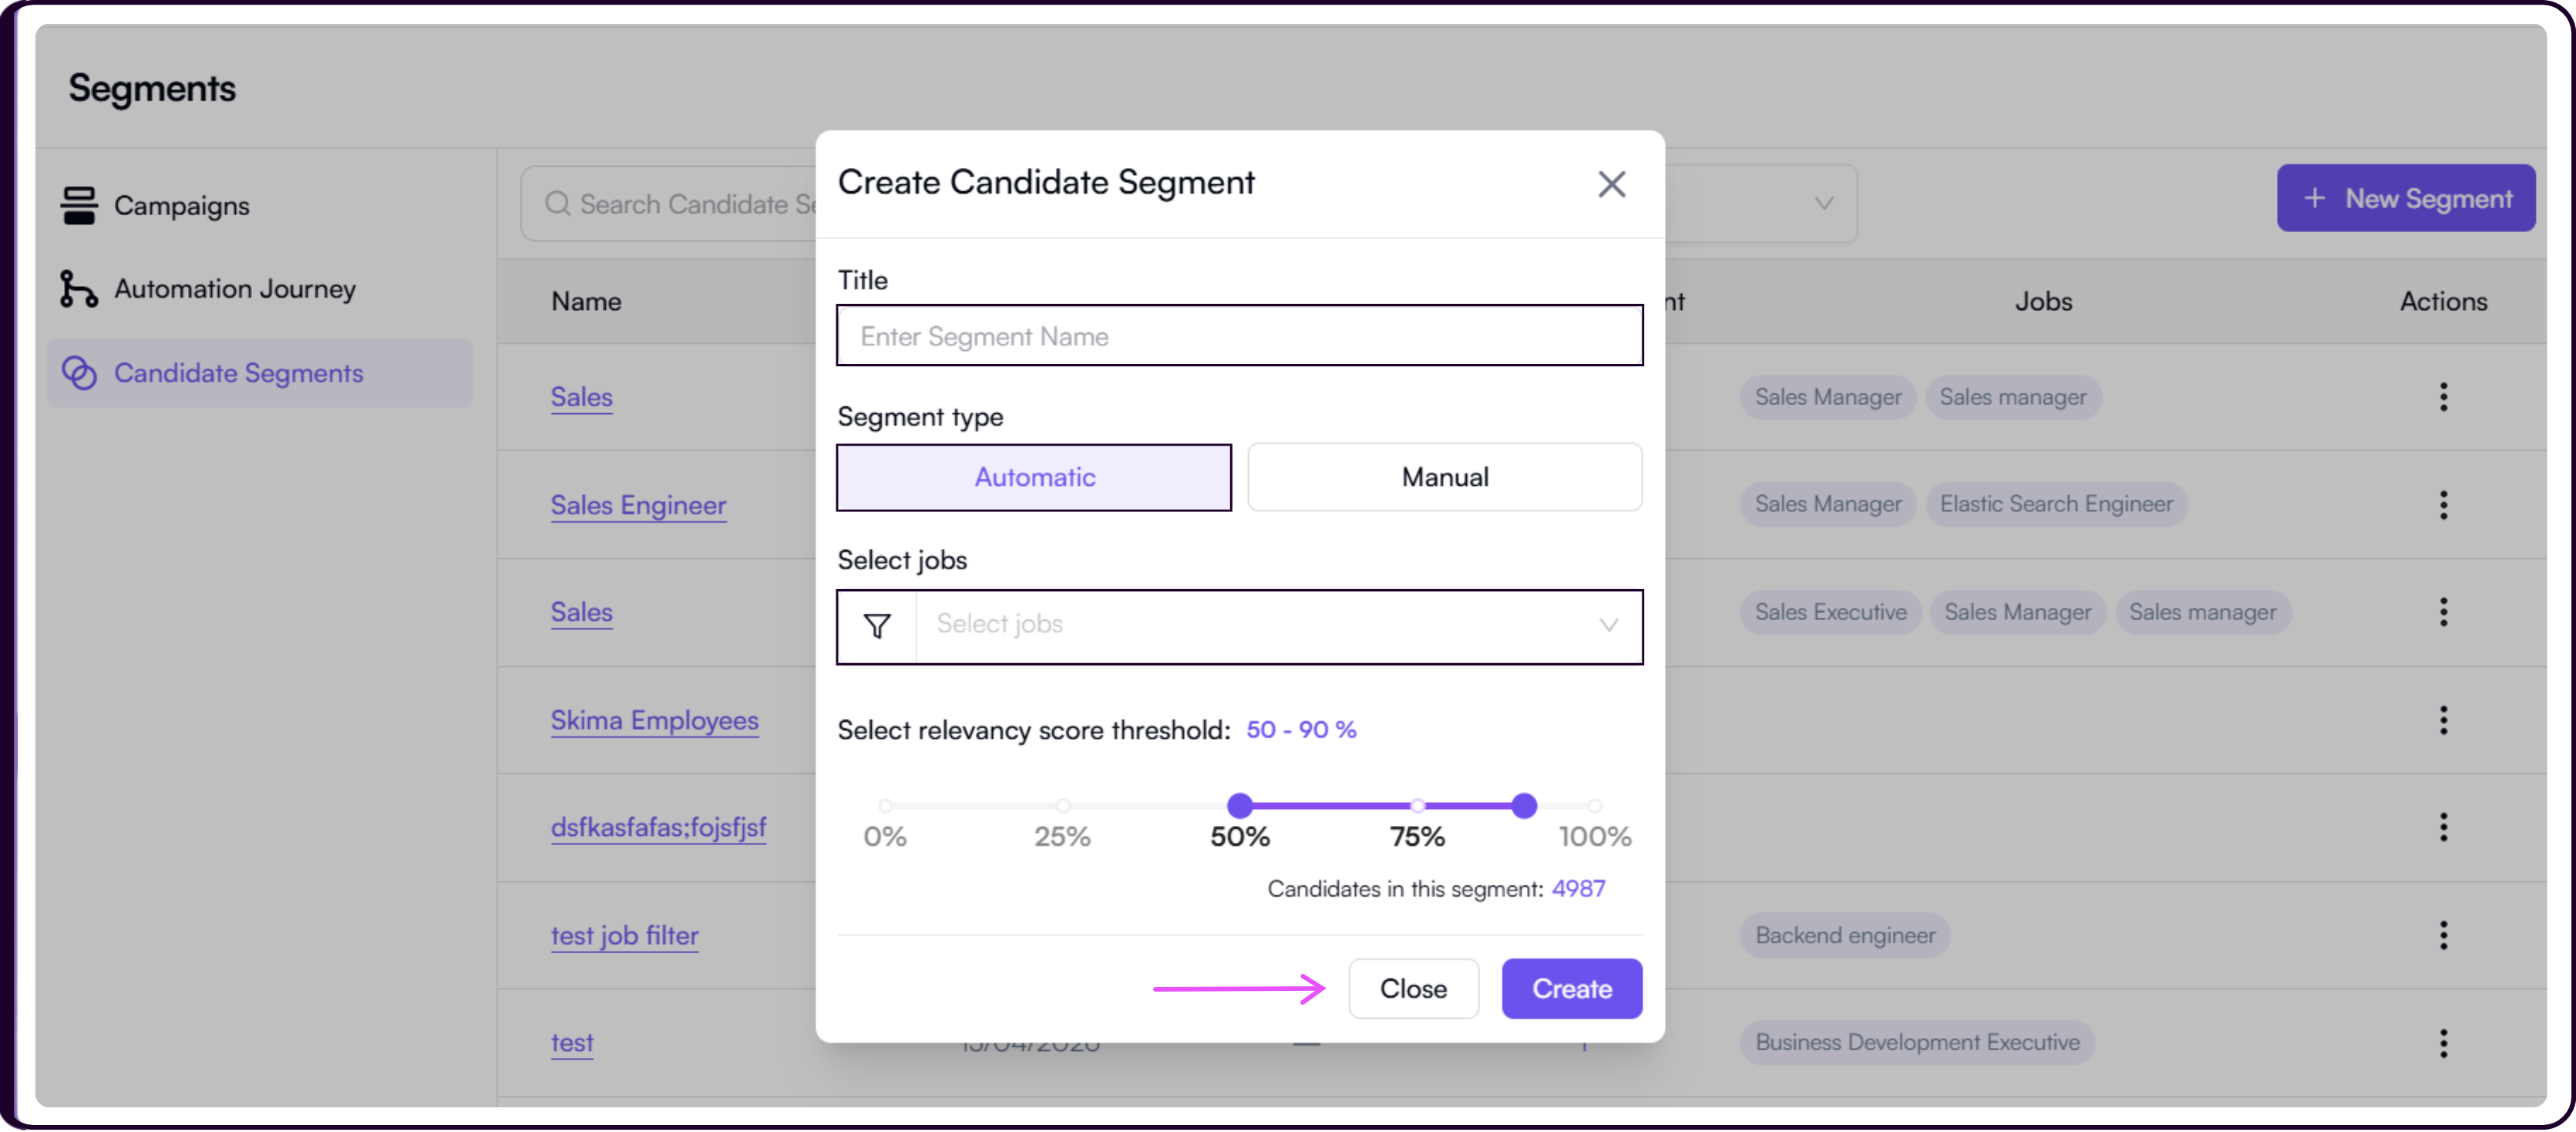
- Skima AI shows a live Candidates in this Segment count as you adjust the settings.
- Click 'Create' to save.
Learn more about how segmentation works without linking to a job: Segment Candidates Without Linking to Jobs
Segments Table
The table displays each segment's name, created date, threshold score, candidate count, and the number of jobs the candidates in that segment belong to. The Actions column lets you delete a segment.
Click on a segment name to view the full list of candidates within that segment.
Reusing Segments
Saved segments are available across Campaign Configuration, the Candidates page, and the Jobs page. You can reuse the same segment across multiple campaigns without recreating it each time.