Publishing Job
Publishing a job in Skima AI allows you to create a public job listing, configure screening questions, track candidate sources, and collect applications directly into your screening workflow.
Publishing helps recruiters:
- Increase job visibility across multiple hiring channels
- Standardize candidate screening before shortlisting
- Track candidate source performance more accurately
- Maintain a structured and branded hiring experience
Navigate to Jobs
Before publishing a job, you first need to locate the role inside the Jobs section.
From the Skima AI dashboard, click on 'Jobs' from the left navigation menu.
Use available filters such as: location, recruiter, client, or created date to quickly find the required job.
Under the 'Actions' column, click on the three dots menu and select 'Create Public Page'.
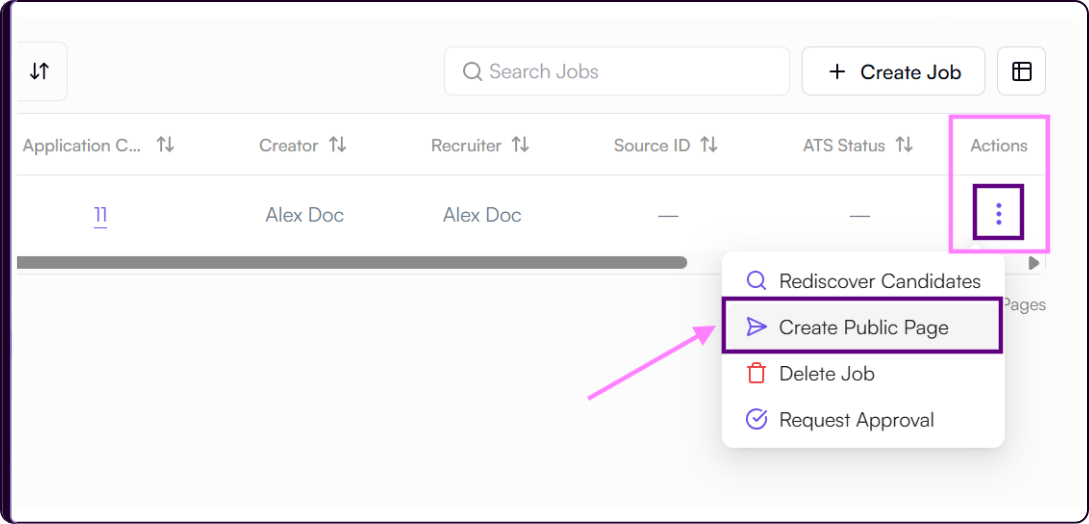
- Alternatively, you can open the job directly and click on 'Create Job Posting' from the top-right corner.
You will now be redirected to the job publishing workflow where you can:
- Review job details
- Configure screening questions
- Add candidate sources
- Preview the public page
- Publish the job
You can also create and customize your own branded career page inside Skima AI. Refer to the Careers Page documentation for complete setup instructions.
Review Job Details
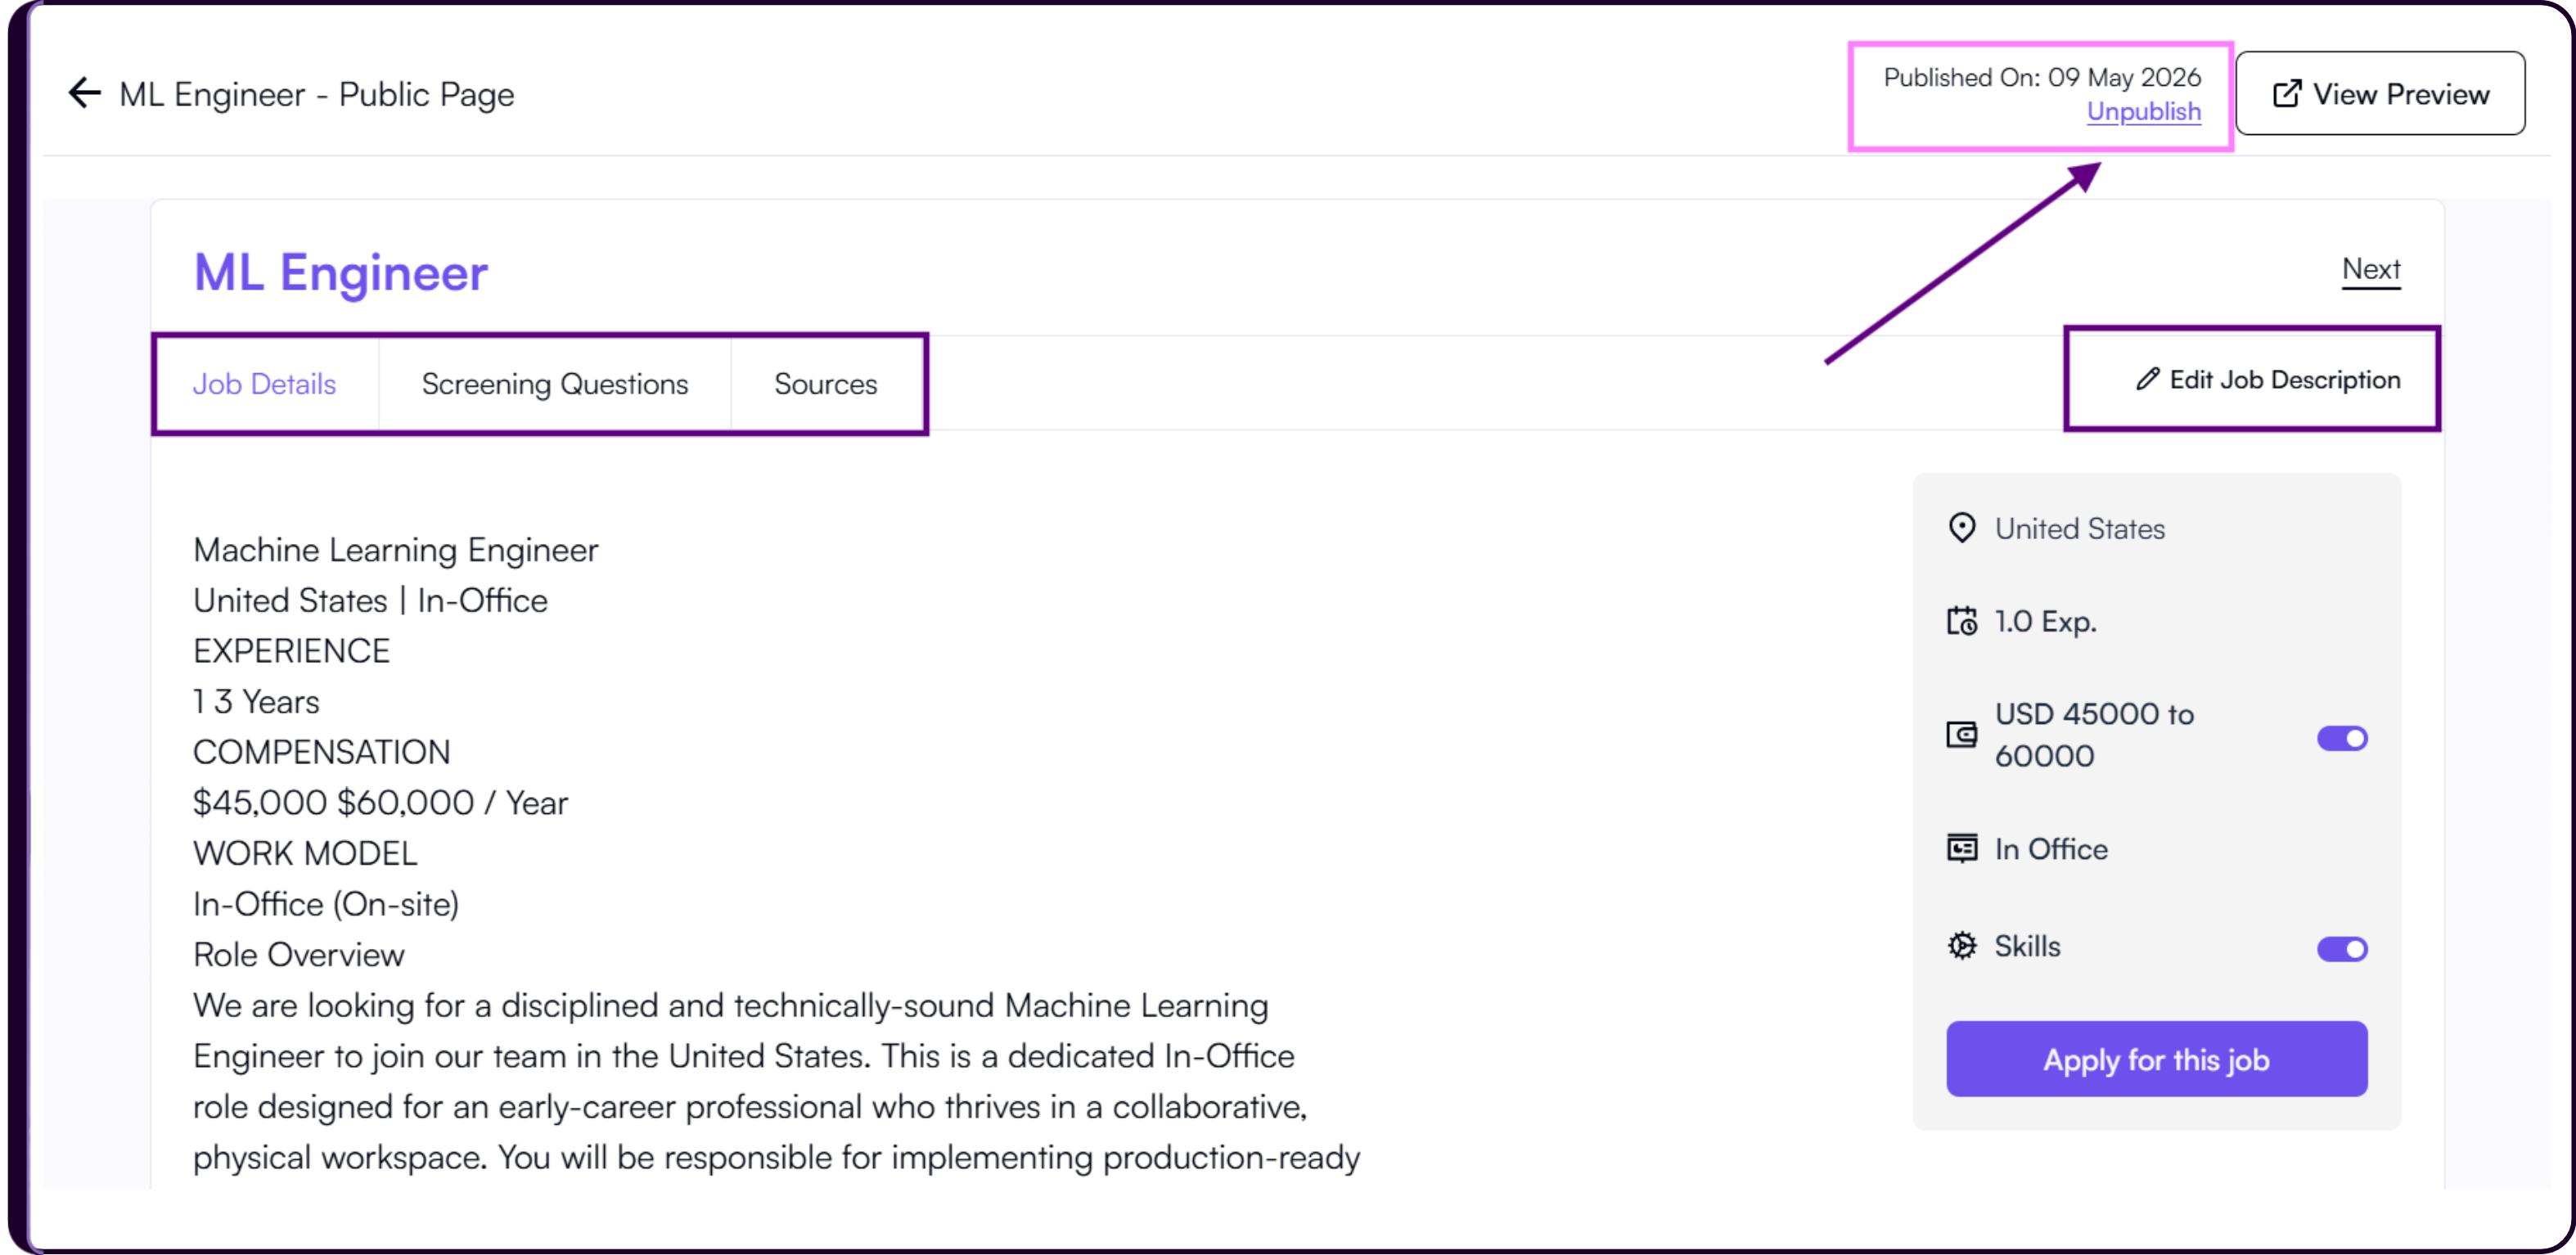
Before publishing the role publicly, review the job details carefully to ensure all information is accurate and ready for candidates.
Click on 'Edit Job Description' if you want to make any final changes before publishing.
Review all important job information including:
- Job title
- Job description
- Experience requirements
- Work model
- Salary range
- Skills
- Location
A clear and structured job description improves applicant quality and reduces irrelevant applications.

Toggle off 'Salary Range' if you do not want candidates to view compensation details publicly.
Toggle off 'Skills' if you do not want the listed skills to appear on the public job page.
Click on 'View Preview' to preview the candidate-facing job page.
Once reviewed, click on 'Next' to continue.
Set Screening Questions
Screening questions help recruiters qualify applicants before manual review begins.
- After clicking 'Next', you will land on the screening questions setup page.
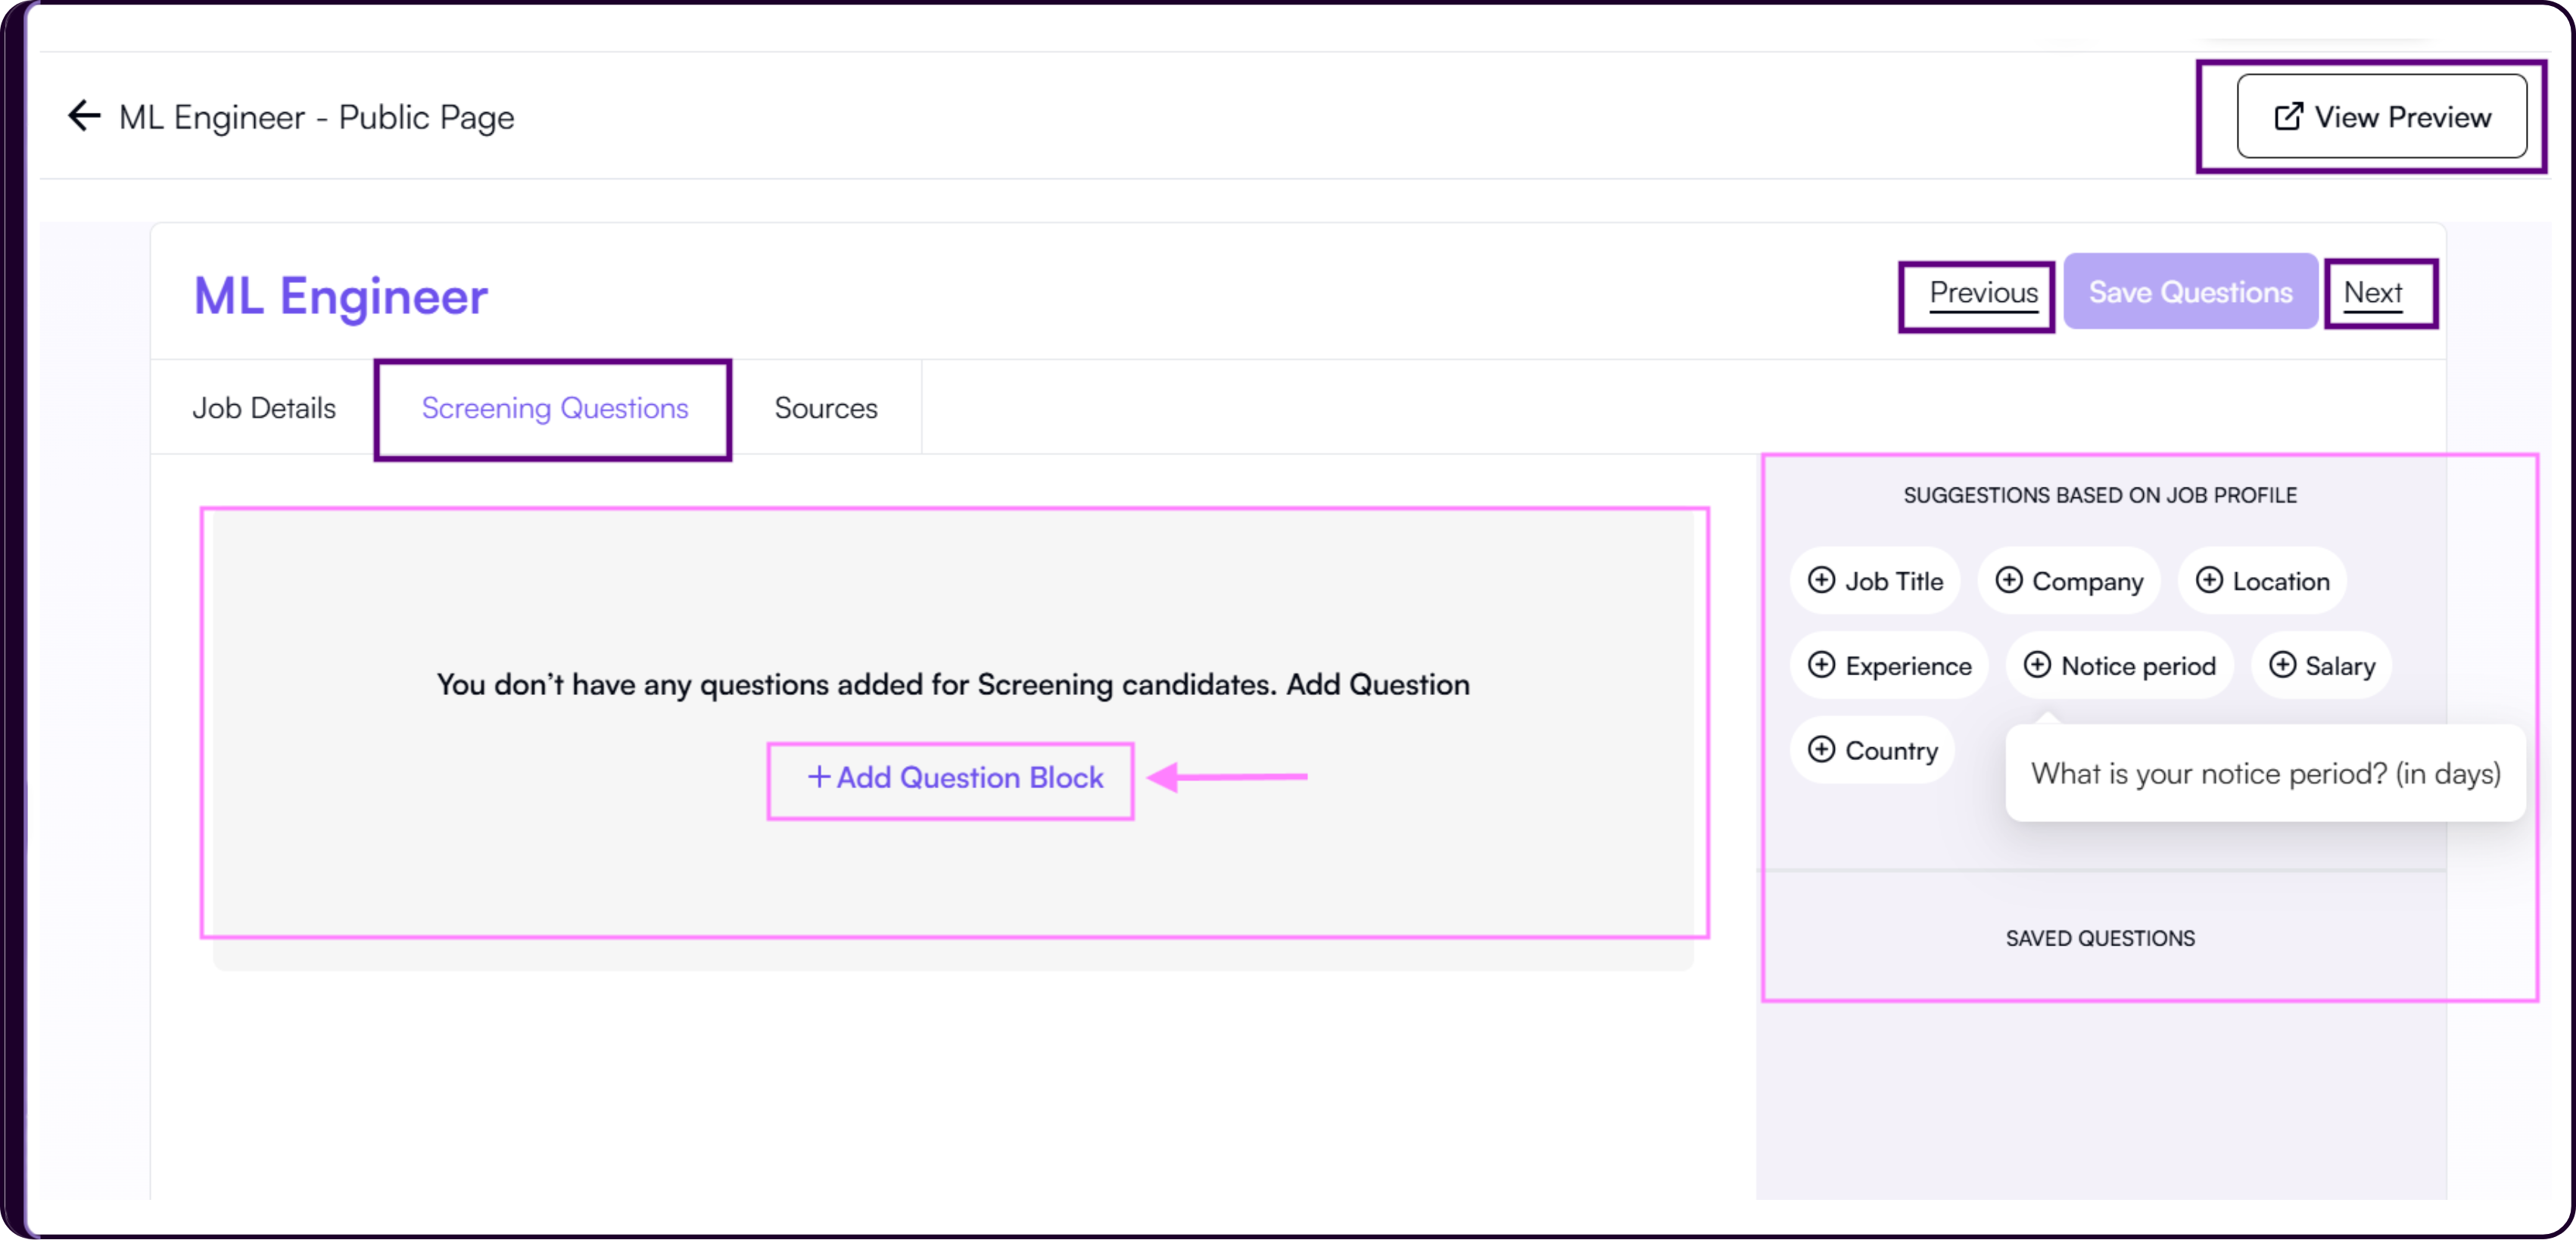
You will see two sections:
- 'Add Question Block' for creating custom questions manually
- AI-generated pre-saved questions based on the role, industry, and experience level
Click on 'Add Question Block' to create a custom screening question.
Select the answer type depending on the information you want from candidates:
- Short Answer
- Long Answer
- Multiple Choice
- Dropdown
- Yes/No and more
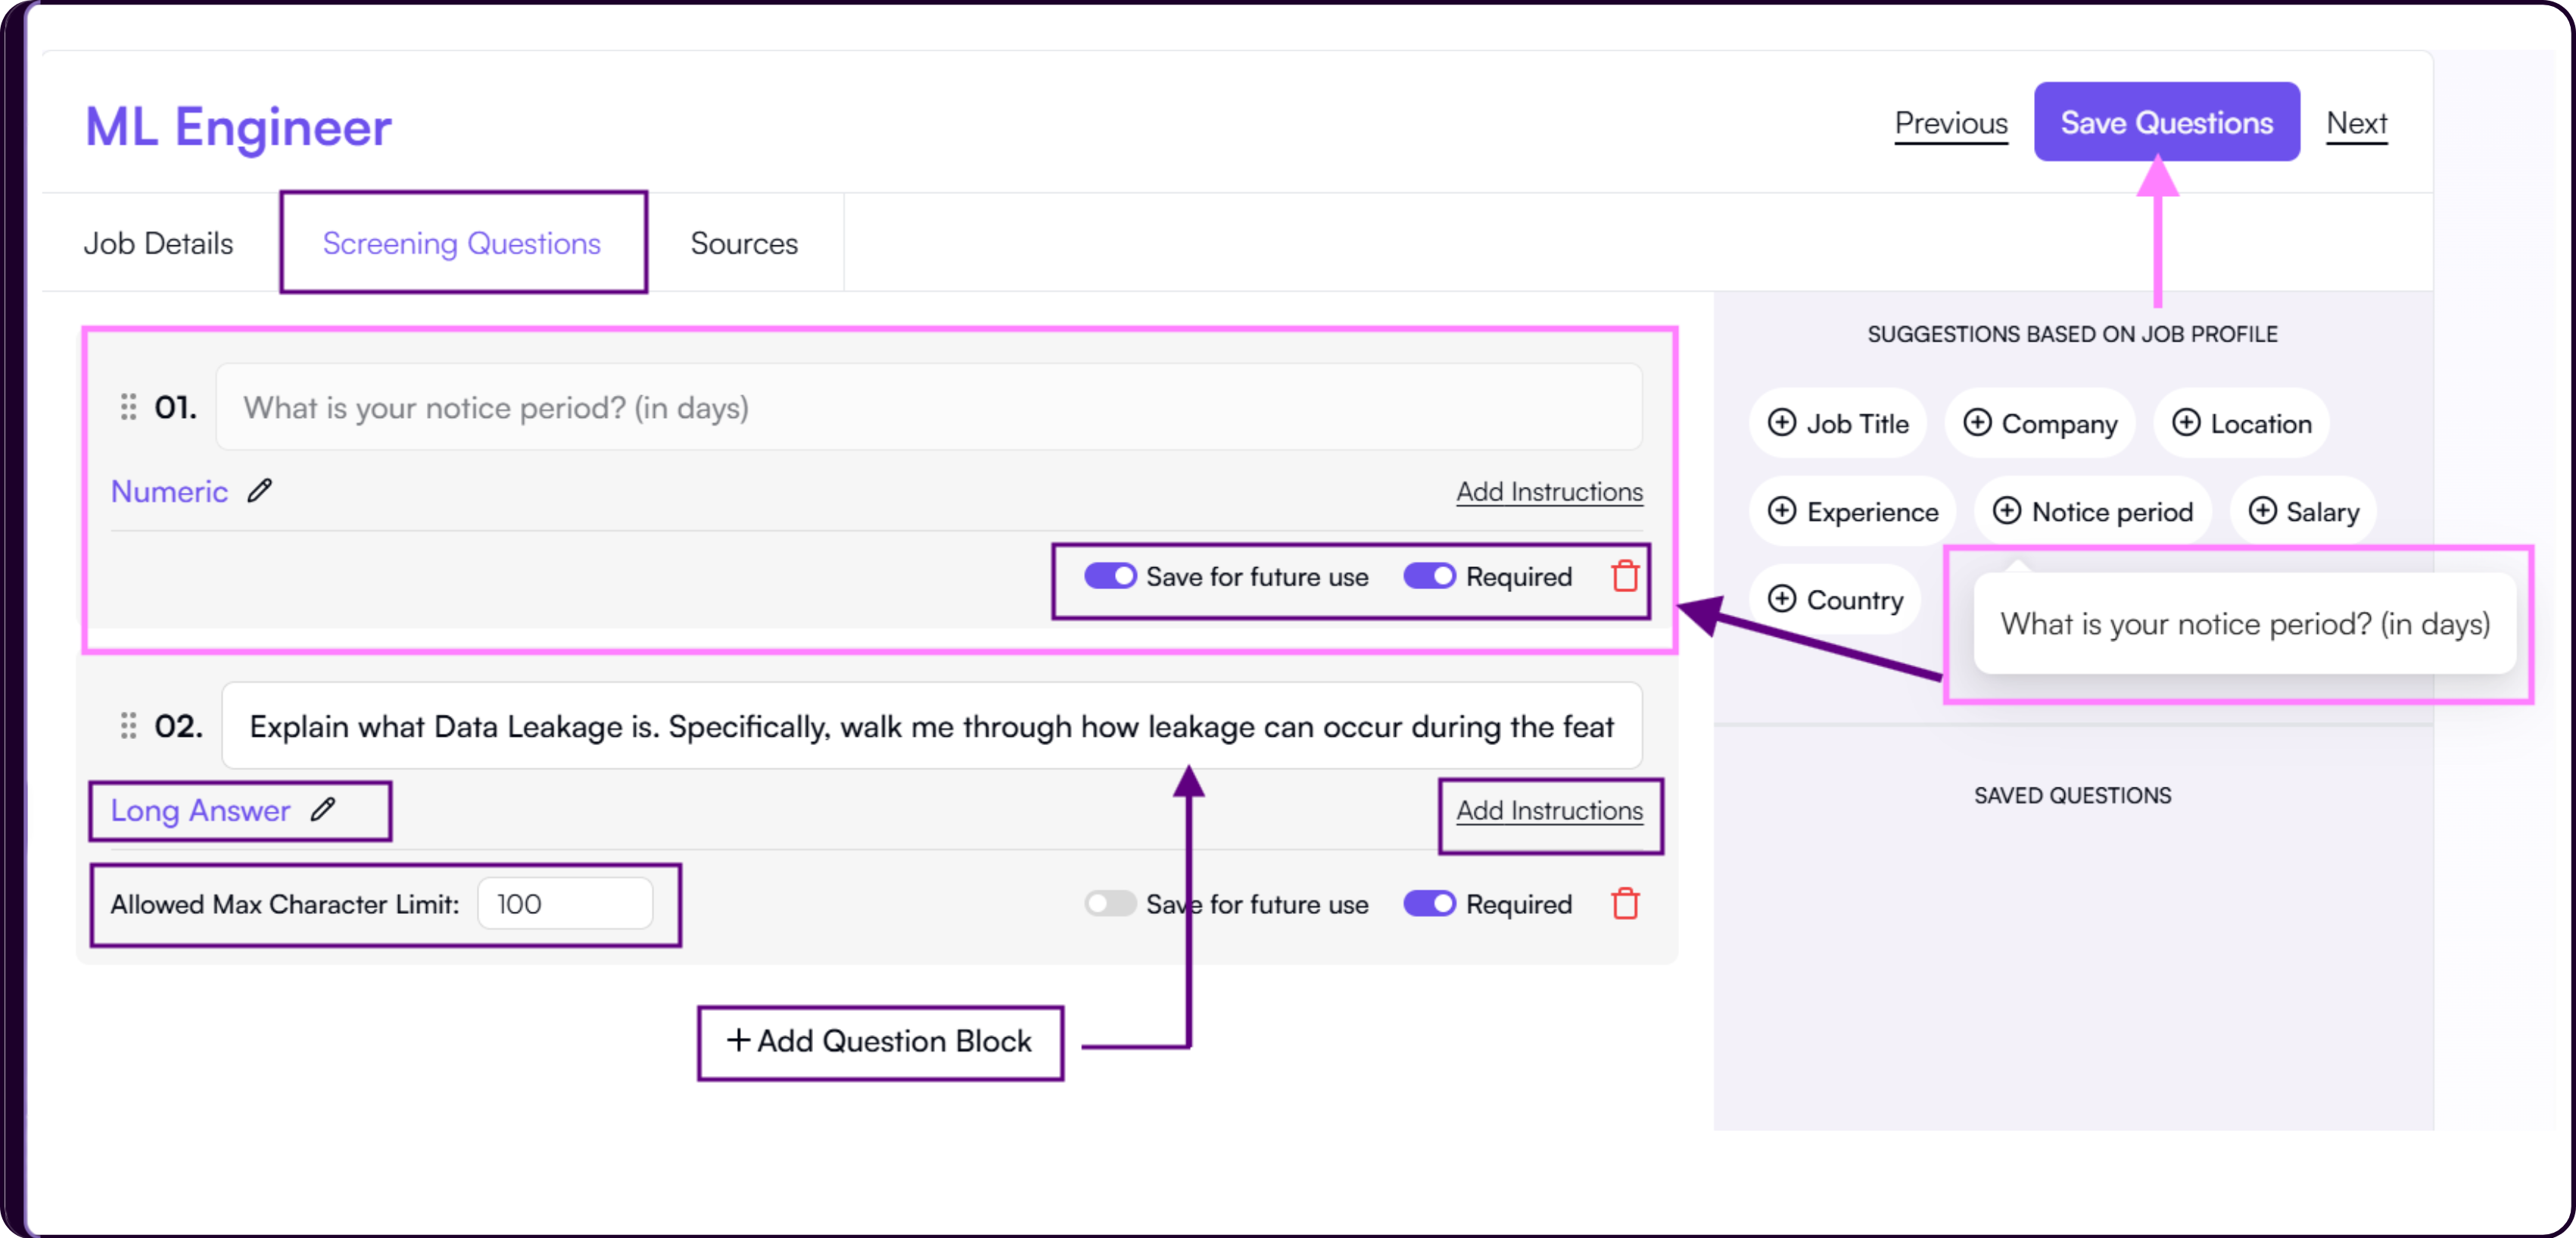
For short and long answer questions, you can configure character limits.
Toggle on 'Required' if the question must be answered before submission.
Toggle on 'Save for future Use' if you want to reuse the question in future jobs.
Alternatively, select from the AI-generated pre-saved questions to speed up setup.
Once all questions are configured, click on 'Save Questions'.
Click on 'Next' to proceed.
Add Sources
The Add Sources section helps you track where candidates are applying from.
This makes it easier to Measure sourcing performance, Filter candidates by source, Analyze channel effectiveness & Build source-specific talent pipelines.
- You will see commonly used platforms already available such as:
- Naukri
- Indeed
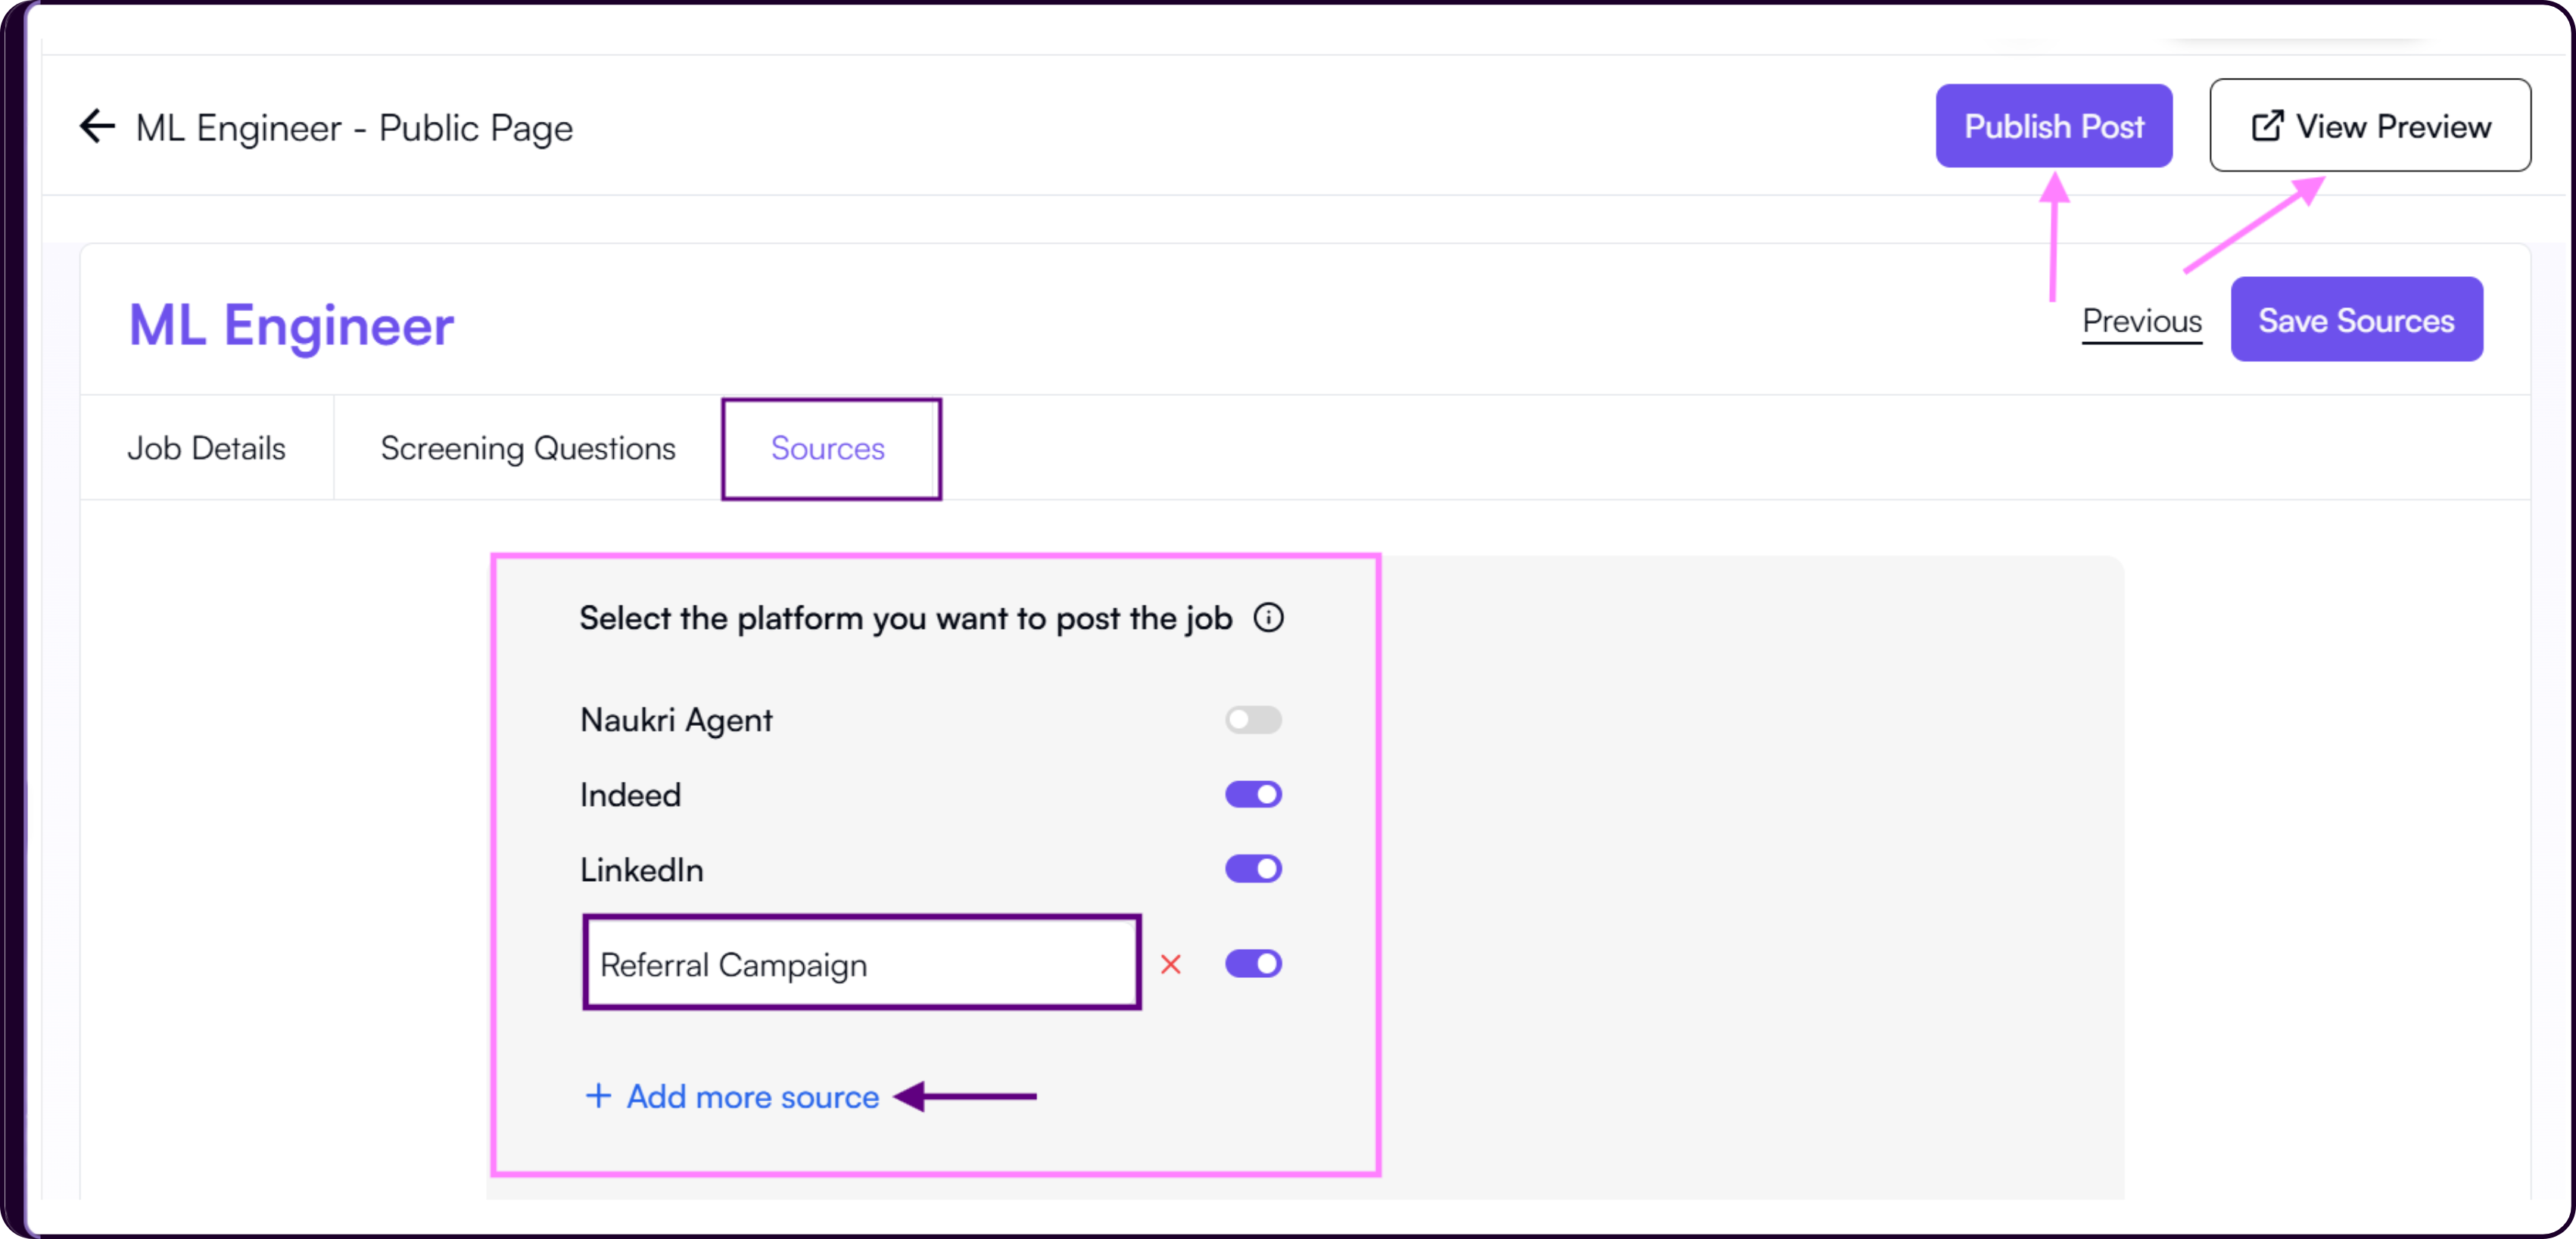
'Toggle on' the platforms where the job will be shared.
To add a custom source, click on '+ Add more source'.
Type the custom source name such as:
- Referral Campaign
- Client Portal
- Campus Hiring
- WhatsApp Campaign
Click on 'Save Sources' once done.
Publish the Job Post
Once the job details, screening questions, and sources are configured, the role is ready to go live.
Click on 'Publish'.
Skima AI will create the public job posting page.
A confirmation message will appear:
“Congratulations! Your job page for 'job name' is live.”
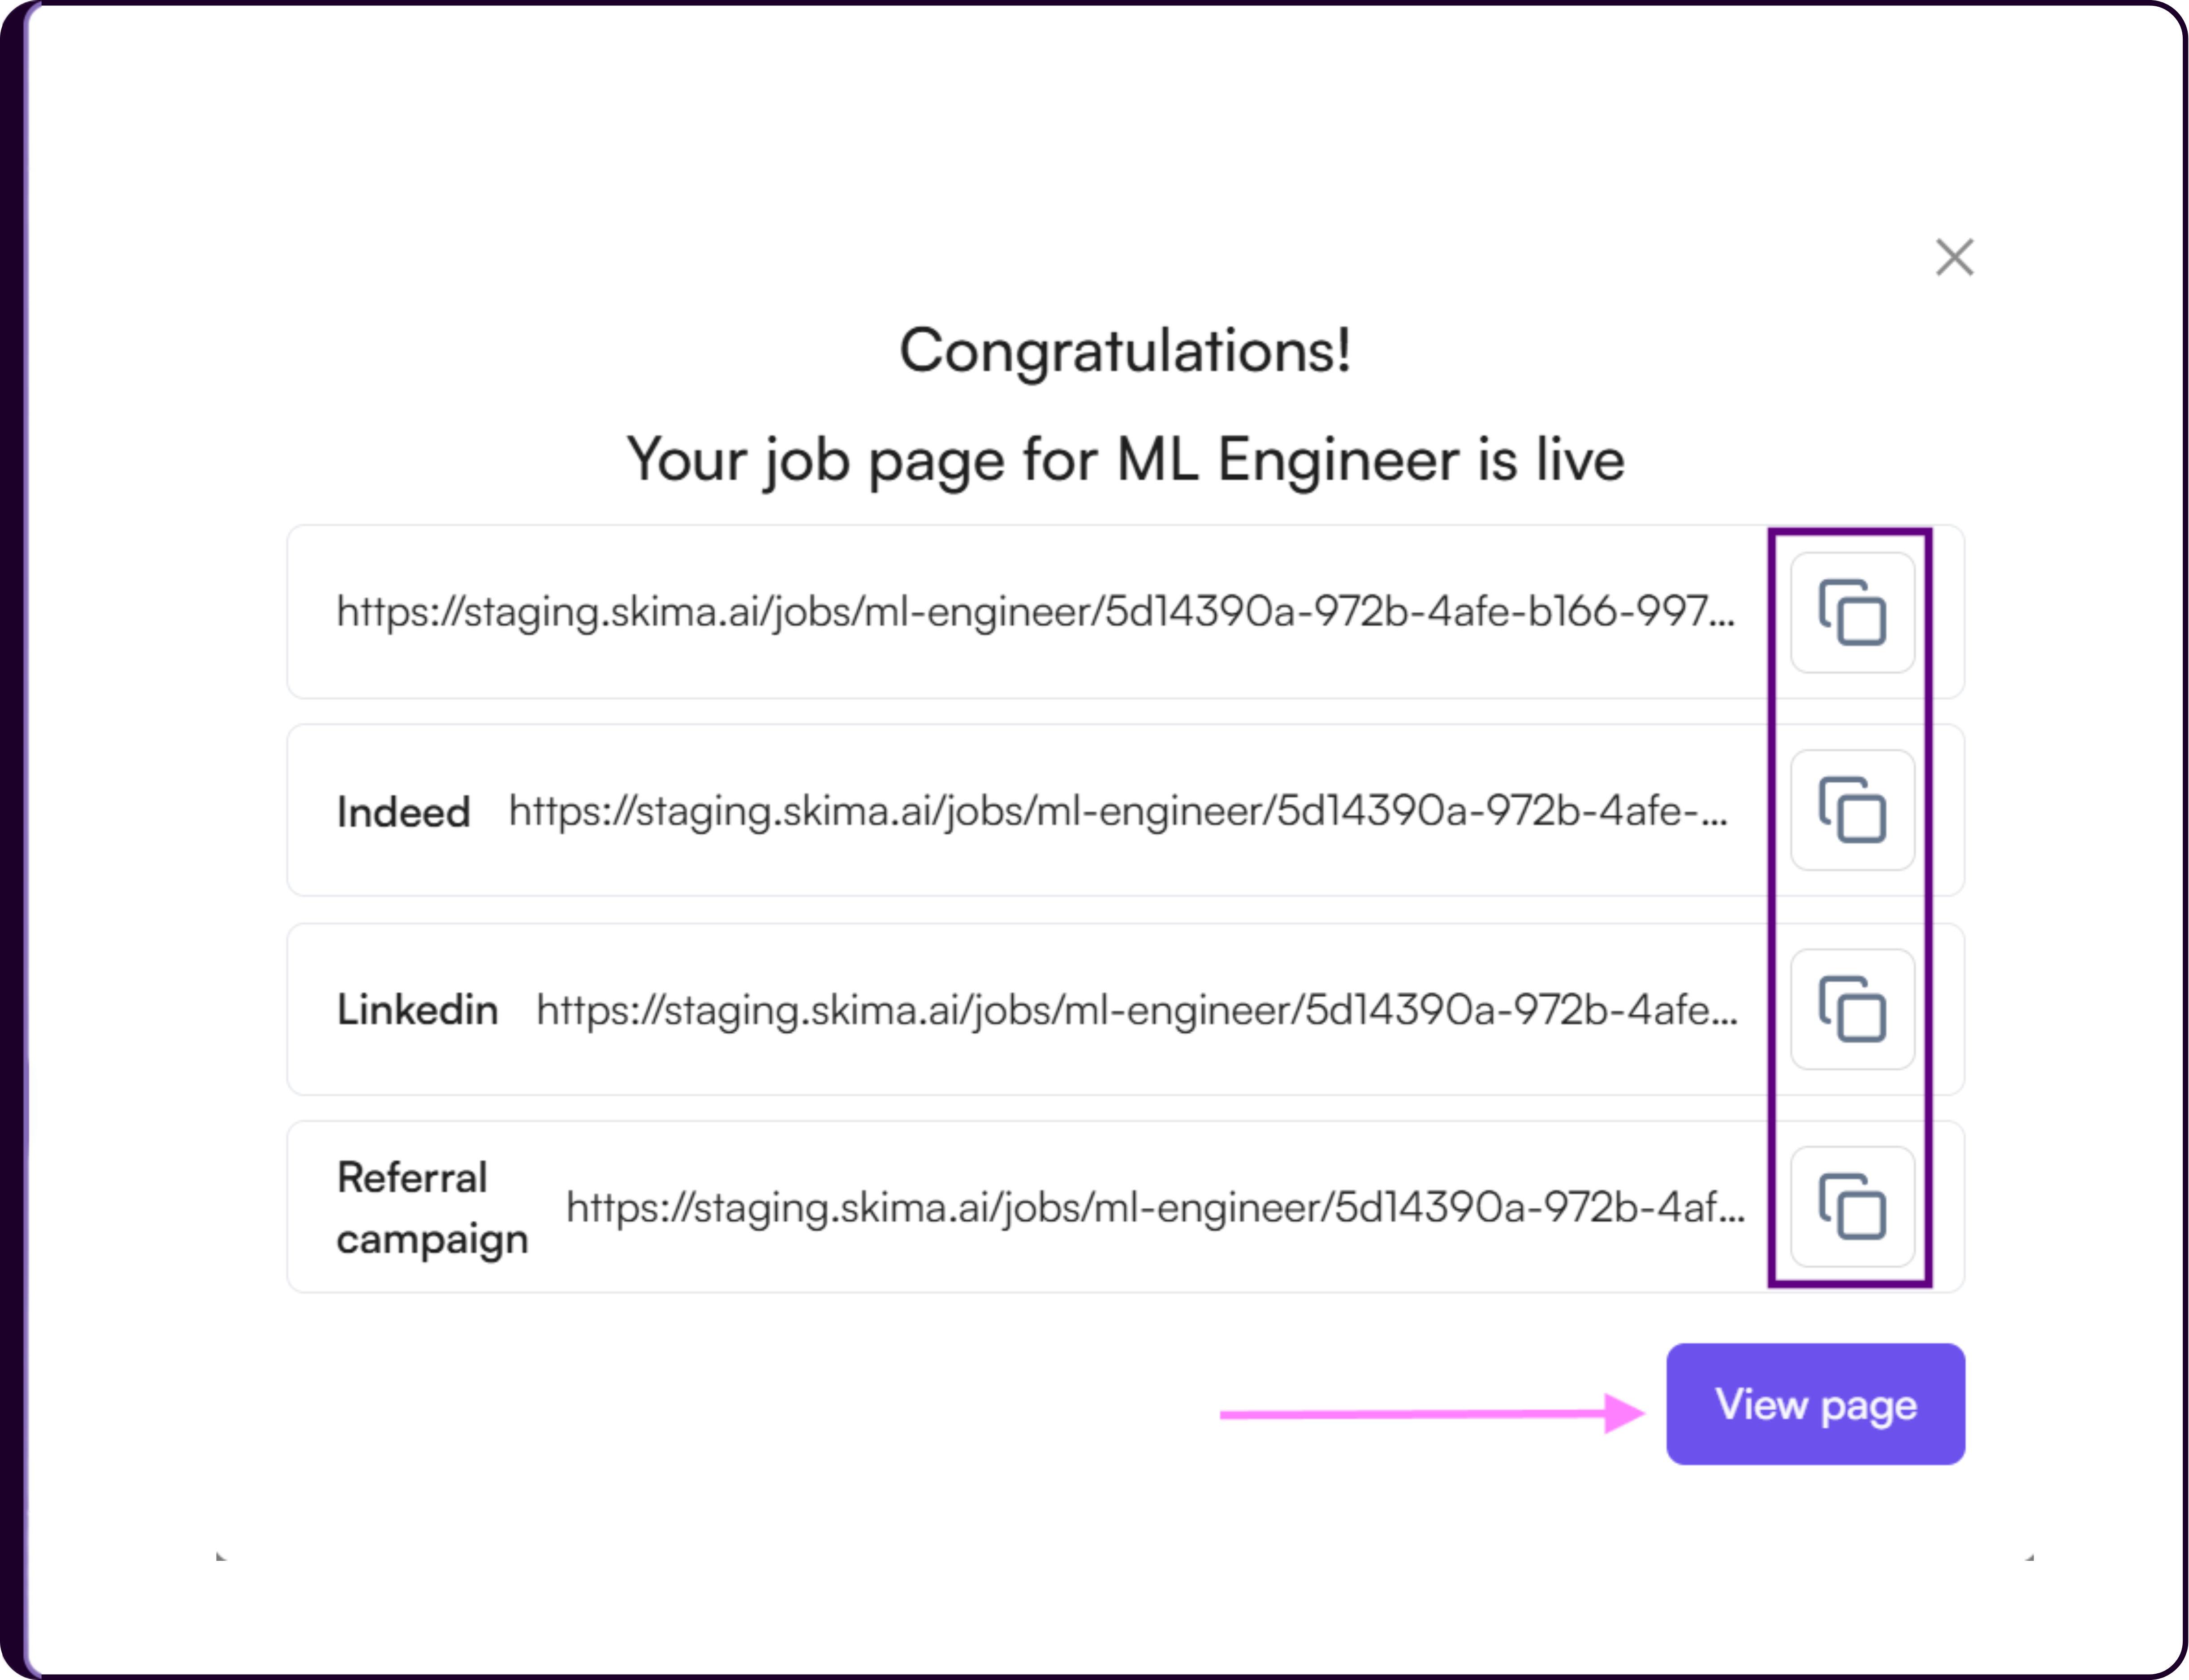
- You will now see generated career page links for all configured sources.
These links can be shared across job boards, LinkedIn, social media, email campaigns, referral programs, or internal hiring channels.
- Candidates applying through these links will automatically enter the Skima AI screening workflow.
- Paste the copied links into your browser to preview the published job posting.
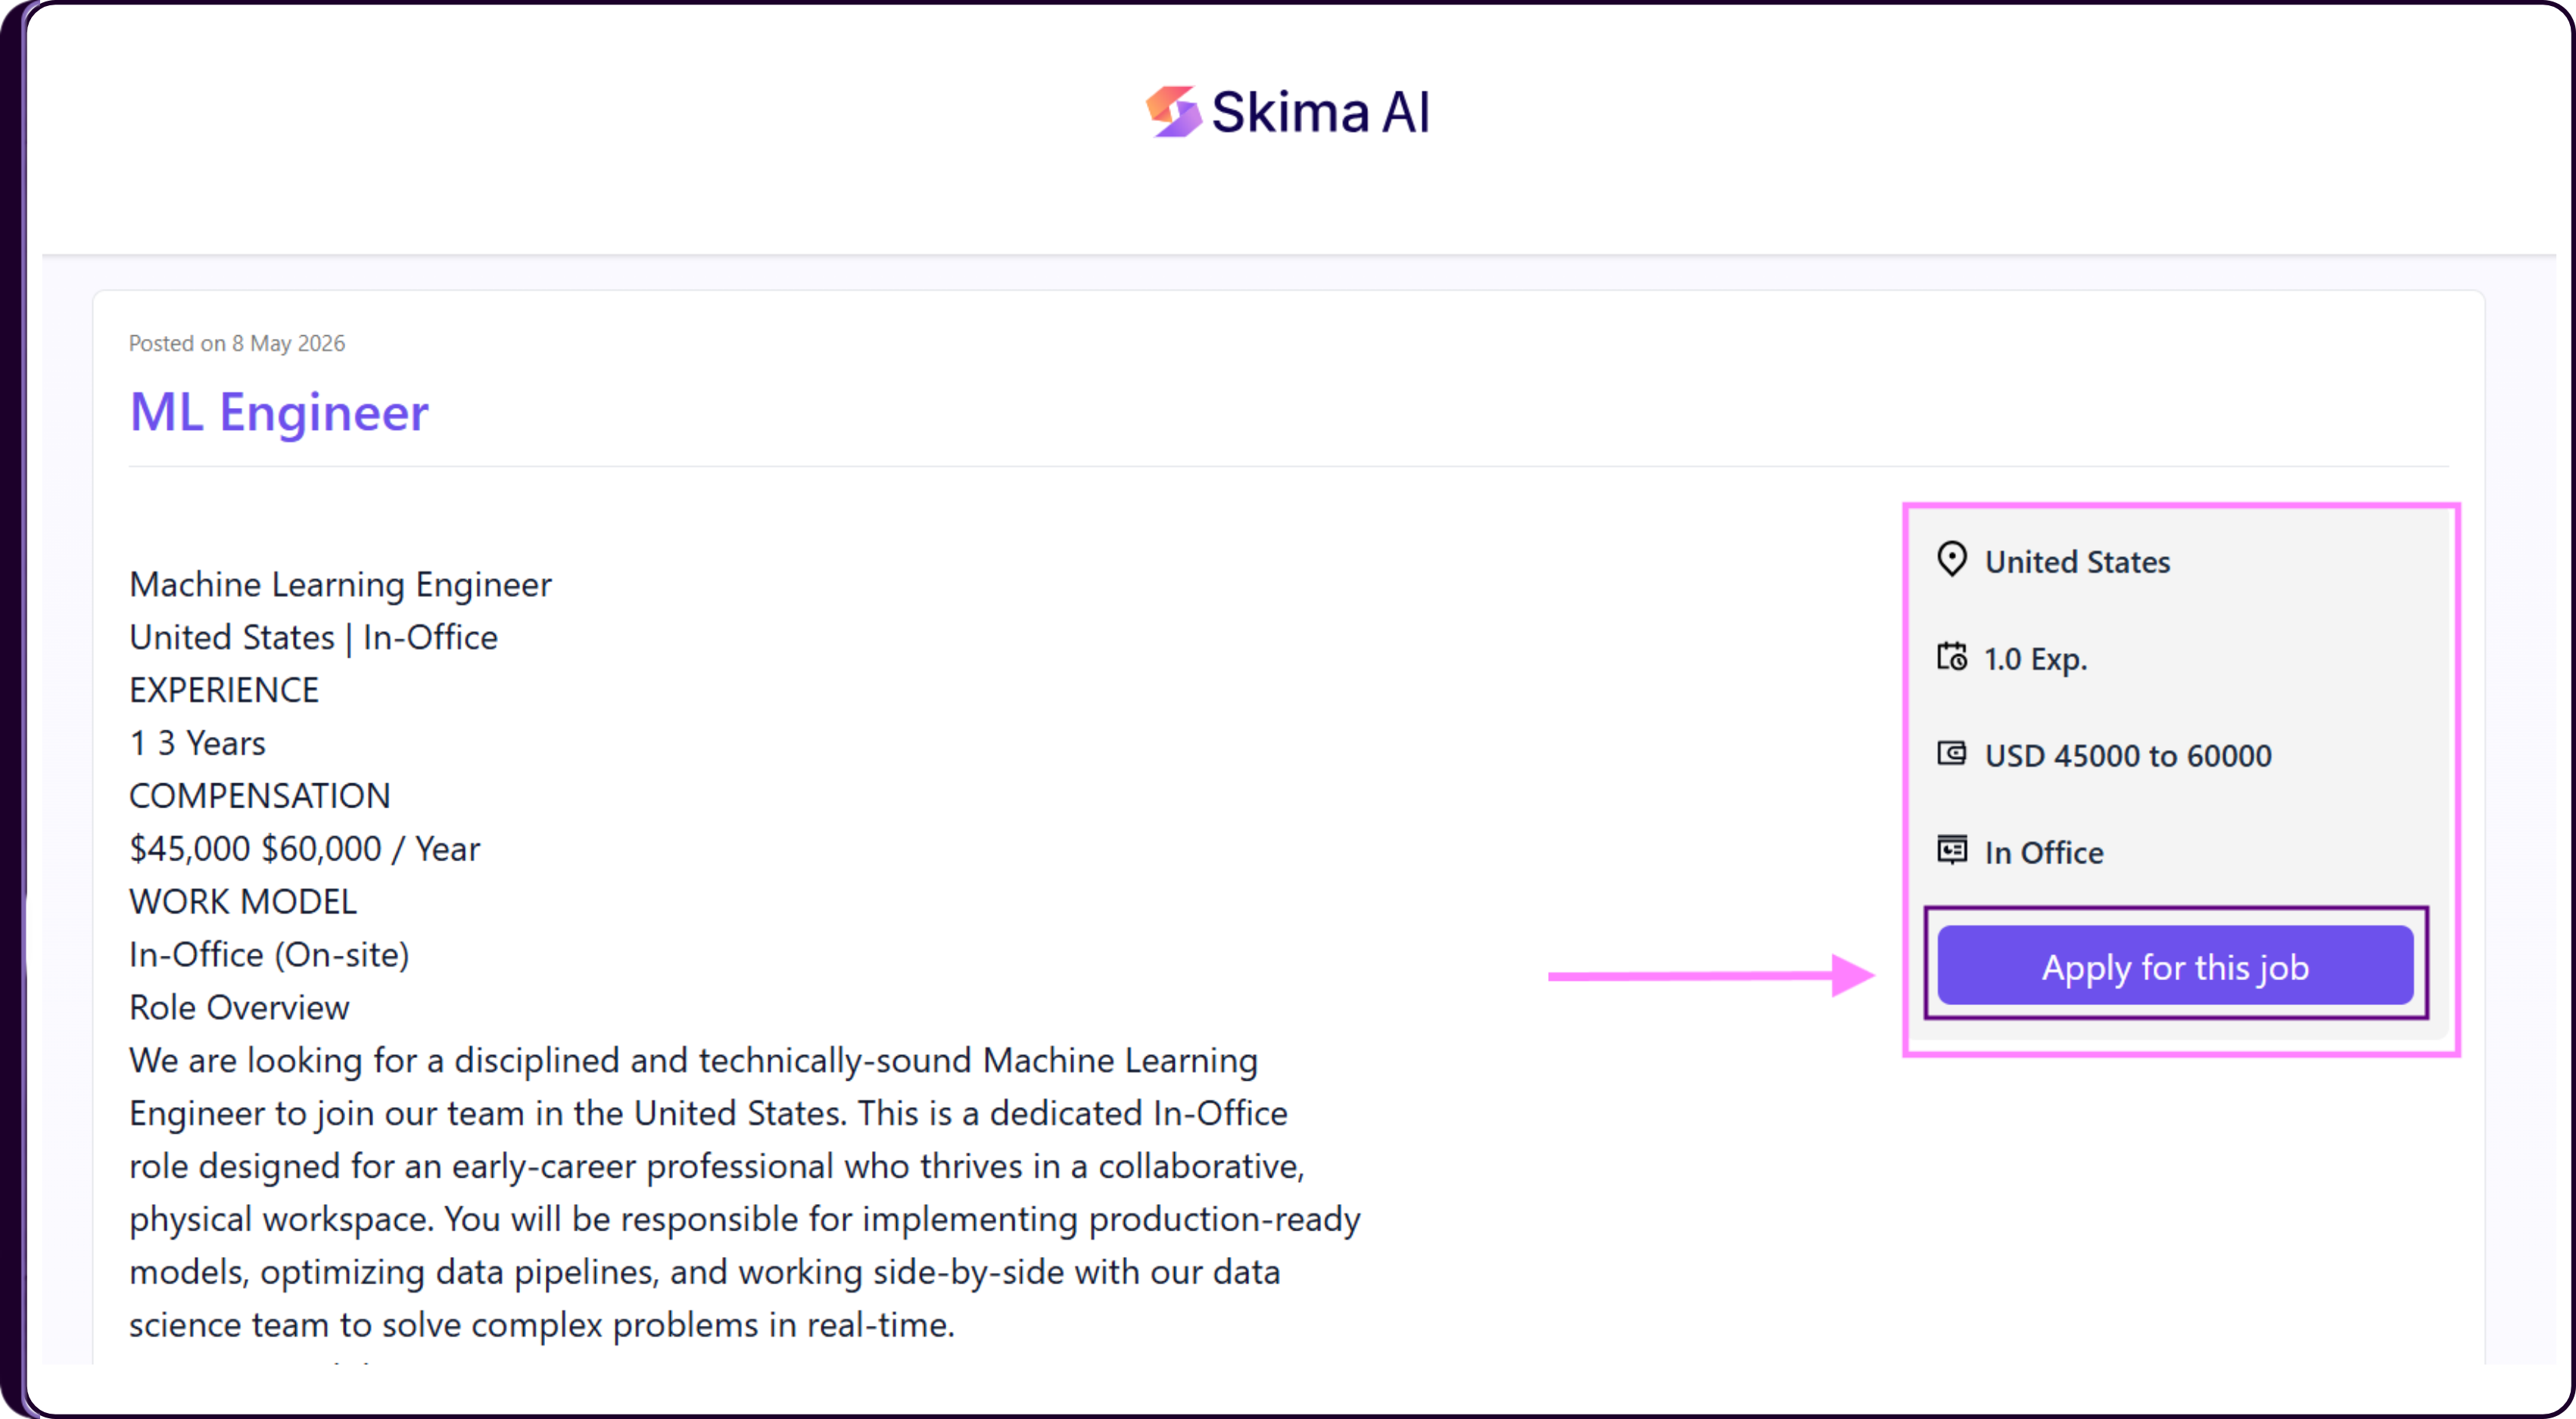
Click on 'Apply for this job' to view the candidate application flow and screening questions configured for the role.
Candidates can upload their resumes and click on 'Submit' to complete the application.
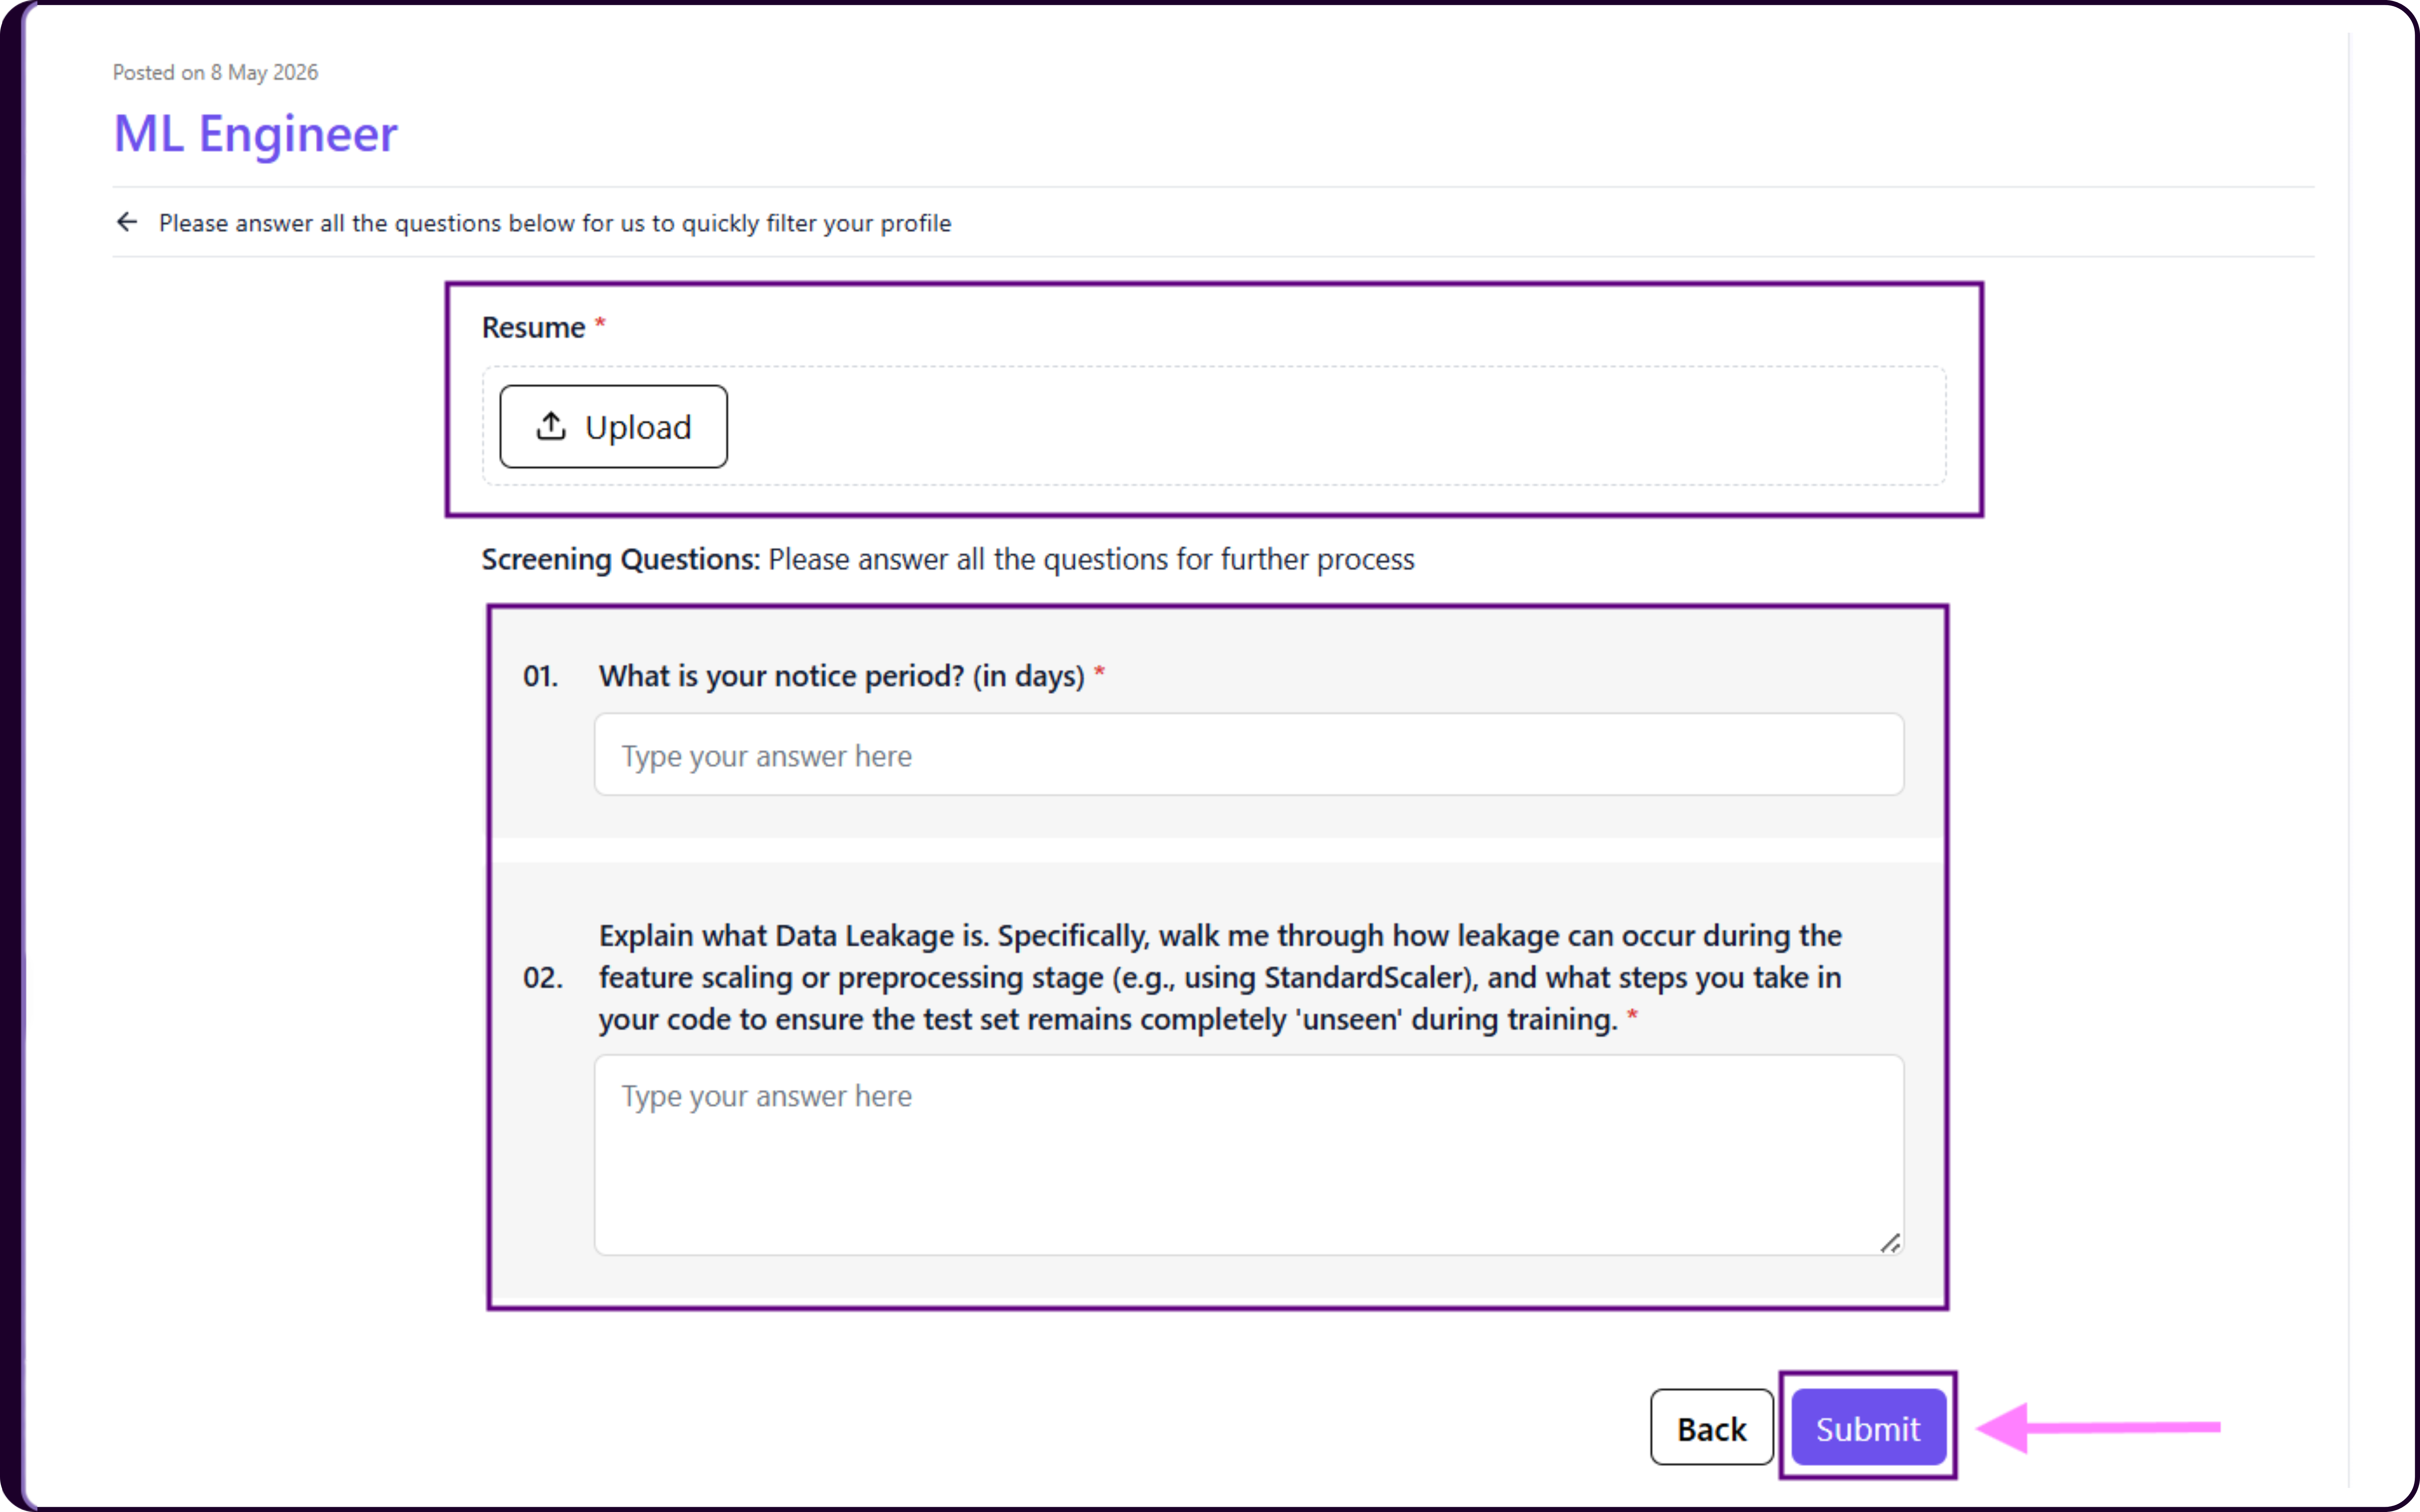
- Submitted candidates are automatically pulled into the job inside Skima AI and screened based on the Job Description, screening questions, and AI Calibration criteria configured for the role.
Deleting Published Jobs
Once a job is published, it must first be unpublished before it can be deleted permanently.
Navigate to the published job from the 'Jobs' list page.
Under the 'Actions' column, click on the three dots menu and select 'Preview Job Posting'.
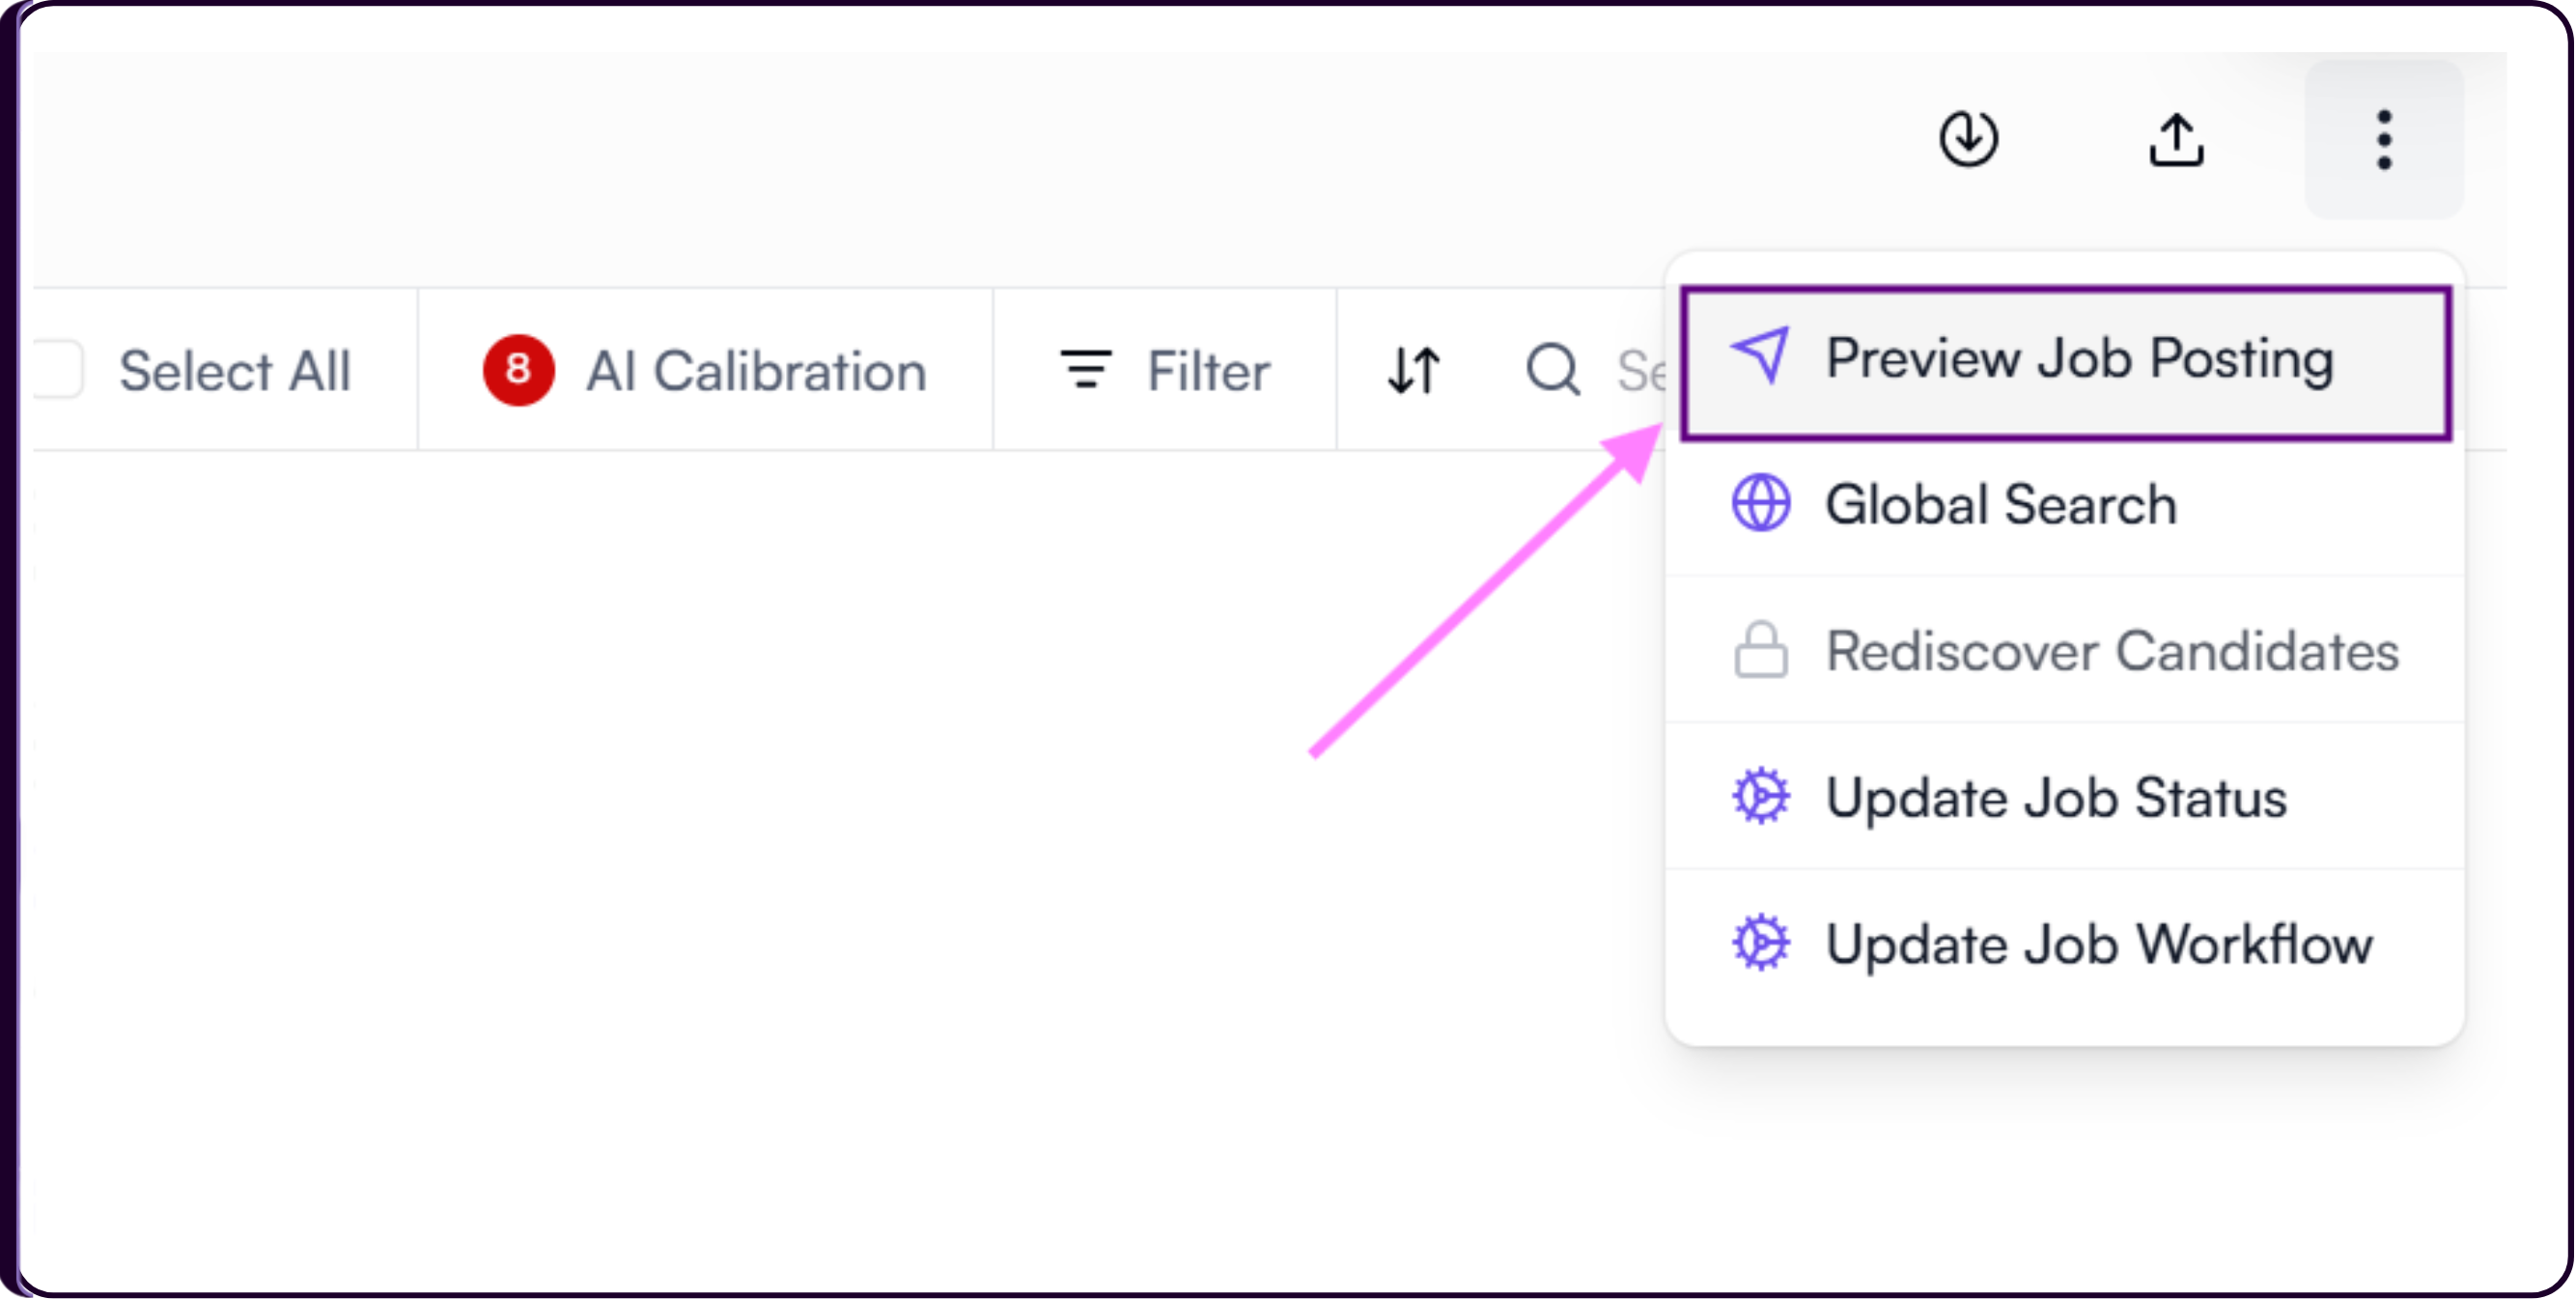
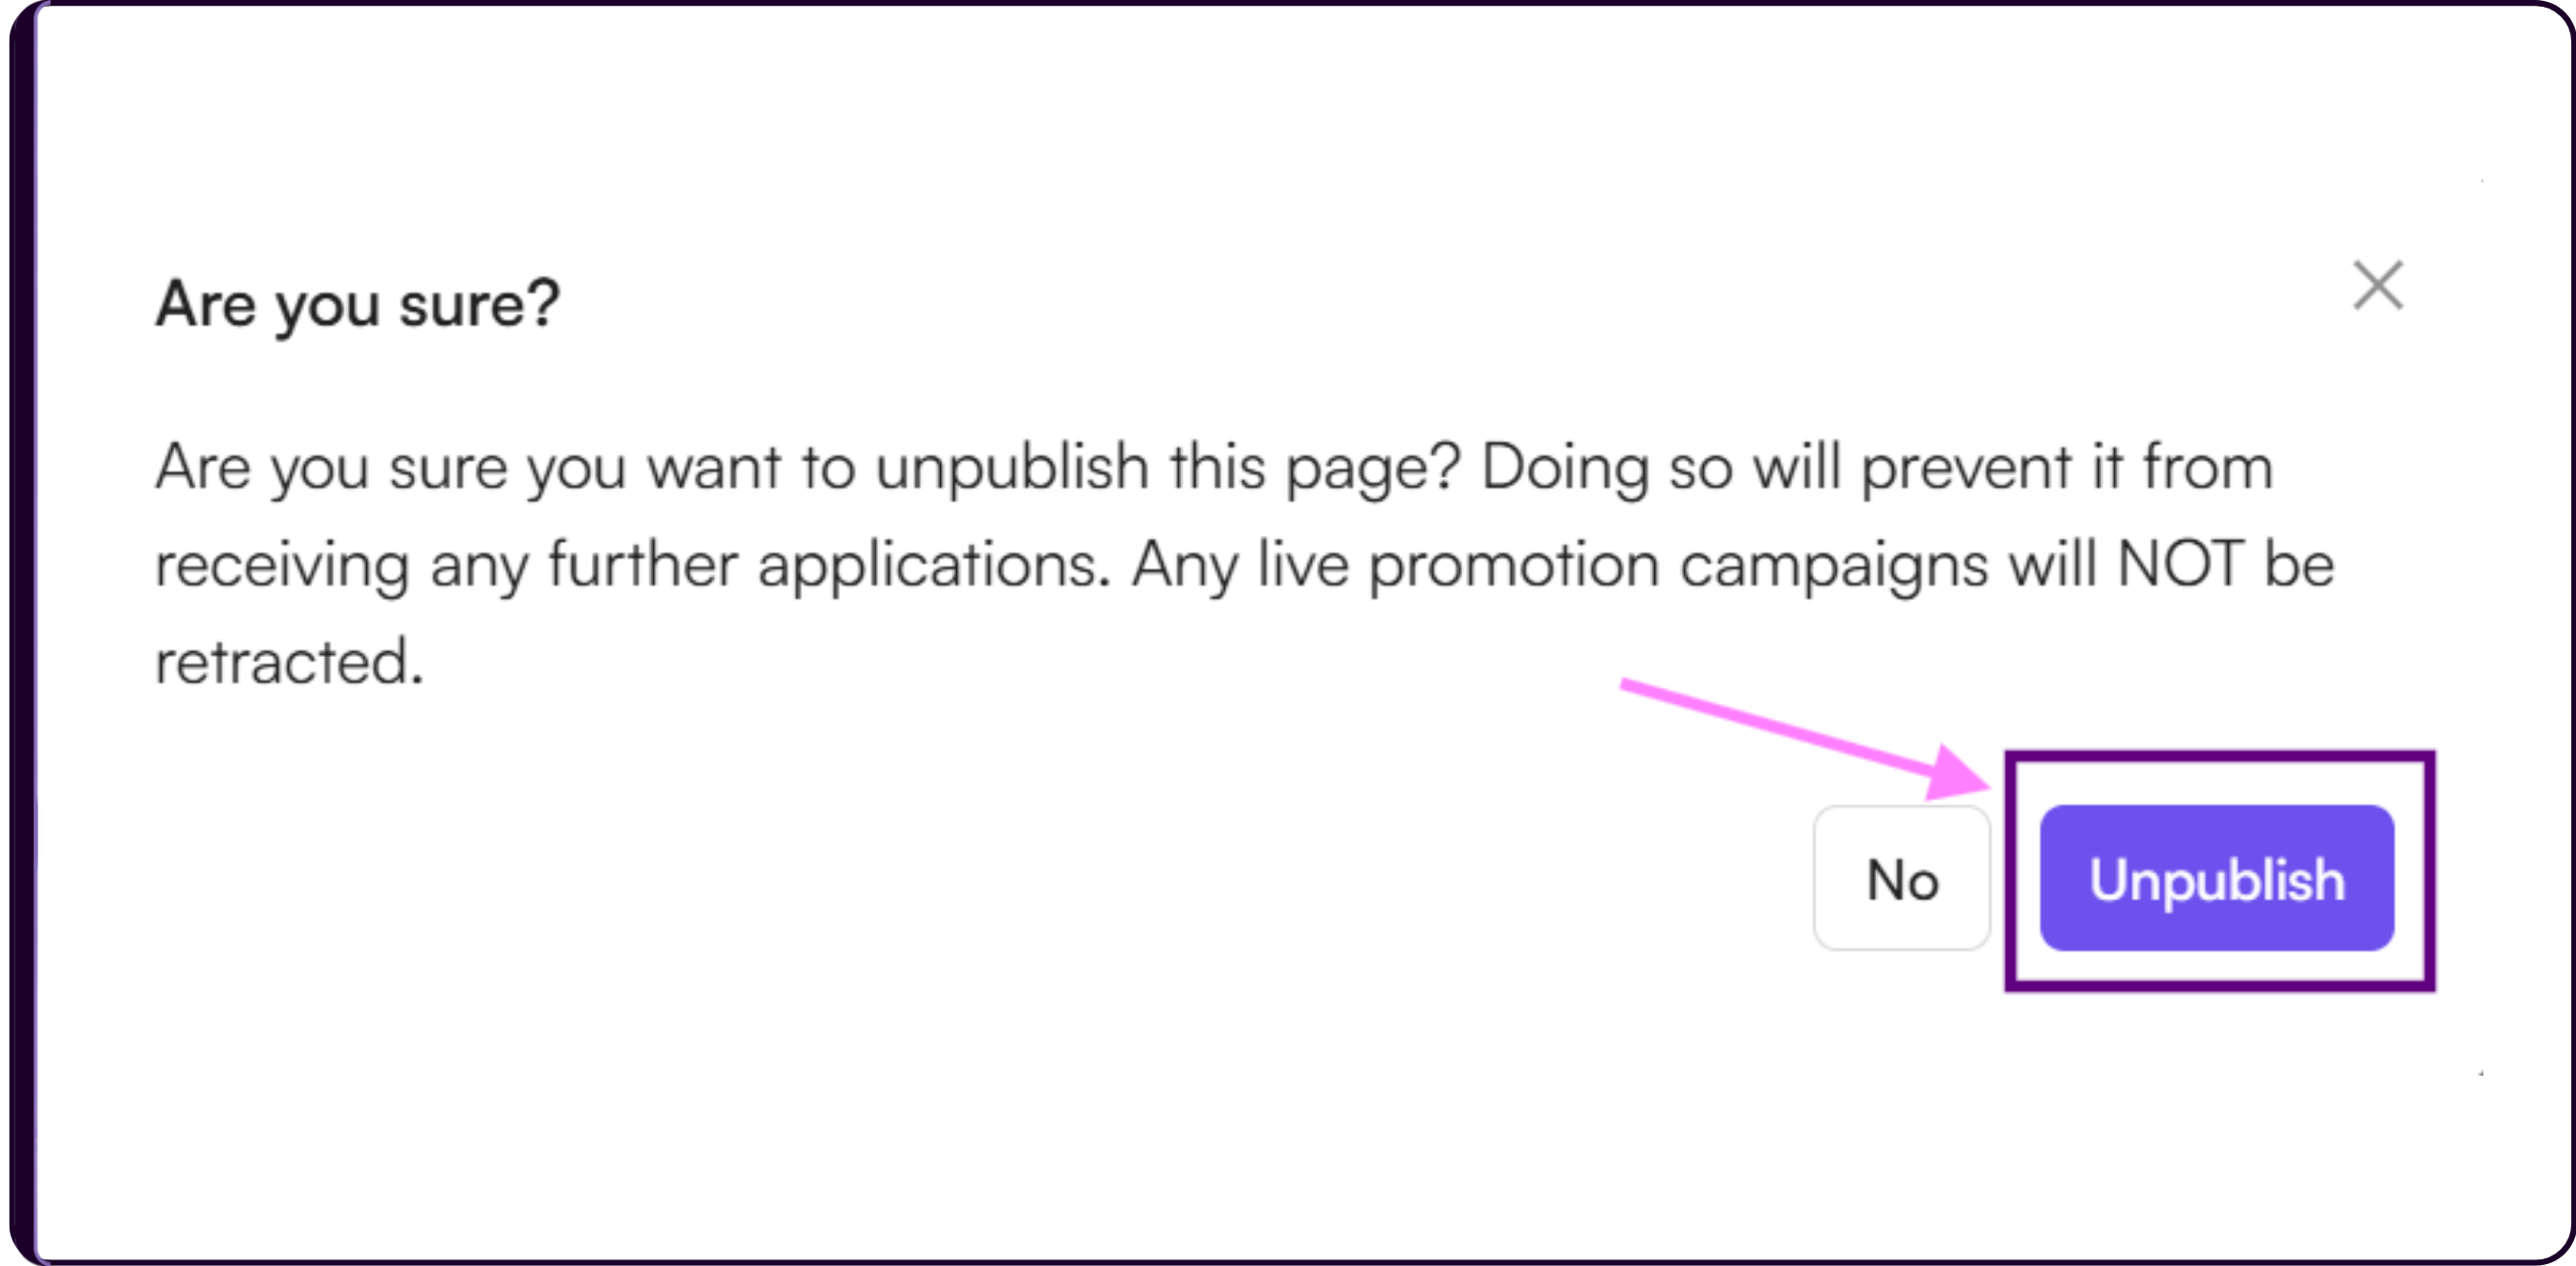
- Inside the public job page view, click on 'Unpublish' from the top-right corner.
- Confirm 'Unpublish' from the warning message that appears.
Return to the 'Jobs' list page.
Find the job you want to delete.
Under the 'Actions' column, click on the three dots menu and select 'Delete Job'.
A confirmation message will appear:
“Are you sure you want to delete ML Engineer job?”
Click on 'Yes' to confirm. The job will now be deleted successfully.