Getting Started
Once you complete the initial onboarding setup, you will land on the Skima AI dashboard. This dashboard is designed to help you get started quickly by guiding you through the most important actions required to begin hiring.
On the left side of the screen, you will see four key steps that represent the core actions in your hiring workflow. On the right side, each step displays a guided panel that helps you perform that action directly.
Step 1: Try AI-Powered Search
This is the fastest way to start exploring Skima AI.
On the right side of the dashboard, you will see the AI-Assisted Search section with a search bar.
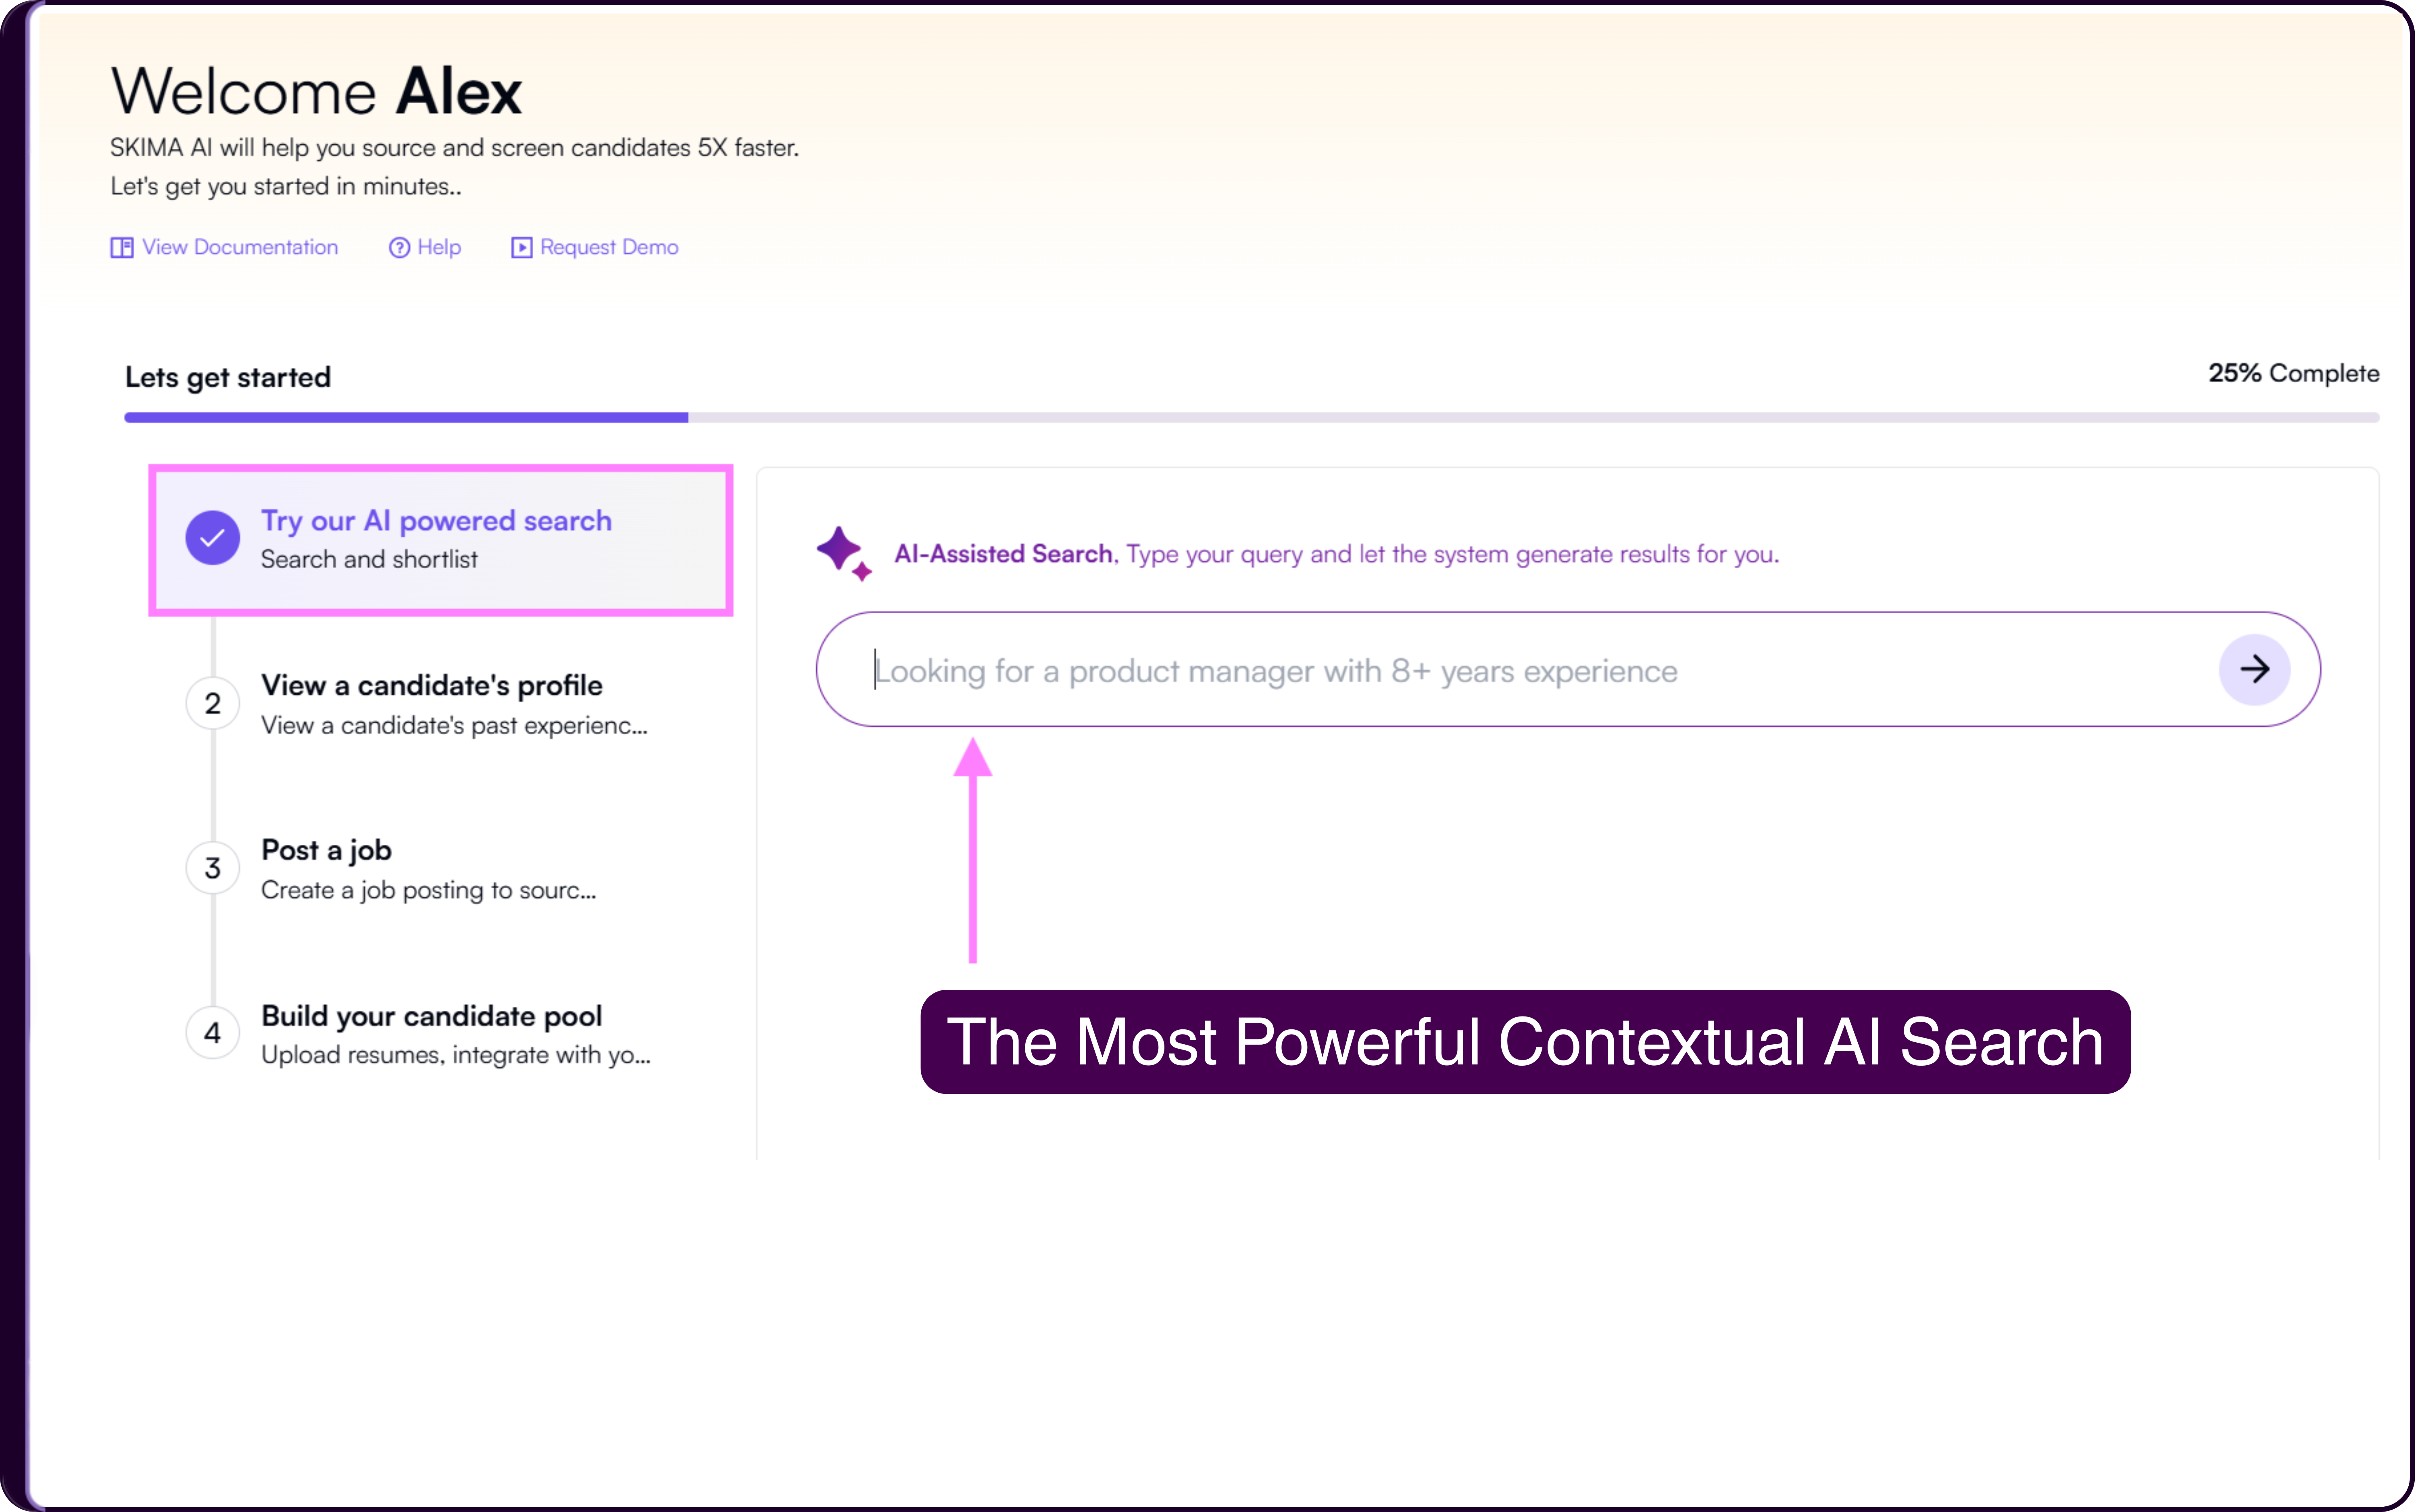
Using the Search Bar:
Click on the search bar under 'AI-Assisted Search'
Type a natural language query based on your requirement
Example:
"Looking for a product manager with 8+ years experience"Press 'enter' to run the search
Understanding Search Result
Skima AI processes your query and returns a list of candidates ranked based on fit. The system evaluates profiles based on skills, experience, and role alignment instead of relying only on keyword matches.
You can open candidate profiles, compare candidates, and take actions directly from the results.
Step 2: View a Candidate Profile
This step helps you understand how candidate data is structured inside Skima AI.
On the right side, you will see the 'View a Candidate’s Profile' section.
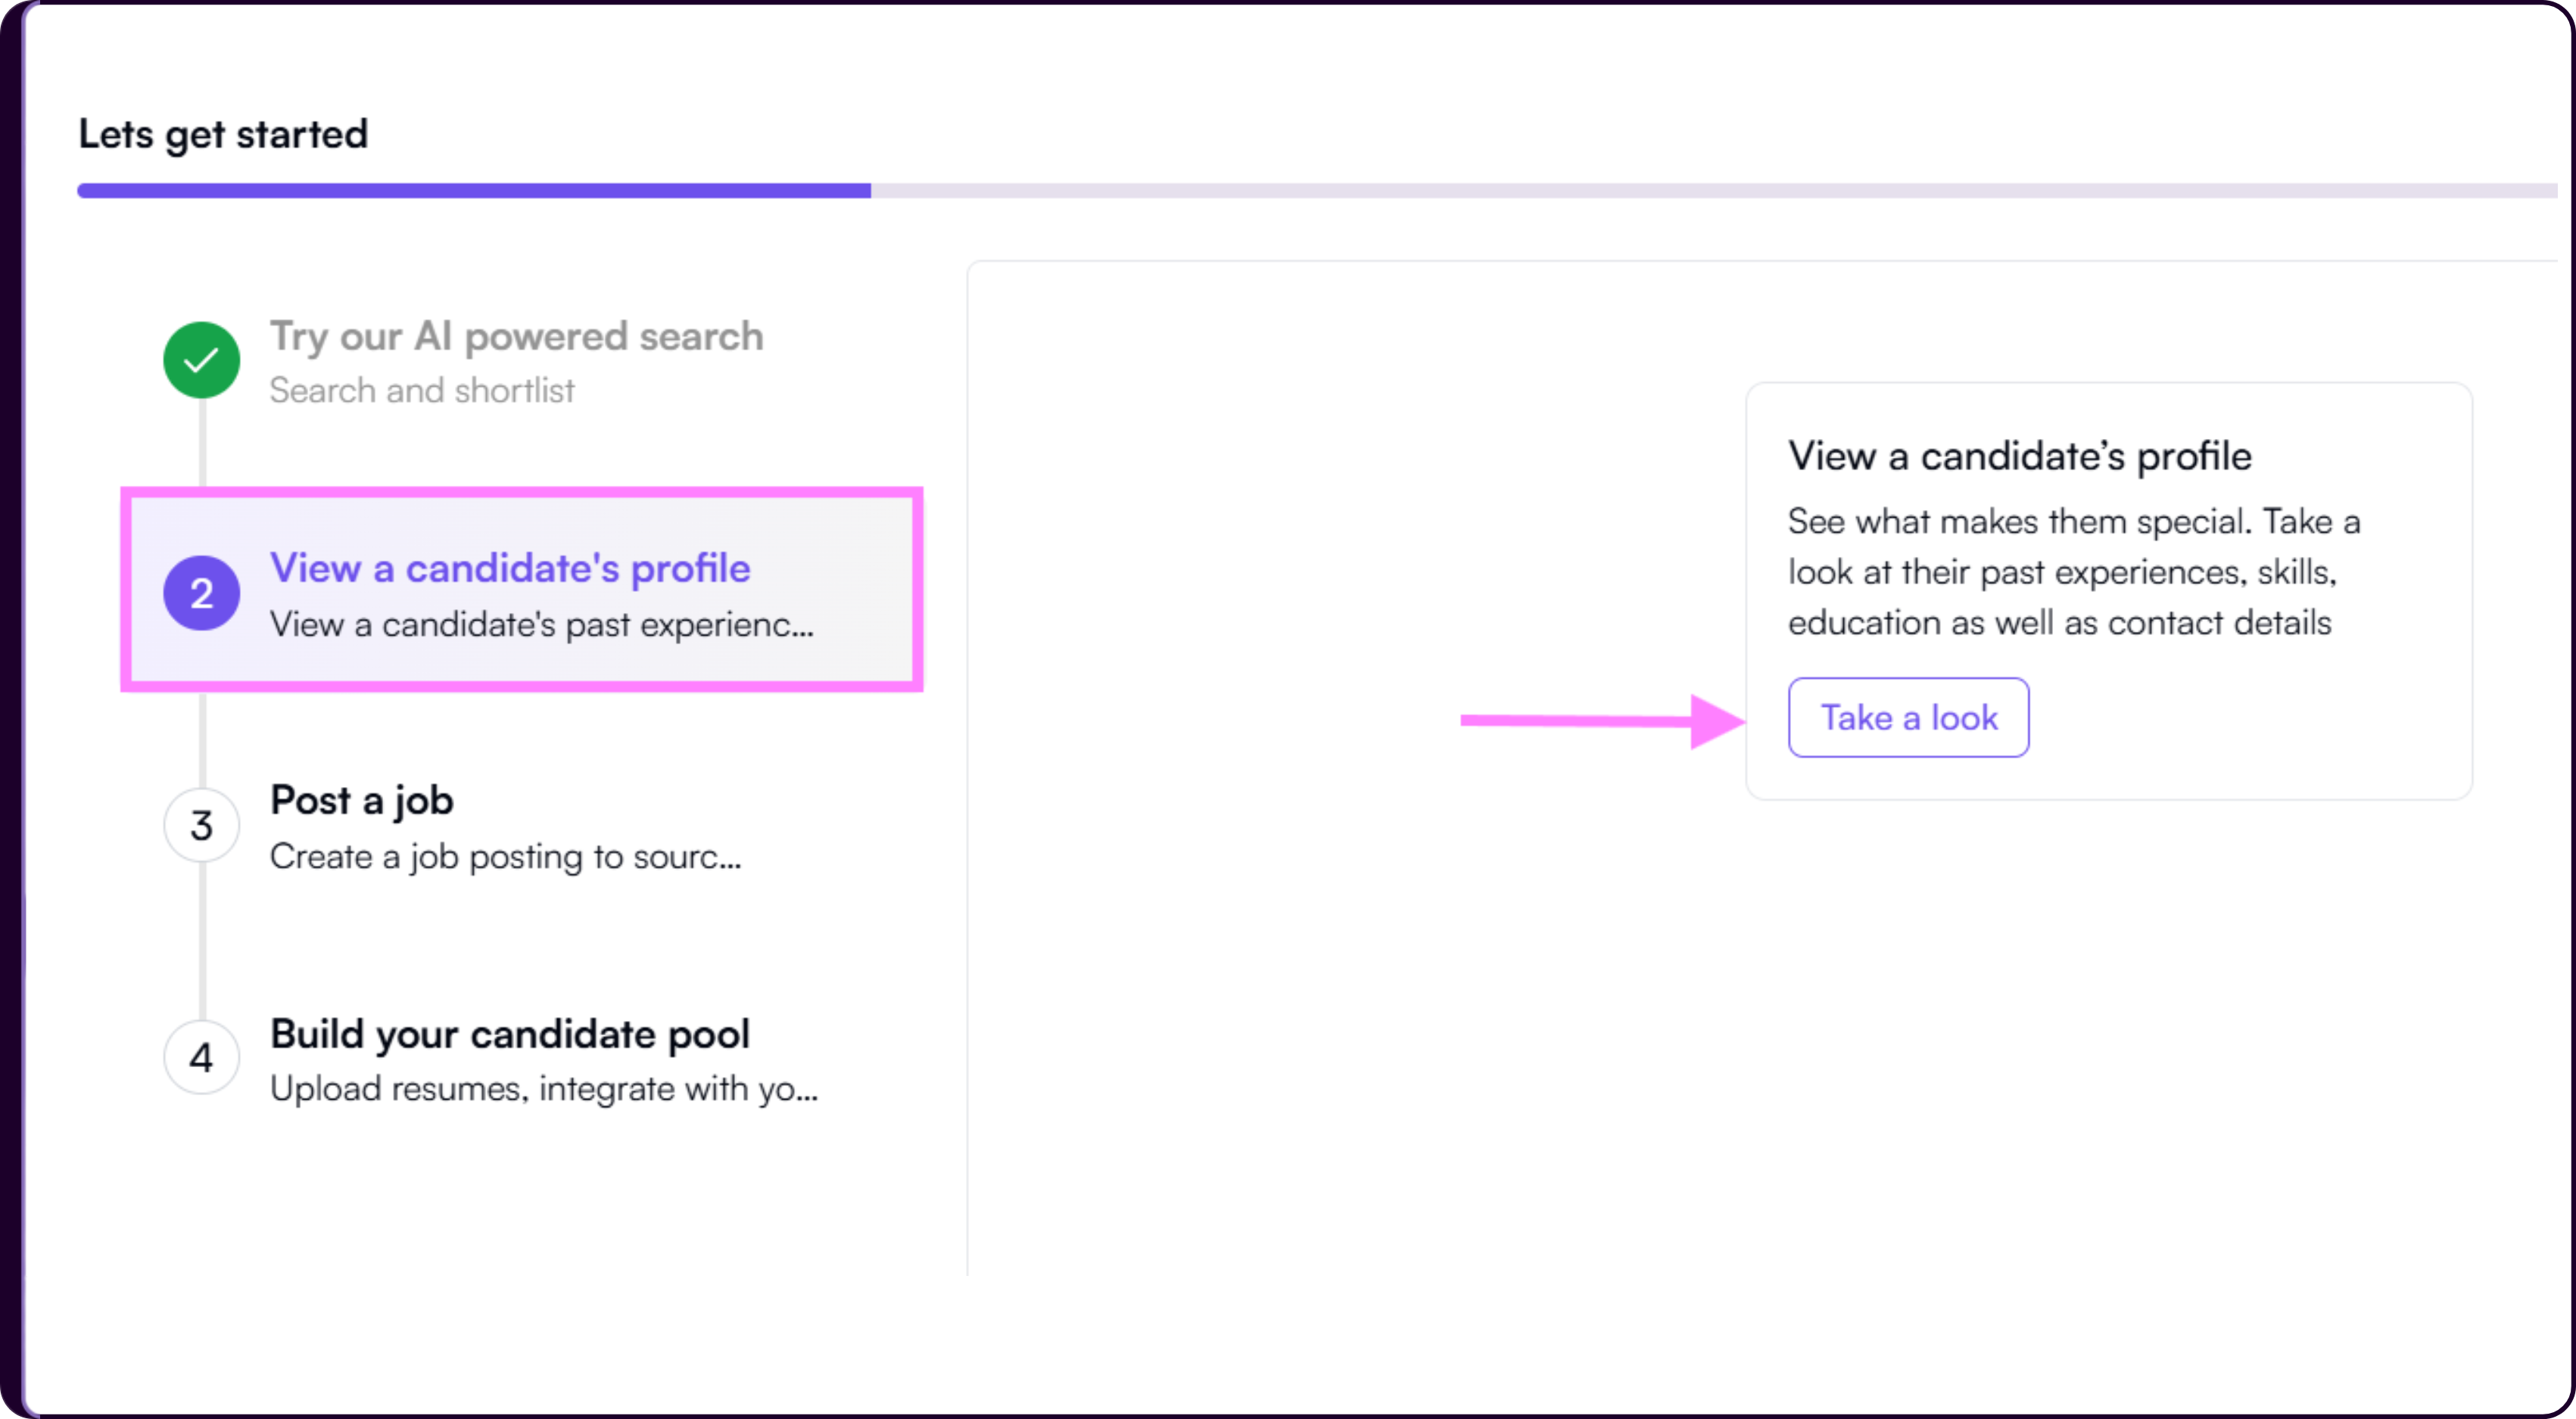
Opening a Profile:
- Click on 'Take a look'
- You will be redirected to a sample candidate profile
Exploring Candidate Information
The profile is structured to give you a complete view of the candidate in one place. You can review:
- Full Candidate Profile
- AI matching Score
- Skills Evidence
- Candidate Pros and Cons
This layout allows you to quickly assess candidate fit without switching between multiple screens or tools.
Step 3: Post a Job
This step introduces how to create a job inside Skima AI.
On the right side, you will see the Create Job section.
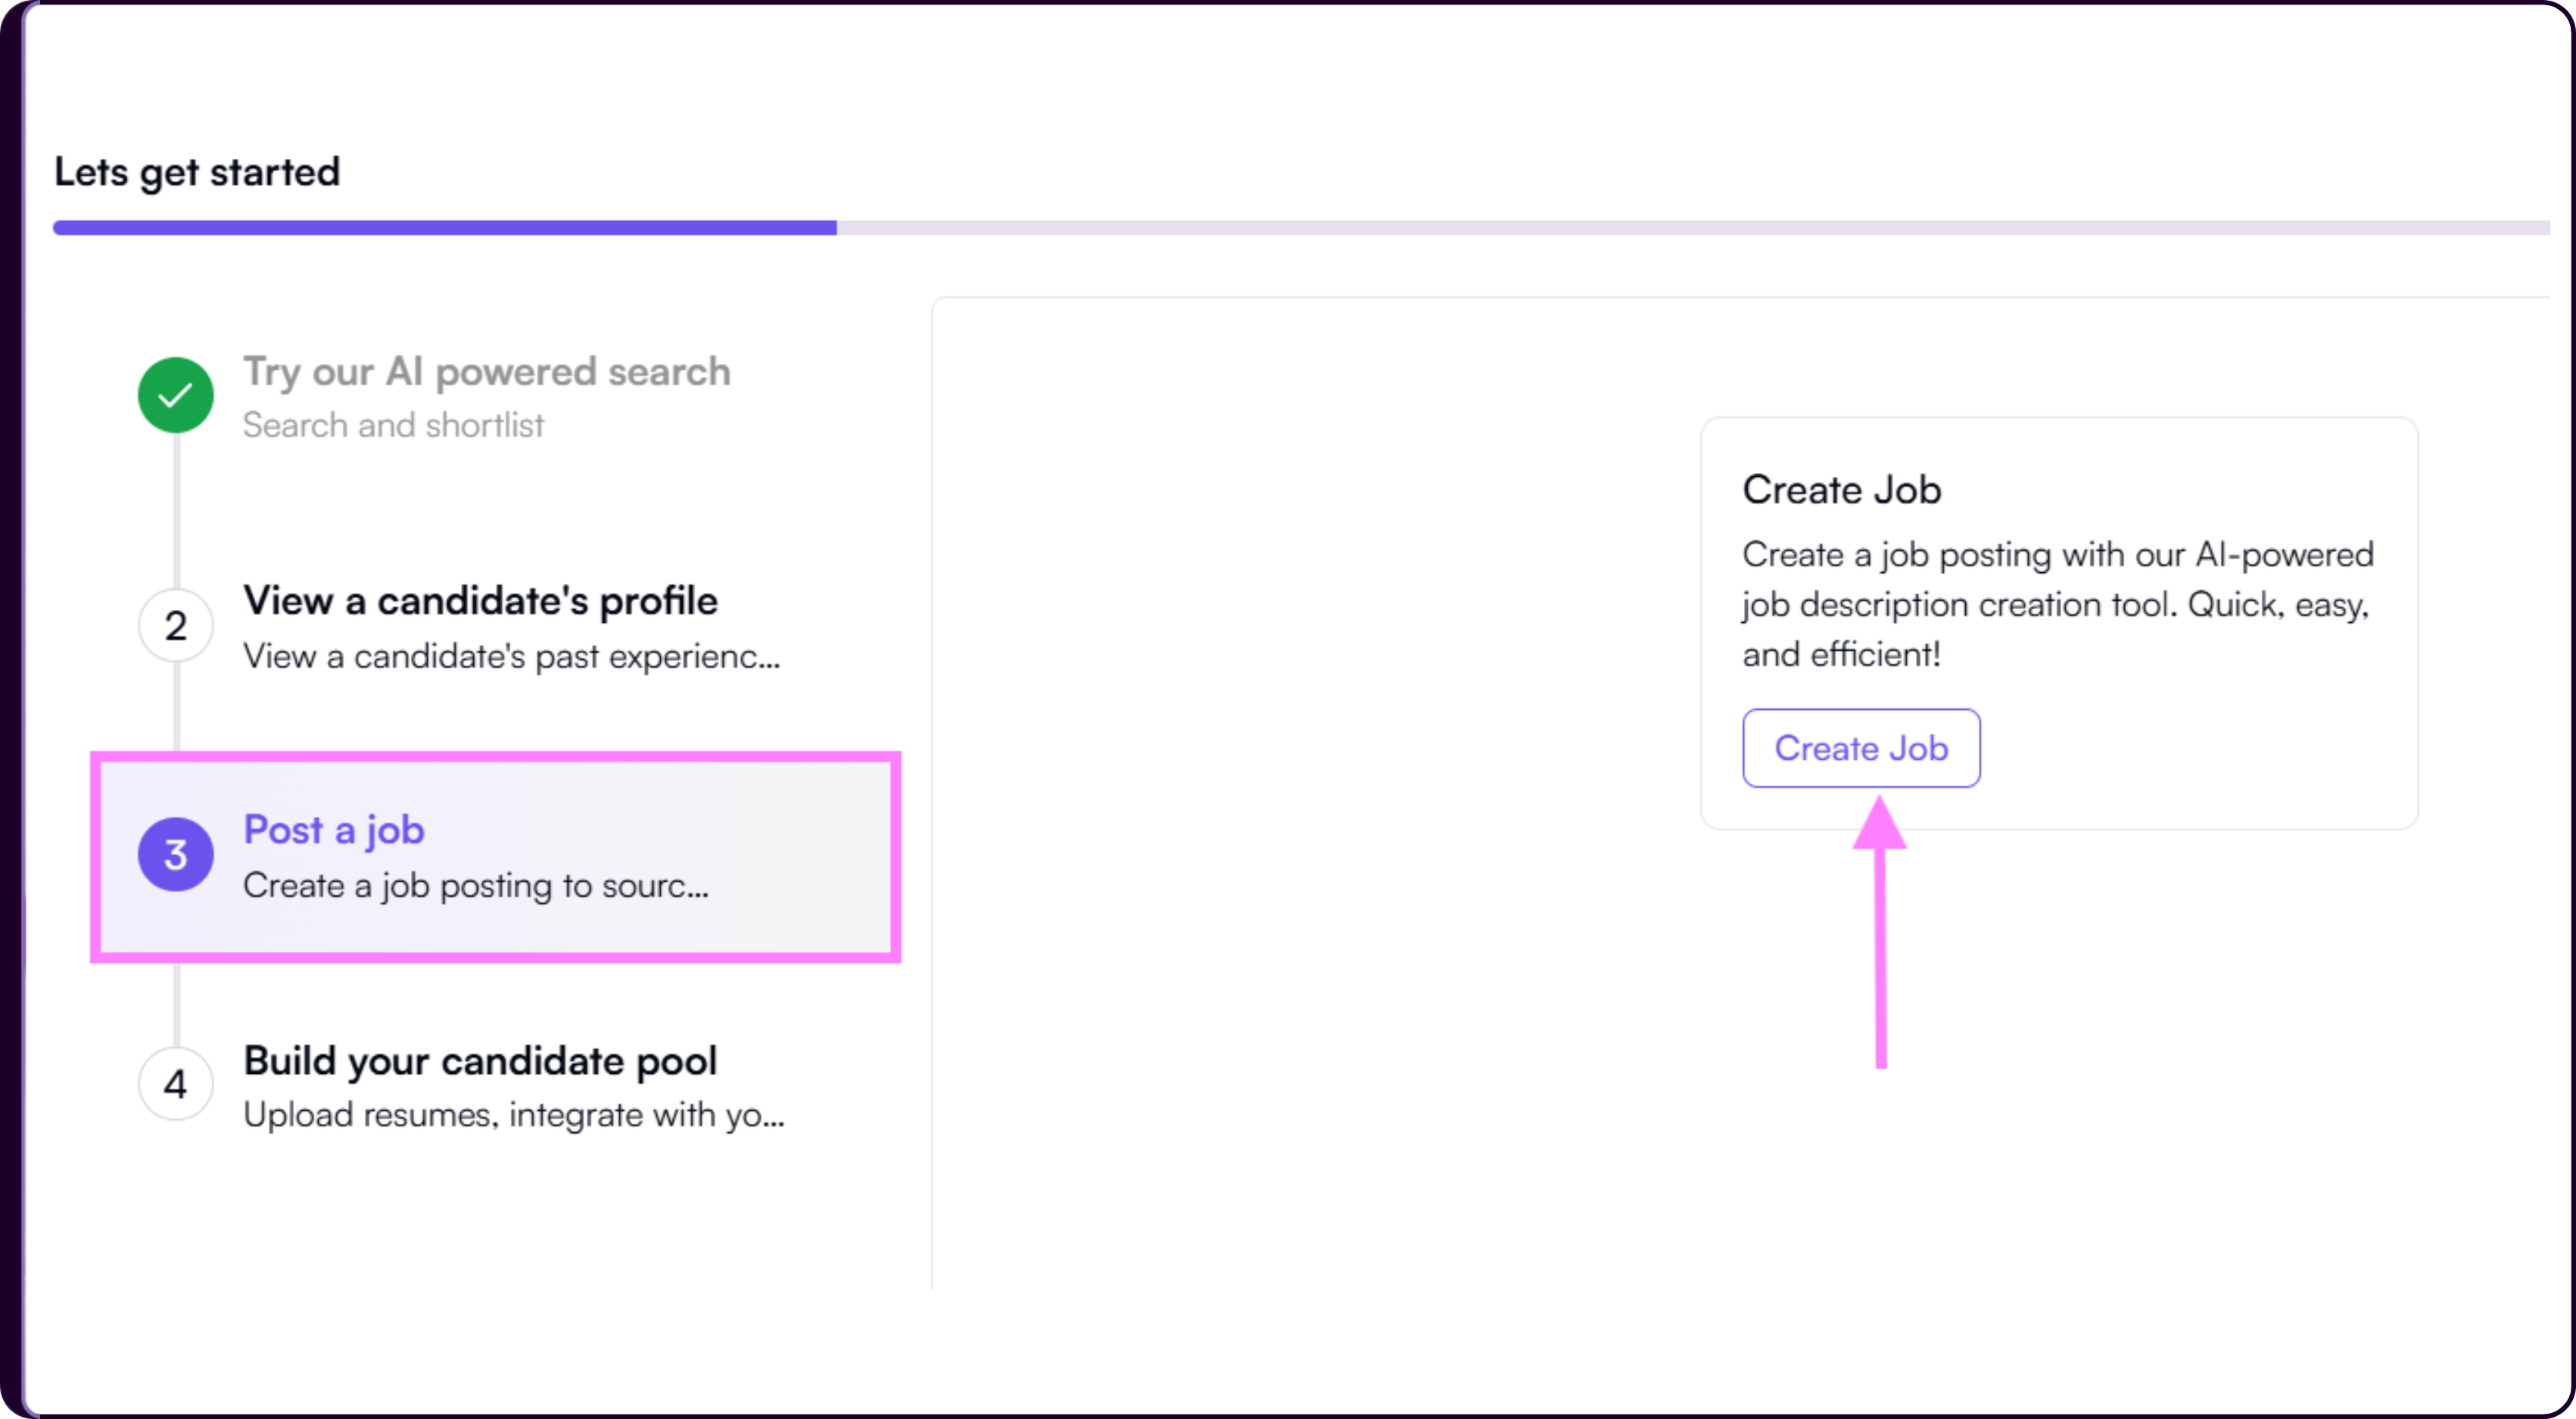
Creating a Job:
- Click on the 'Create Job' button
- You will be redirected to the job creation page
Defining the Role
You can enter role details, requirements, and job description. Skima AI assists in structuring the job description to make it clearer and more aligned with screening and matching.
A well-defined job helps improve the quality of candidate matches and screening outcomes across the platform.
Step 4: Build Your Candidate Pool
This step allows you to bring candidate data into Skima AI so you can begin searching, screening, and shortlisting effectively.
On the right side, you will see three options to add candidates.
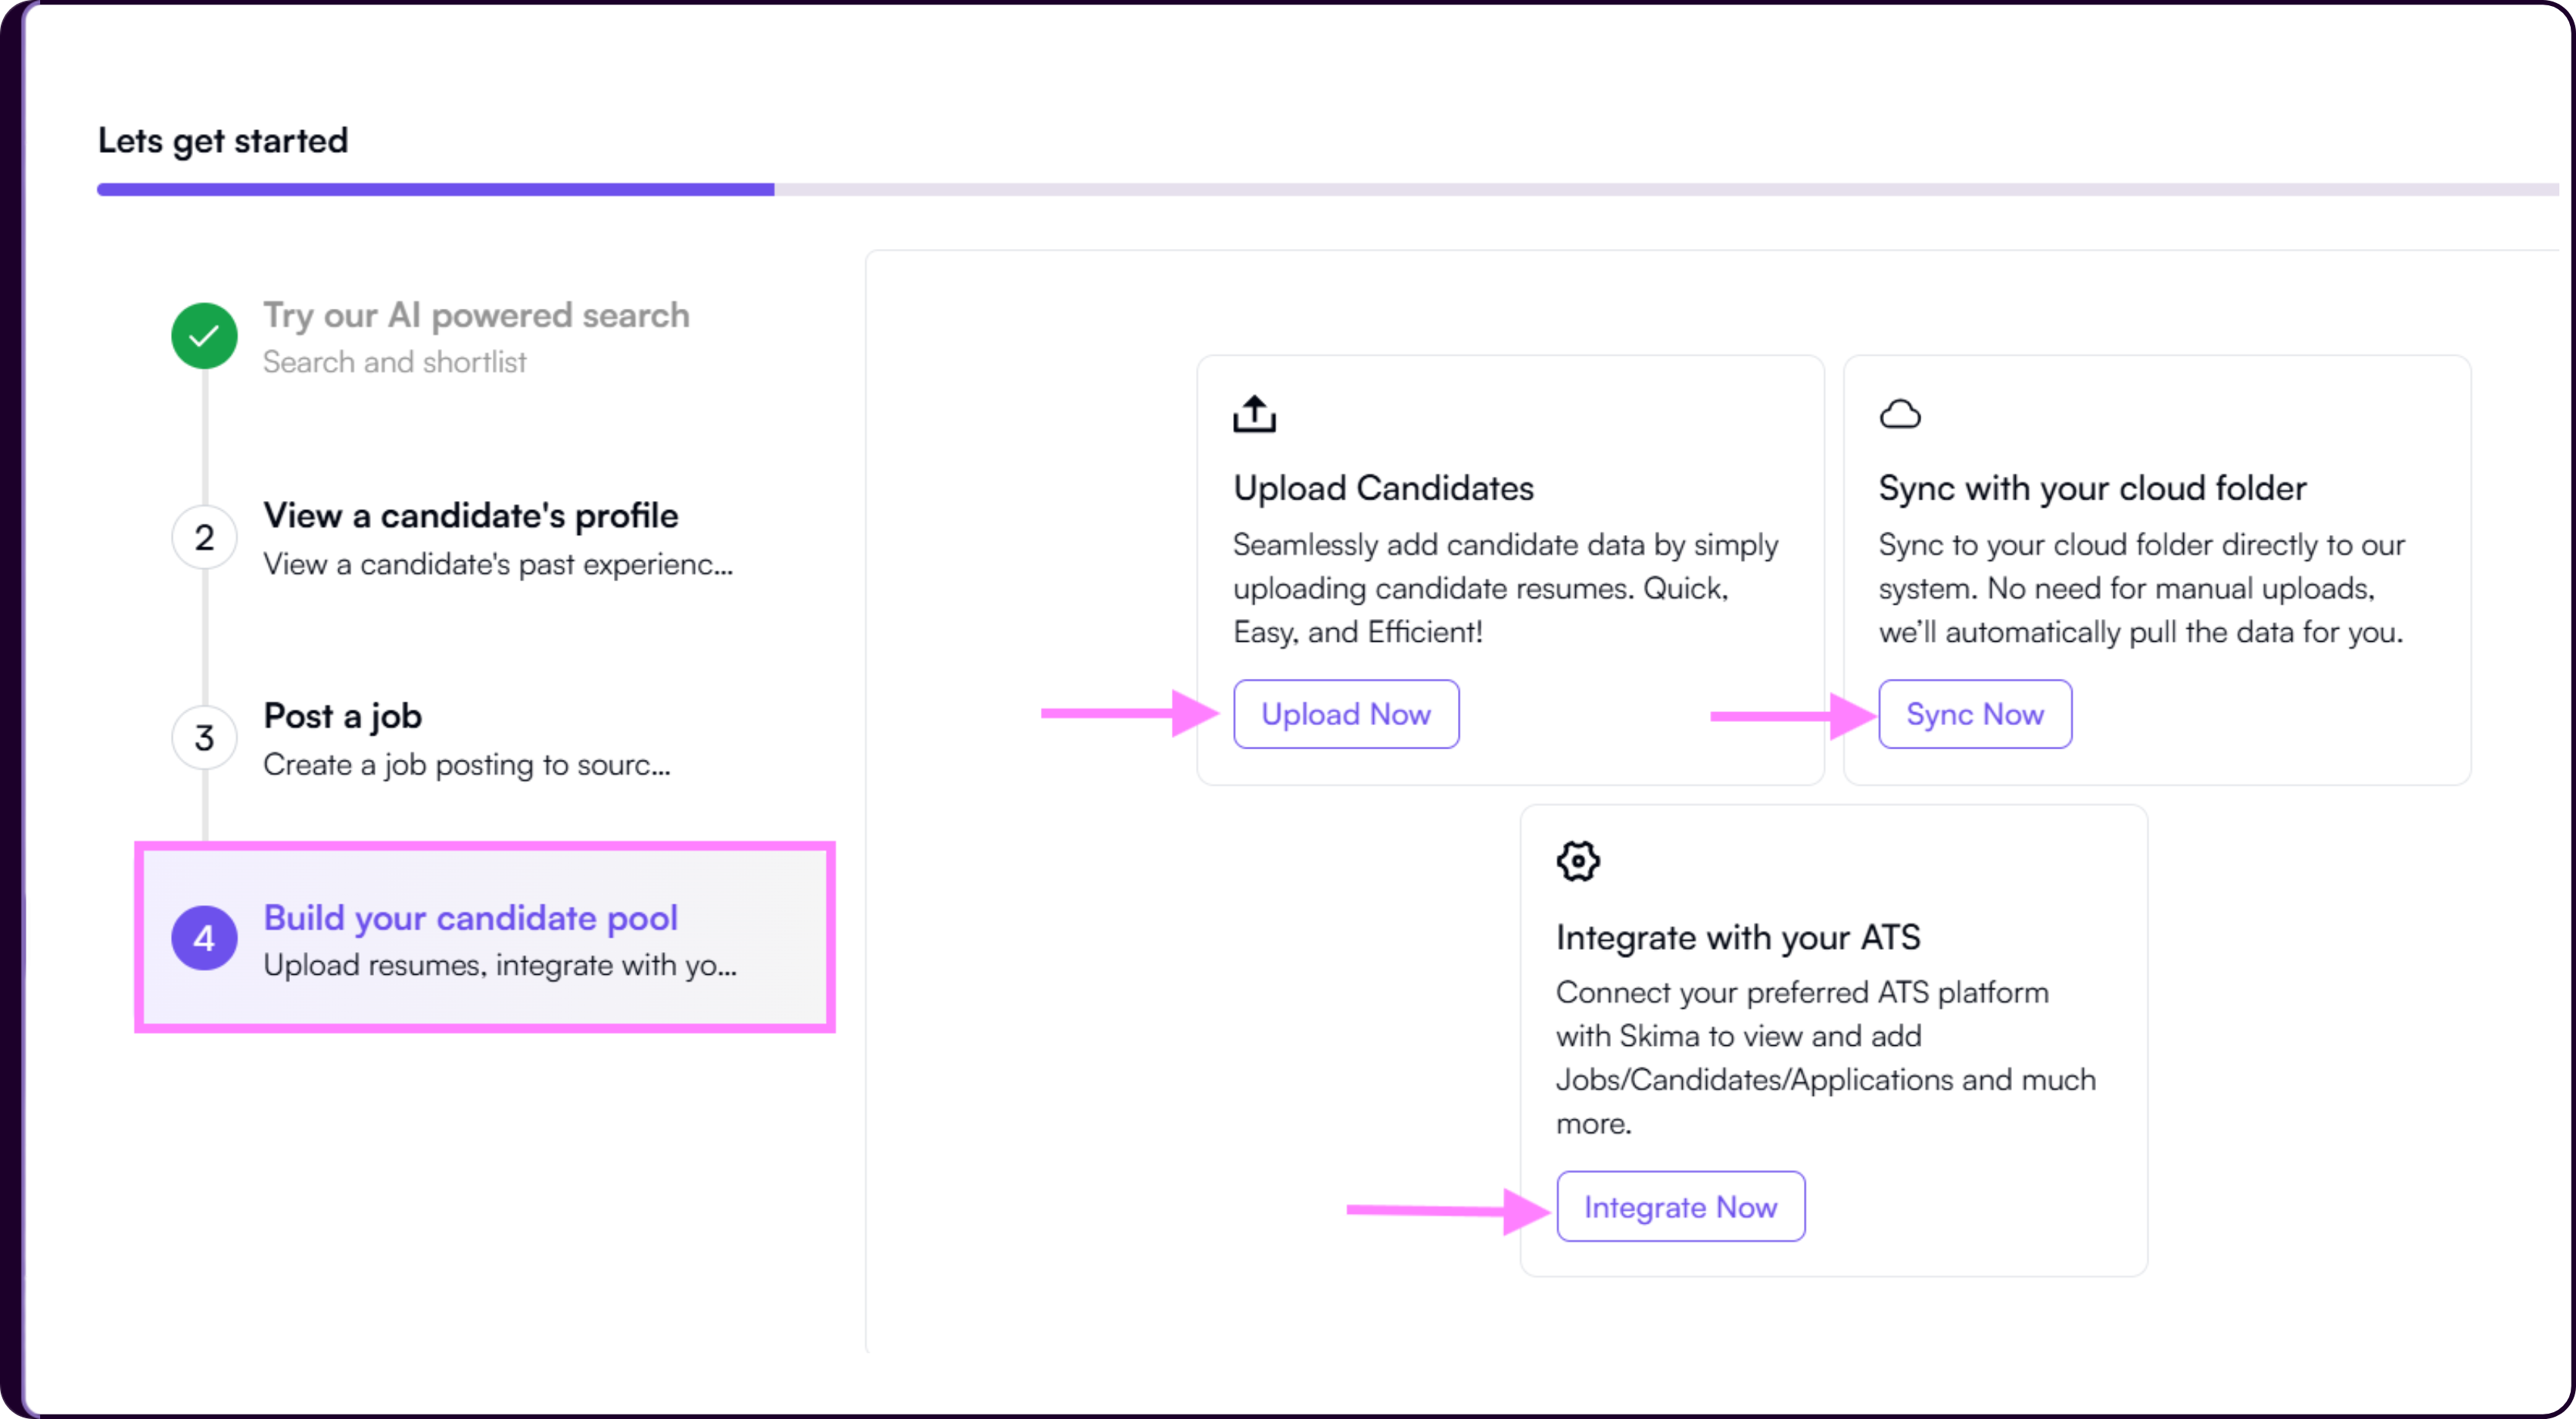
1. Upload Candidates
This option allows you to upload resumes directly from your system.
Click on 'Upload Now'
The Upload Resumes modal will appear
Enter the required details:
- Batch Name
- Select files (PDF, DOC, DOCX, Word; maximum 50 files at a time)
.png)
Optionally select a 'Source' such as LinkedIn, Indeed, or create a custom source
Click 'Upload'
Once uploaded, resumes are processed and converted into structured candidate profiles. These profiles become searchable and available across the platform.
2. Sync with Cloud Folder
This option allows you to connect a cloud folder and automatically import resumes.
.png)
Click on 'Sync Now'
The Sync Resumes from Cloud modal will appear
Click 'Add New' and enter:
- URL Name
- Source
- Job (optional)
- Paste Cloud Folder URL
Select Sync Frequency:
- One-time sync
- Recurring sync (every 24 hours)
Click 'Save'
Once connected, Skima AI pulls resumes from the folder based on the selected frequency. This keeps your candidate pool updated without repeated manual uploads.
3. Integrate with Your ATS
If your candidate data already exists in an Applicant Tracking System, you can connect it to Skima AI instead of uploading or syncing manually.
This allows you to bring jobs, candidates, and applications into Skima AI while continuing to work within your existing hiring workflow. Once connected, Skima AI adds search, scoring, and screening capabilities on top of your ATS data.
For the complete setup process, refer to the ATS Integration guide added next to this doc.
What to Do Next
Once these steps are completed, your Skima AI workspace is ready for use.
You can continue with candidate search, job management, and screening workflows based on your hiring needs.